
Remote Servers
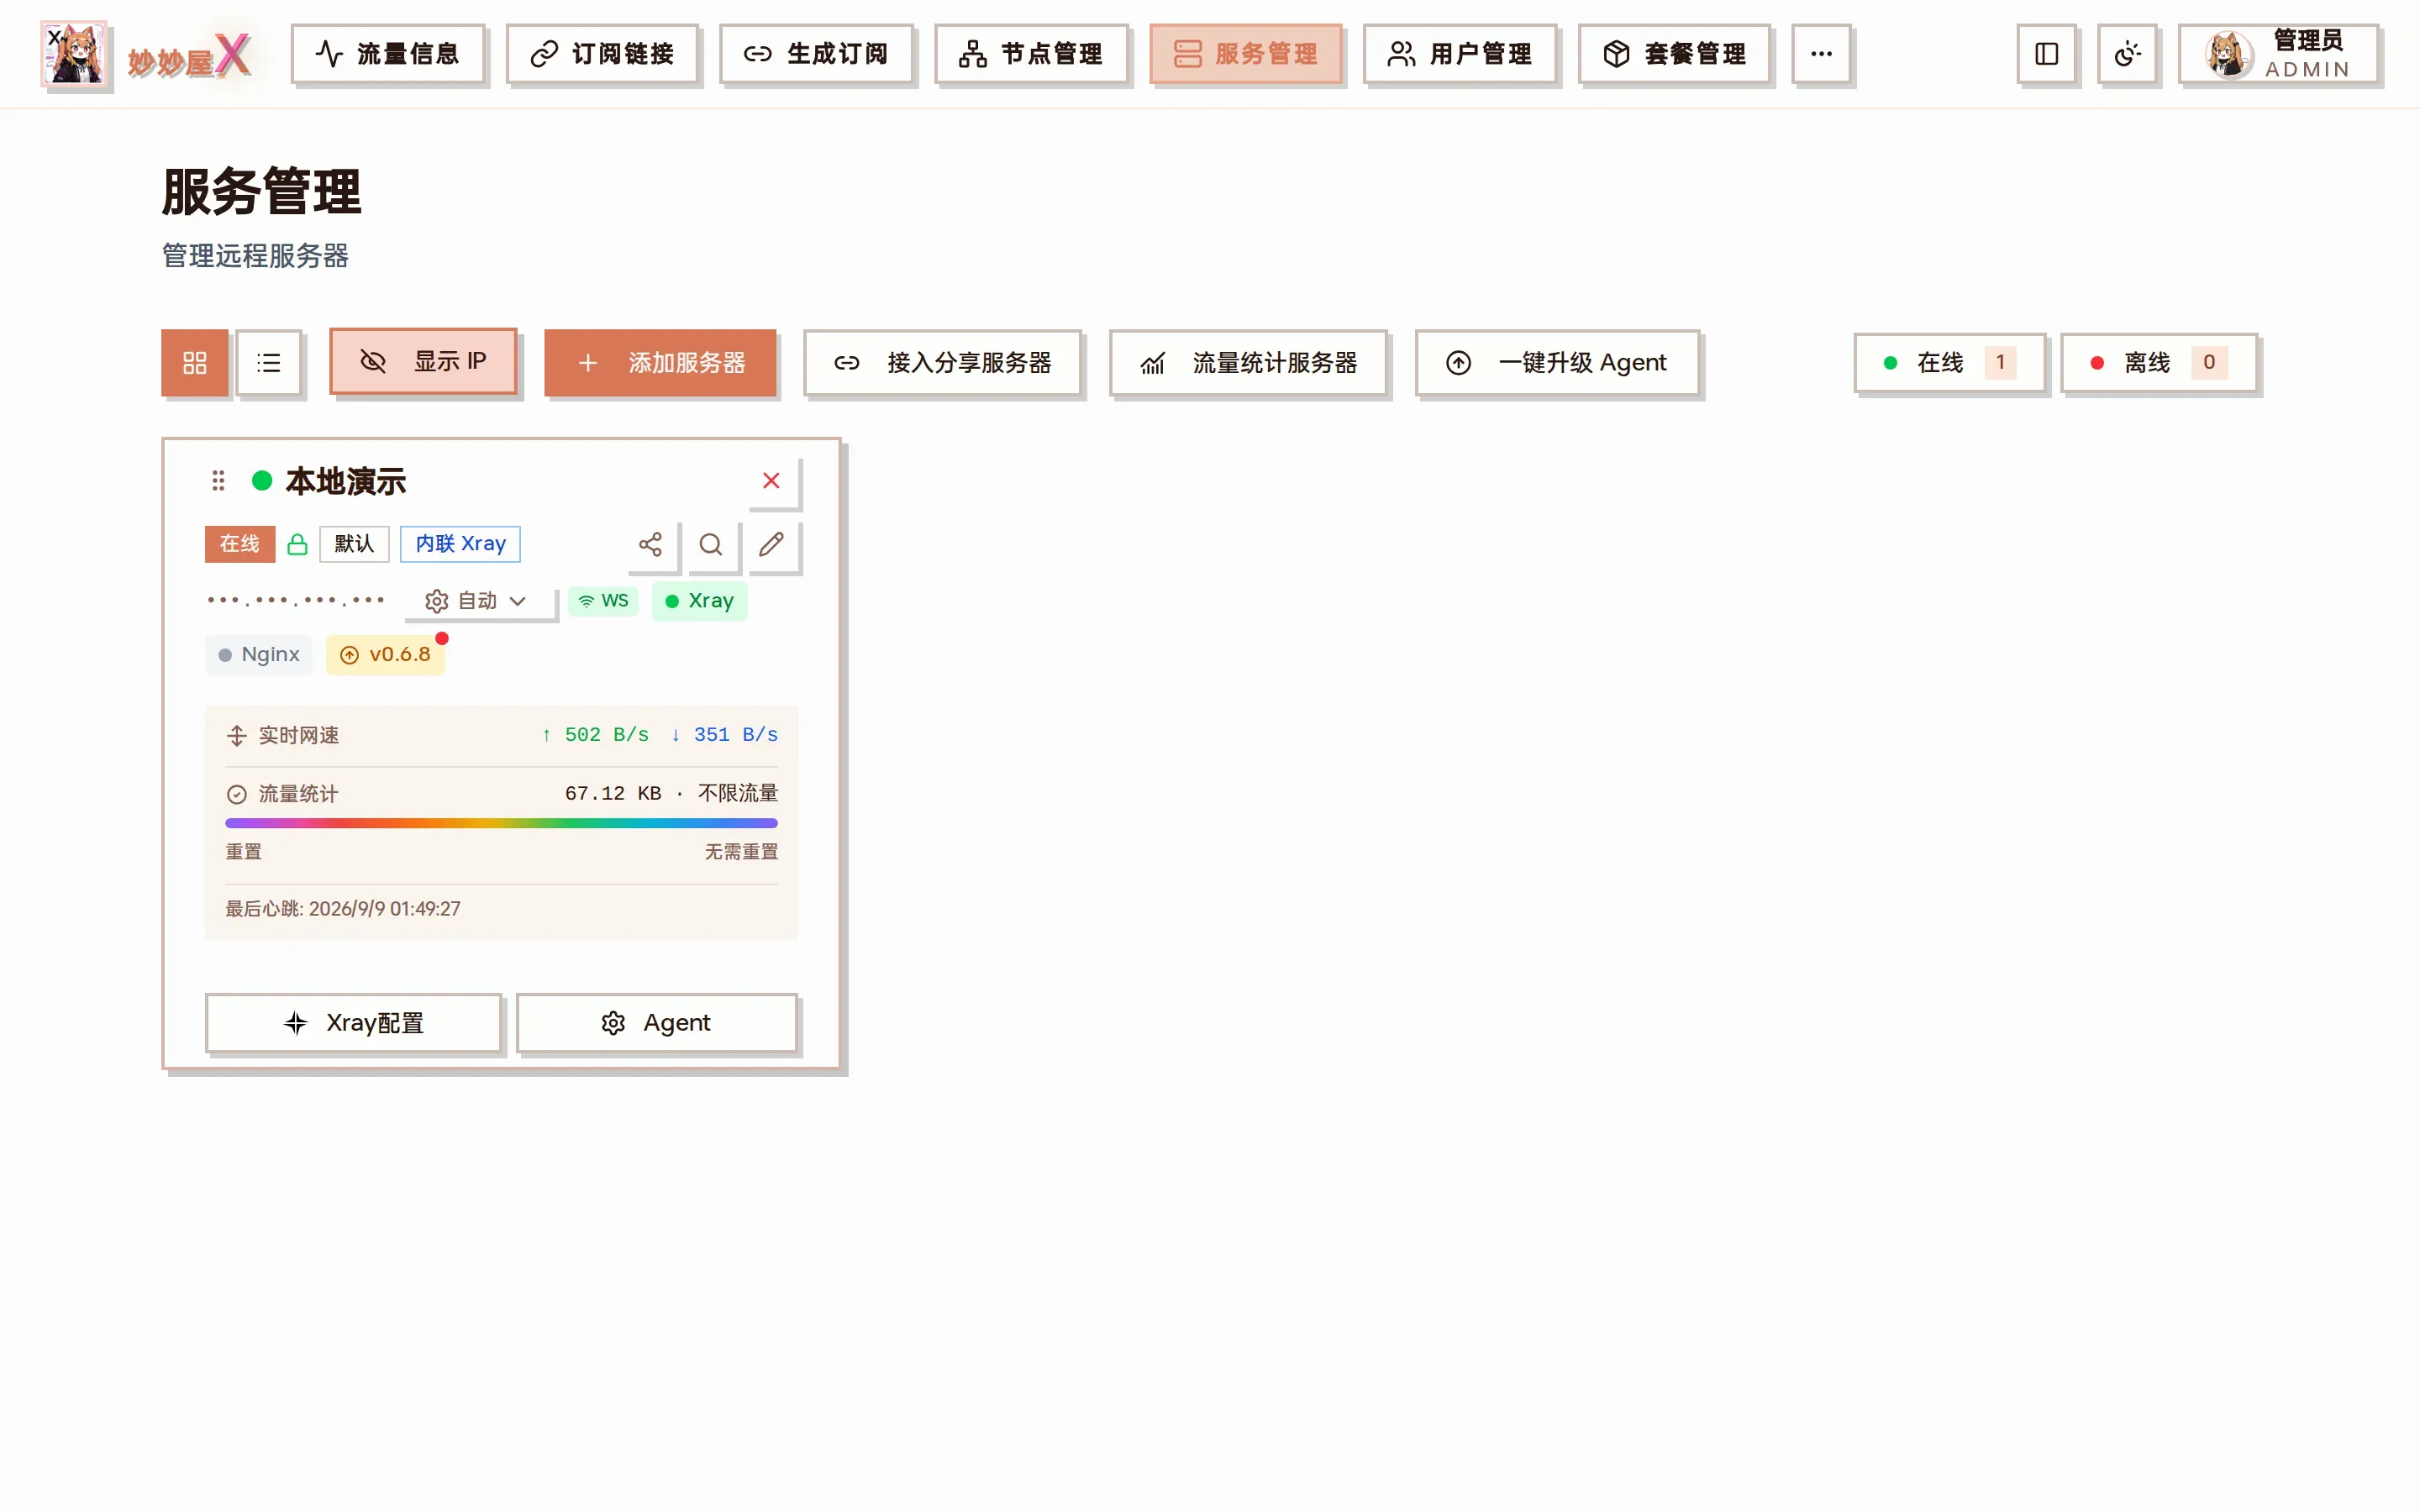
Servers — every server is a card with status / connection / Xray & Nginx state / live speed / traffic / one-click actions
Overview
Section titled “Overview”MiaoMiaoWu X uses a Master-Agent architecture. The master talks to the Agent on each remote server over the network to install, configure and manage Xray/Nginx remotely. The “Servers” page is the overview of all Agent servers. The toolbar offers card / list view, hide IP, add server, join shared server, traffic-stat servers and one-click Agent upgrade; the online / offline counts sit on the right.
Reading a server card
Section titled “Reading a server card”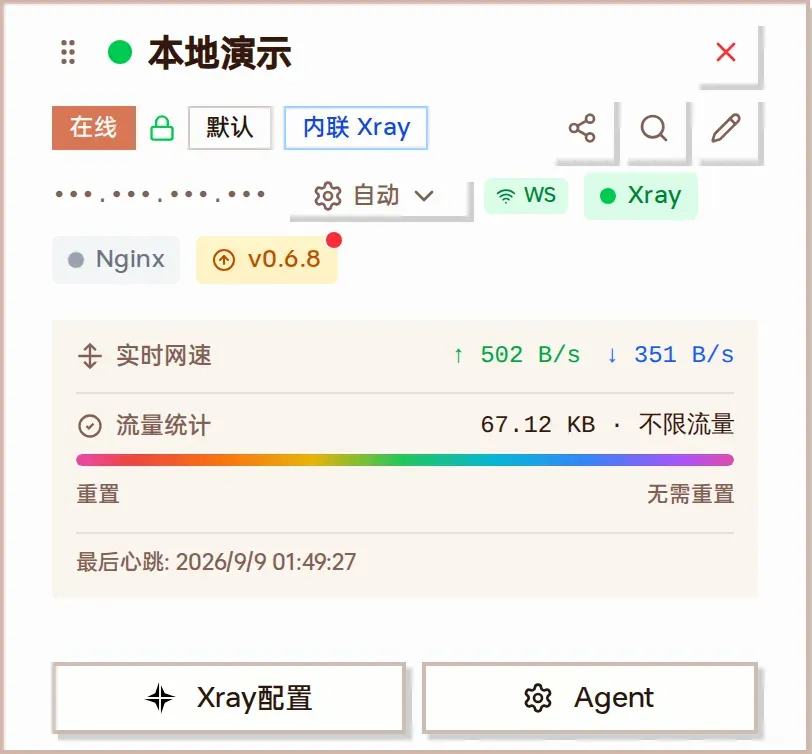
An online embedded-Xray server card (with “Hide IP” on)
| Area | Meaning |
|---|---|
| Title row | Green dot = online, red = offline; drag handle reorders cards; × deletes the server |
| Status badges | “Online”, lock icon (encrypted master↔Agent channel), steal-self mode (Default / Tunnel / Fallback), Xray mode (Embedded / External) |
| Three icon buttons | Share server (PRO), scan remote services (re-scan Xray / Nginx and sync inbounds), edit server |
| Address row | Public IPv4 / IPv6 (click the counter to switch), “Auto” dropdown for connection mode, WS badge for WebSocket, Xray / Nginx badges (click Nginx to start / restart) |
| Version badge | Agent version; a red dot means an update is available, click to upgrade this Agent |
| Live speed / traffic | System NIC live up/down; used / limit for the current billing period with a colored bar; “Reset” resets the billing period |
| Last heartbeat | Last report time from the Agent, used to detect offline |
| Xray Config / Agent | Opens the Xray management dialog (config / inbounds / outbounds / routing / service control); the Agent menu is described below |
Add a server
Section titled “Add a server”- Open “Servers” and click “Add Server”
- Enter a name and the server address (domain or IP; with a domain, nodes use the domain as their address)
- Adjust Agent port, traffic limit, reset day, IPv6, Xray mode, traffic counting rule and data source as needed
- Turn on “Steal self” and fill in the domain and site type if you want REALITY steal-self
- Click “Generate Token”; the system generates the Server Token and shows the install command and Docker environment variables
- Run the command on the remote server to deploy the Agent
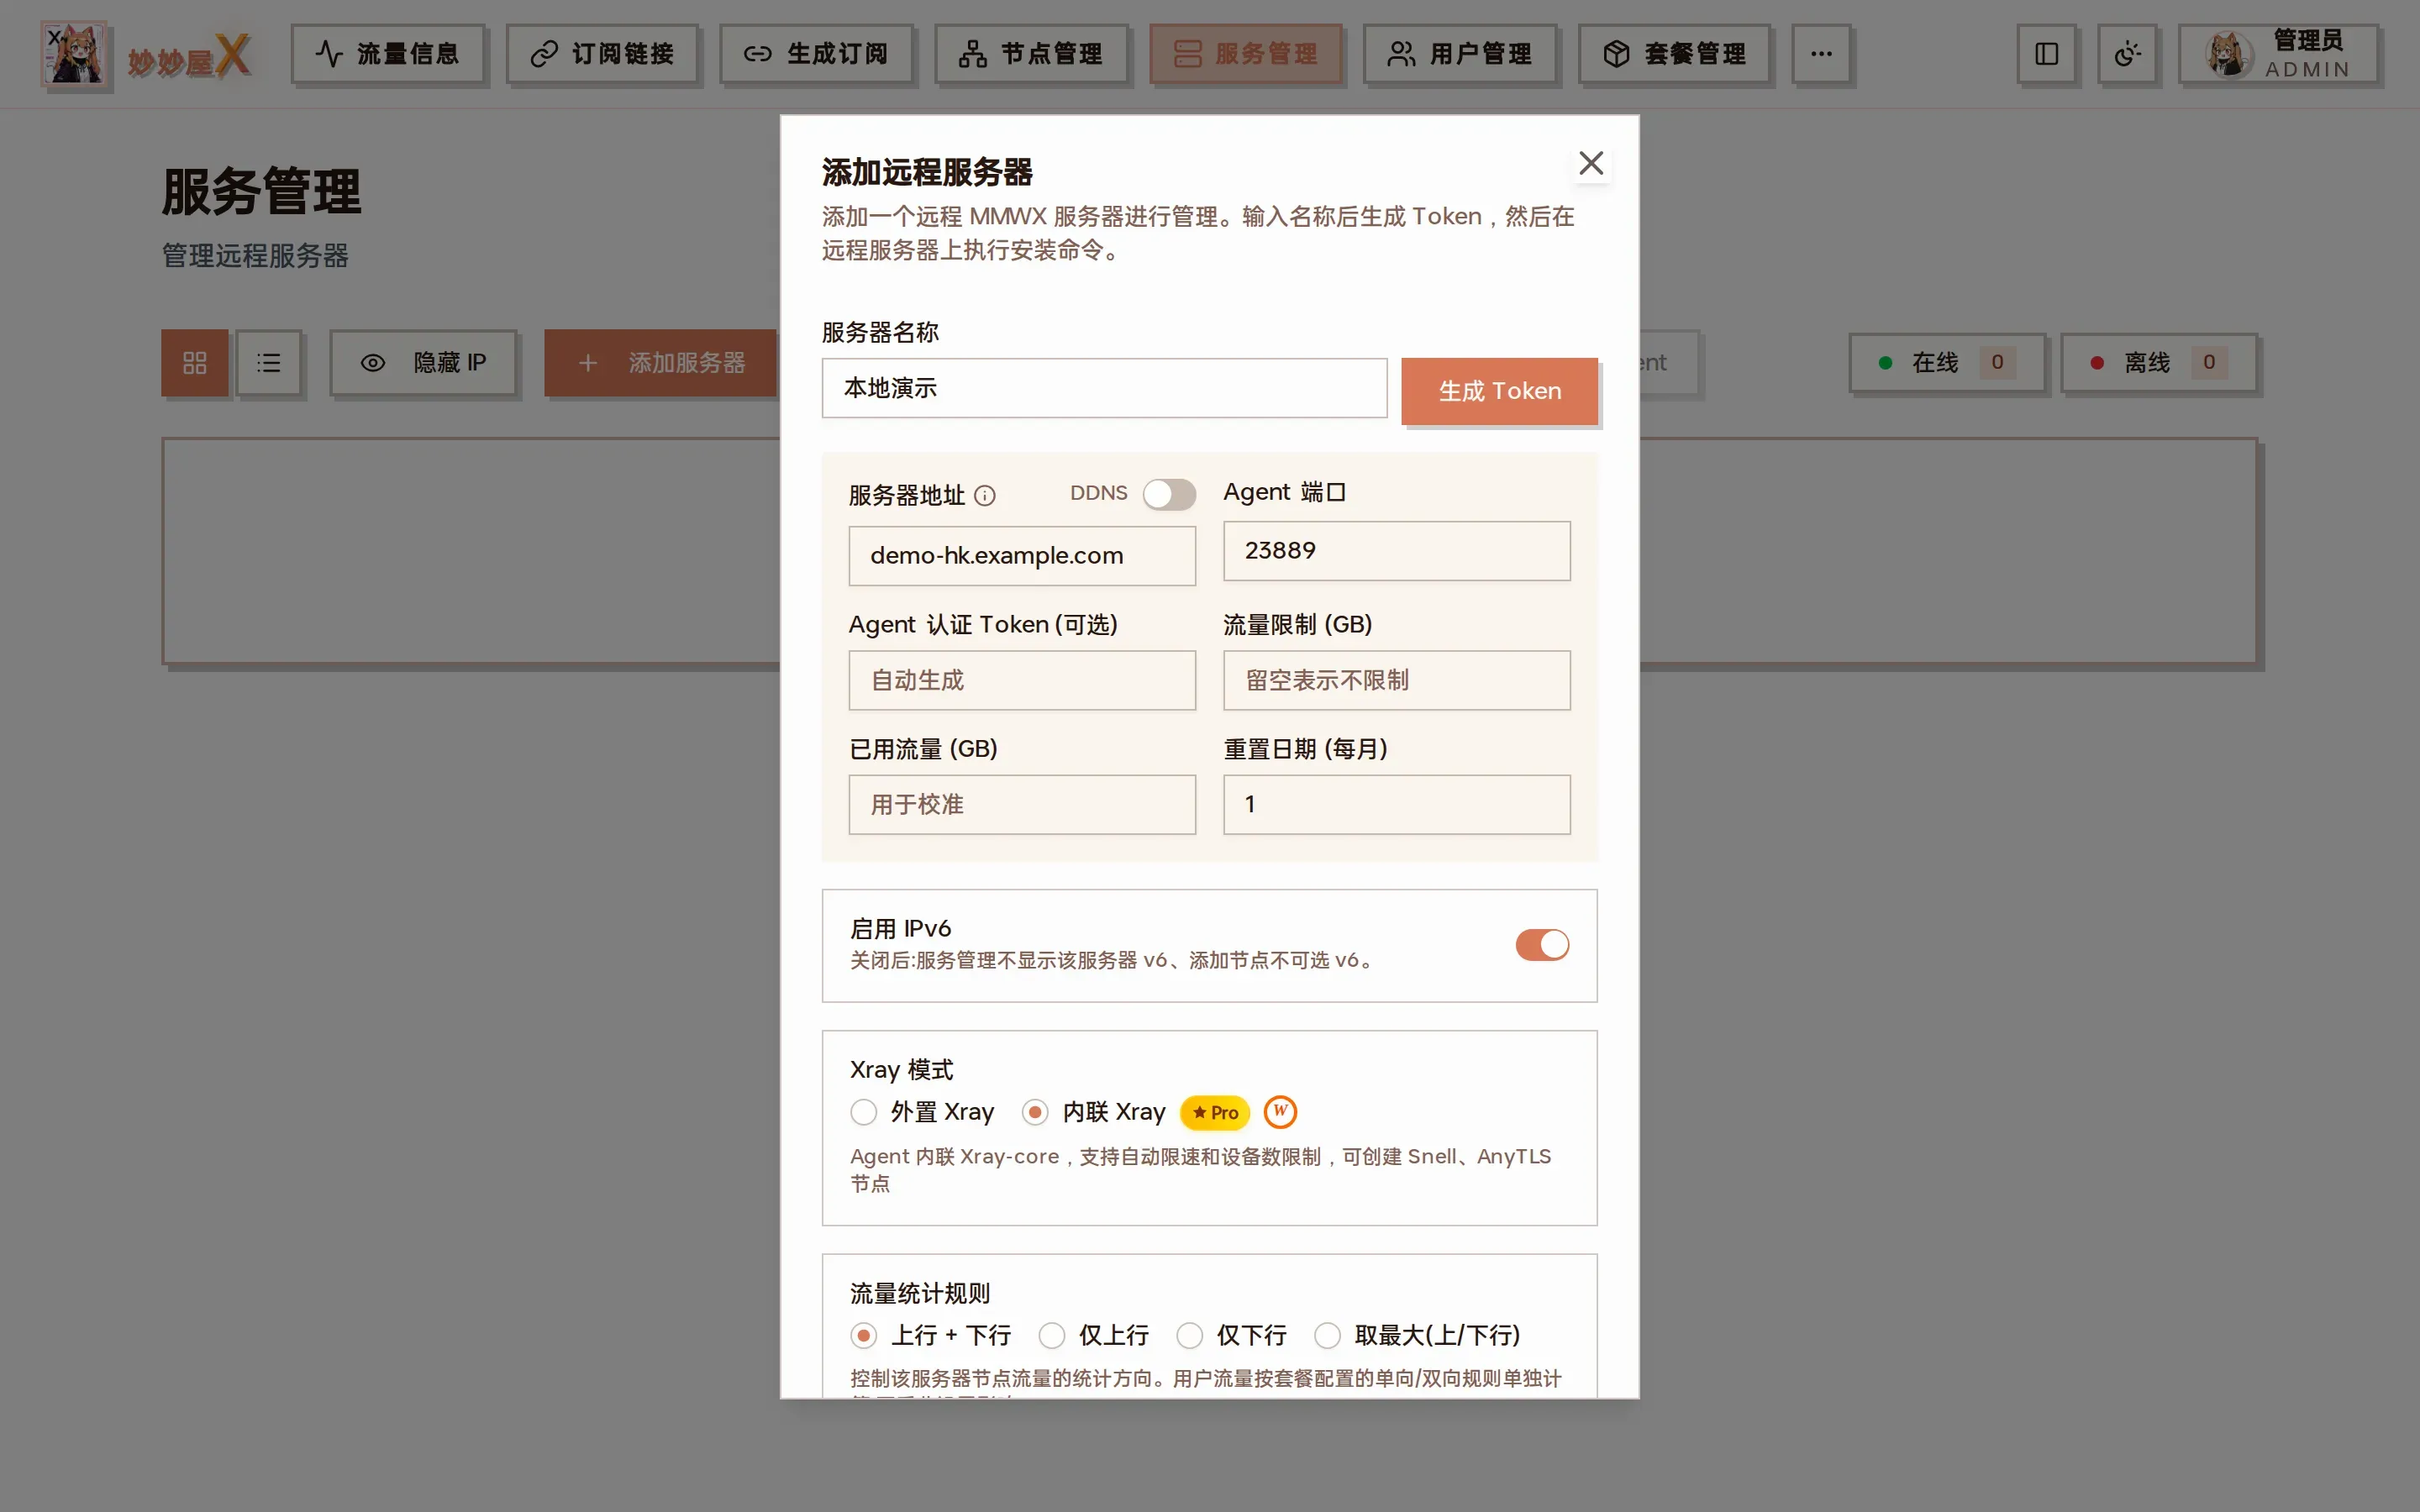
Add remote server dialog
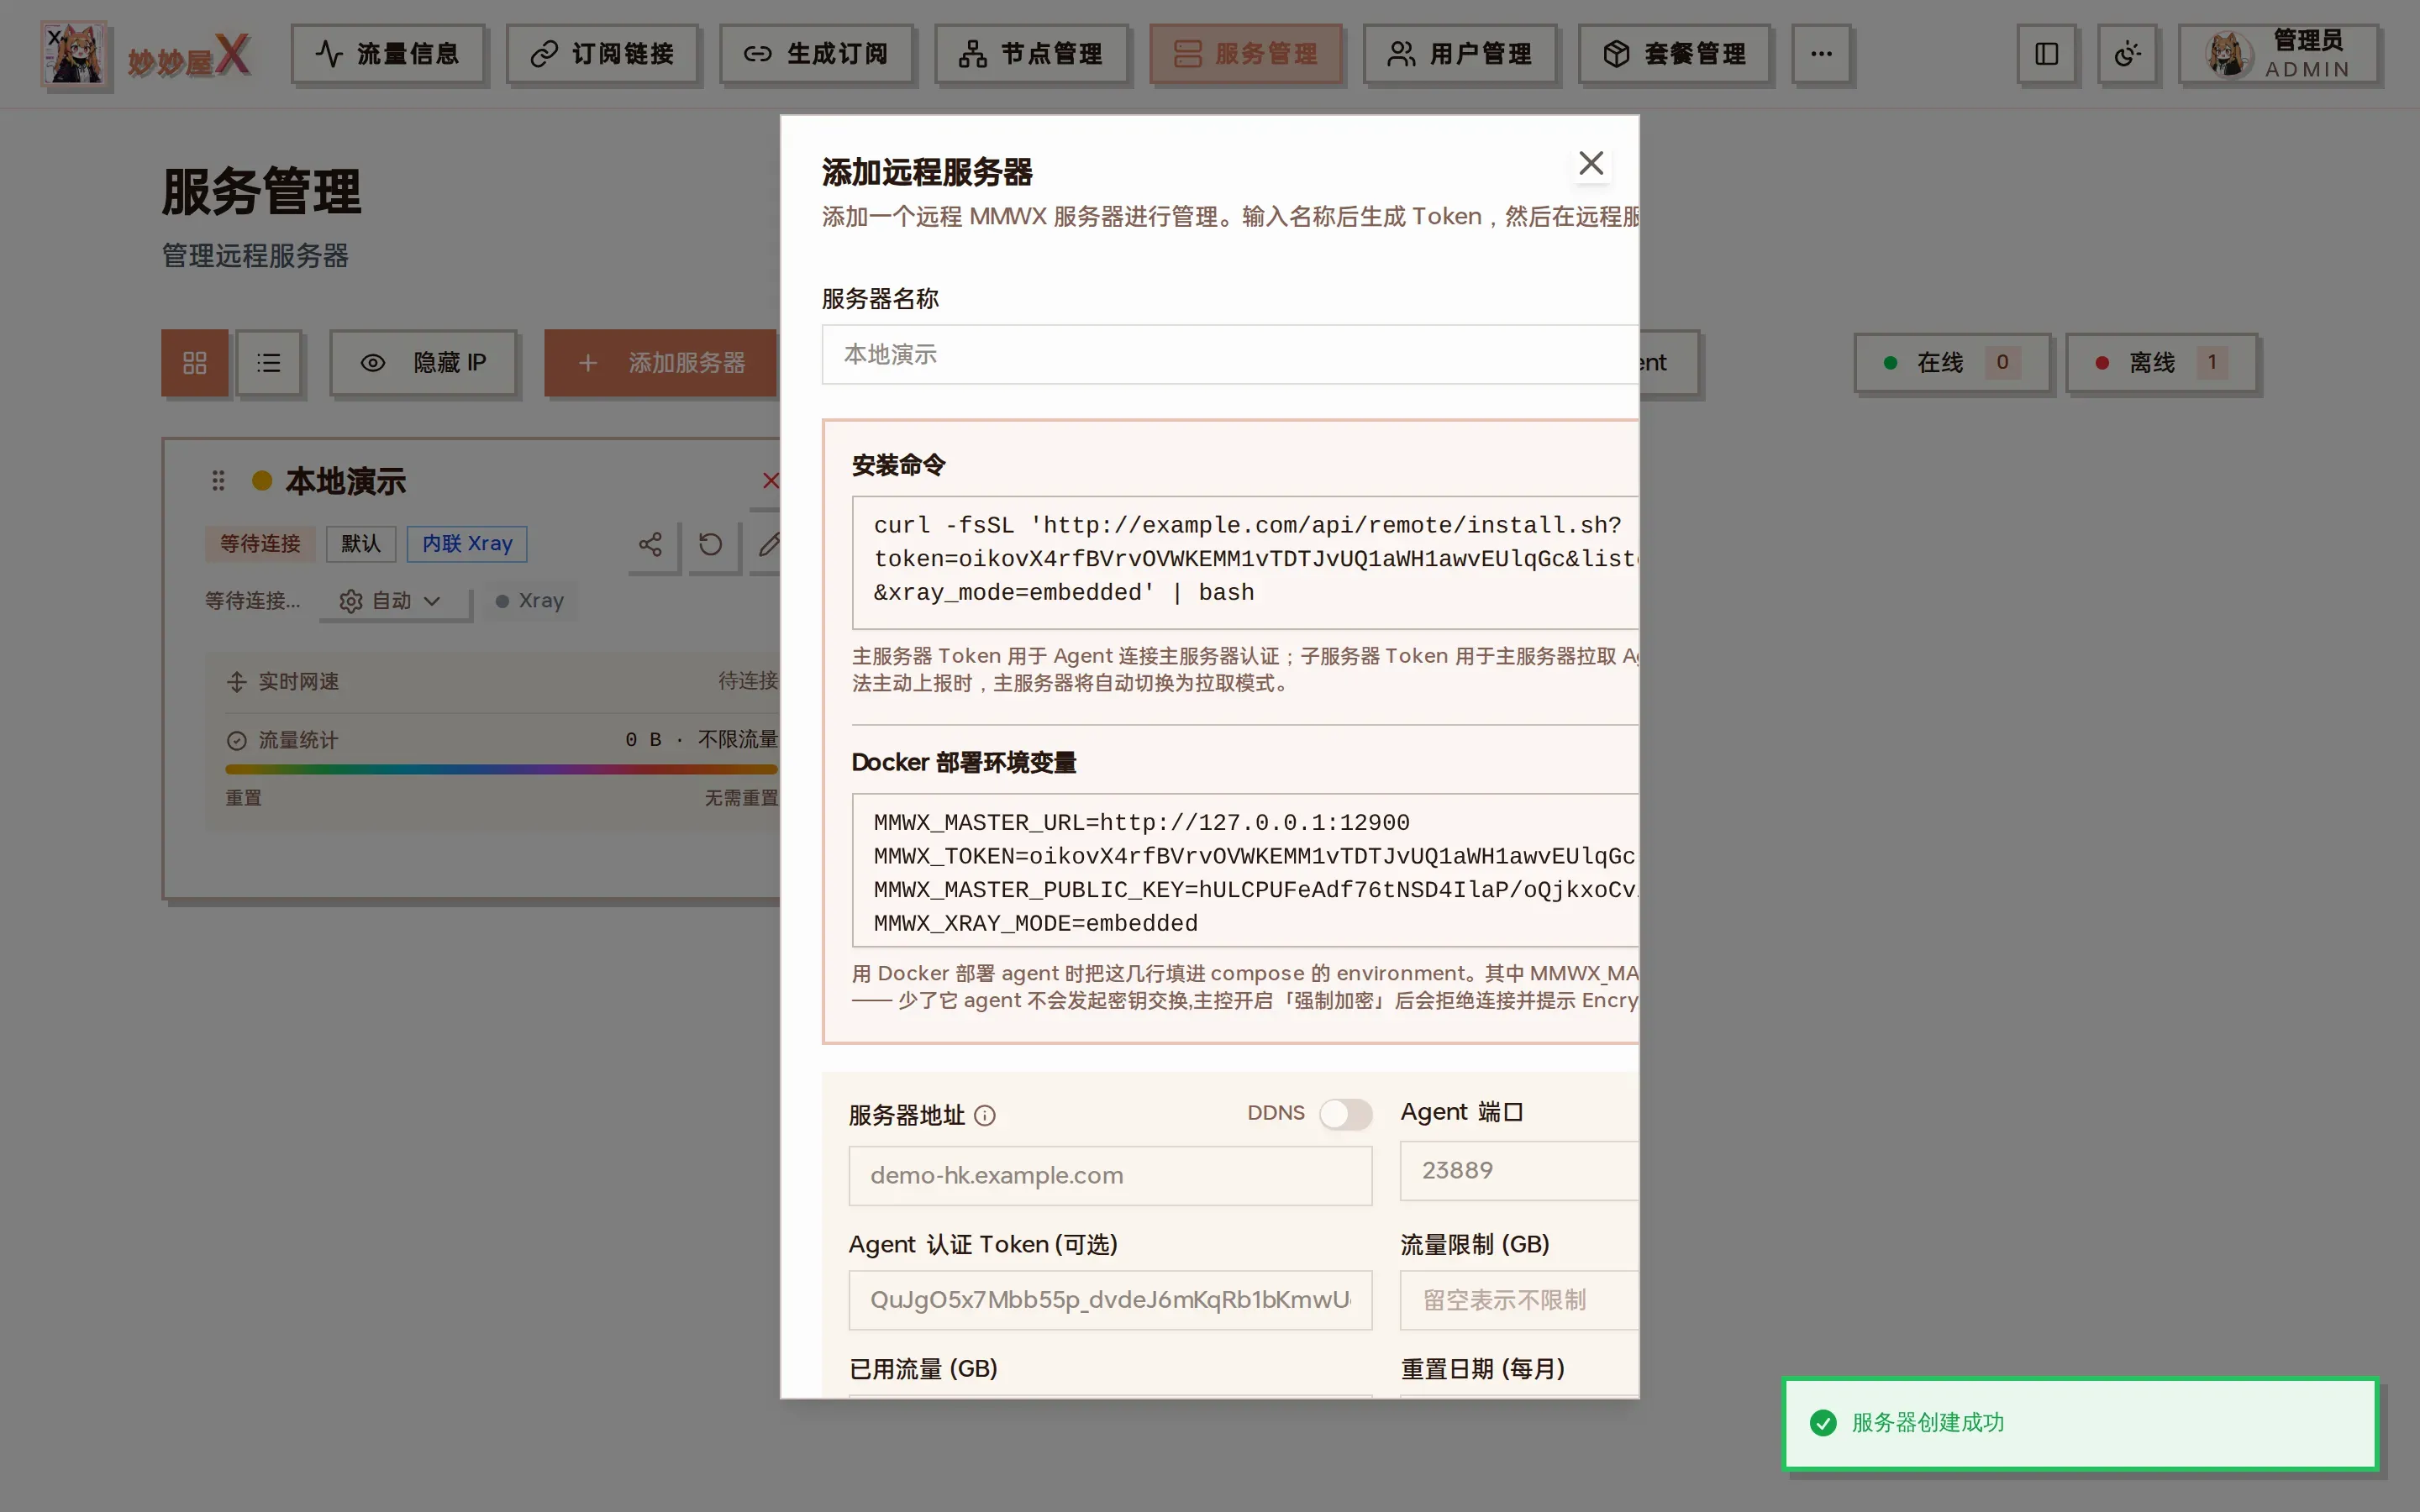
After generating the token: one-click install command (with token / listen_port / xray_mode) and Docker environment variables
Fields
Section titled “Fields”| Field | Description |
|---|---|
| Server address / DDNS | Domain or IP. With a domain, nodes use it; with DDNS on, the master updates the record to the IP reported by the Agent |
| Agent port | Local management API port, default 23889; hidden while a WebSocket connection is active |
| Agent auth token | Credential the master uses for the Agent API; auto-generated when empty |
| Traffic limit / used / reset day | Monthly quota, used amount for calibration, monthly reset day; empty limit = unlimited |
| Enable IPv6 | When off, the v6 address is hidden and cannot be selected when adding nodes |
| Xray mode | External: standalone Xray controlled via gRPC; Embedded (PRO): xray-core inside the Agent with rate limits, device limits, Snell, AnyTLS |
| Traffic counting rule | Up + Down / Up only / Down only / Max(up, down). Only affects this server’s node traffic; user traffic follows package rules |
| Traffic data source | Xray protocol traffic (default) or system NIC traffic, see below |
| Steal self | After the Agent installs, Xray + Nginx are installed and port 443 is taken over in Tunnel / Fallback mode; needs domain and site type |
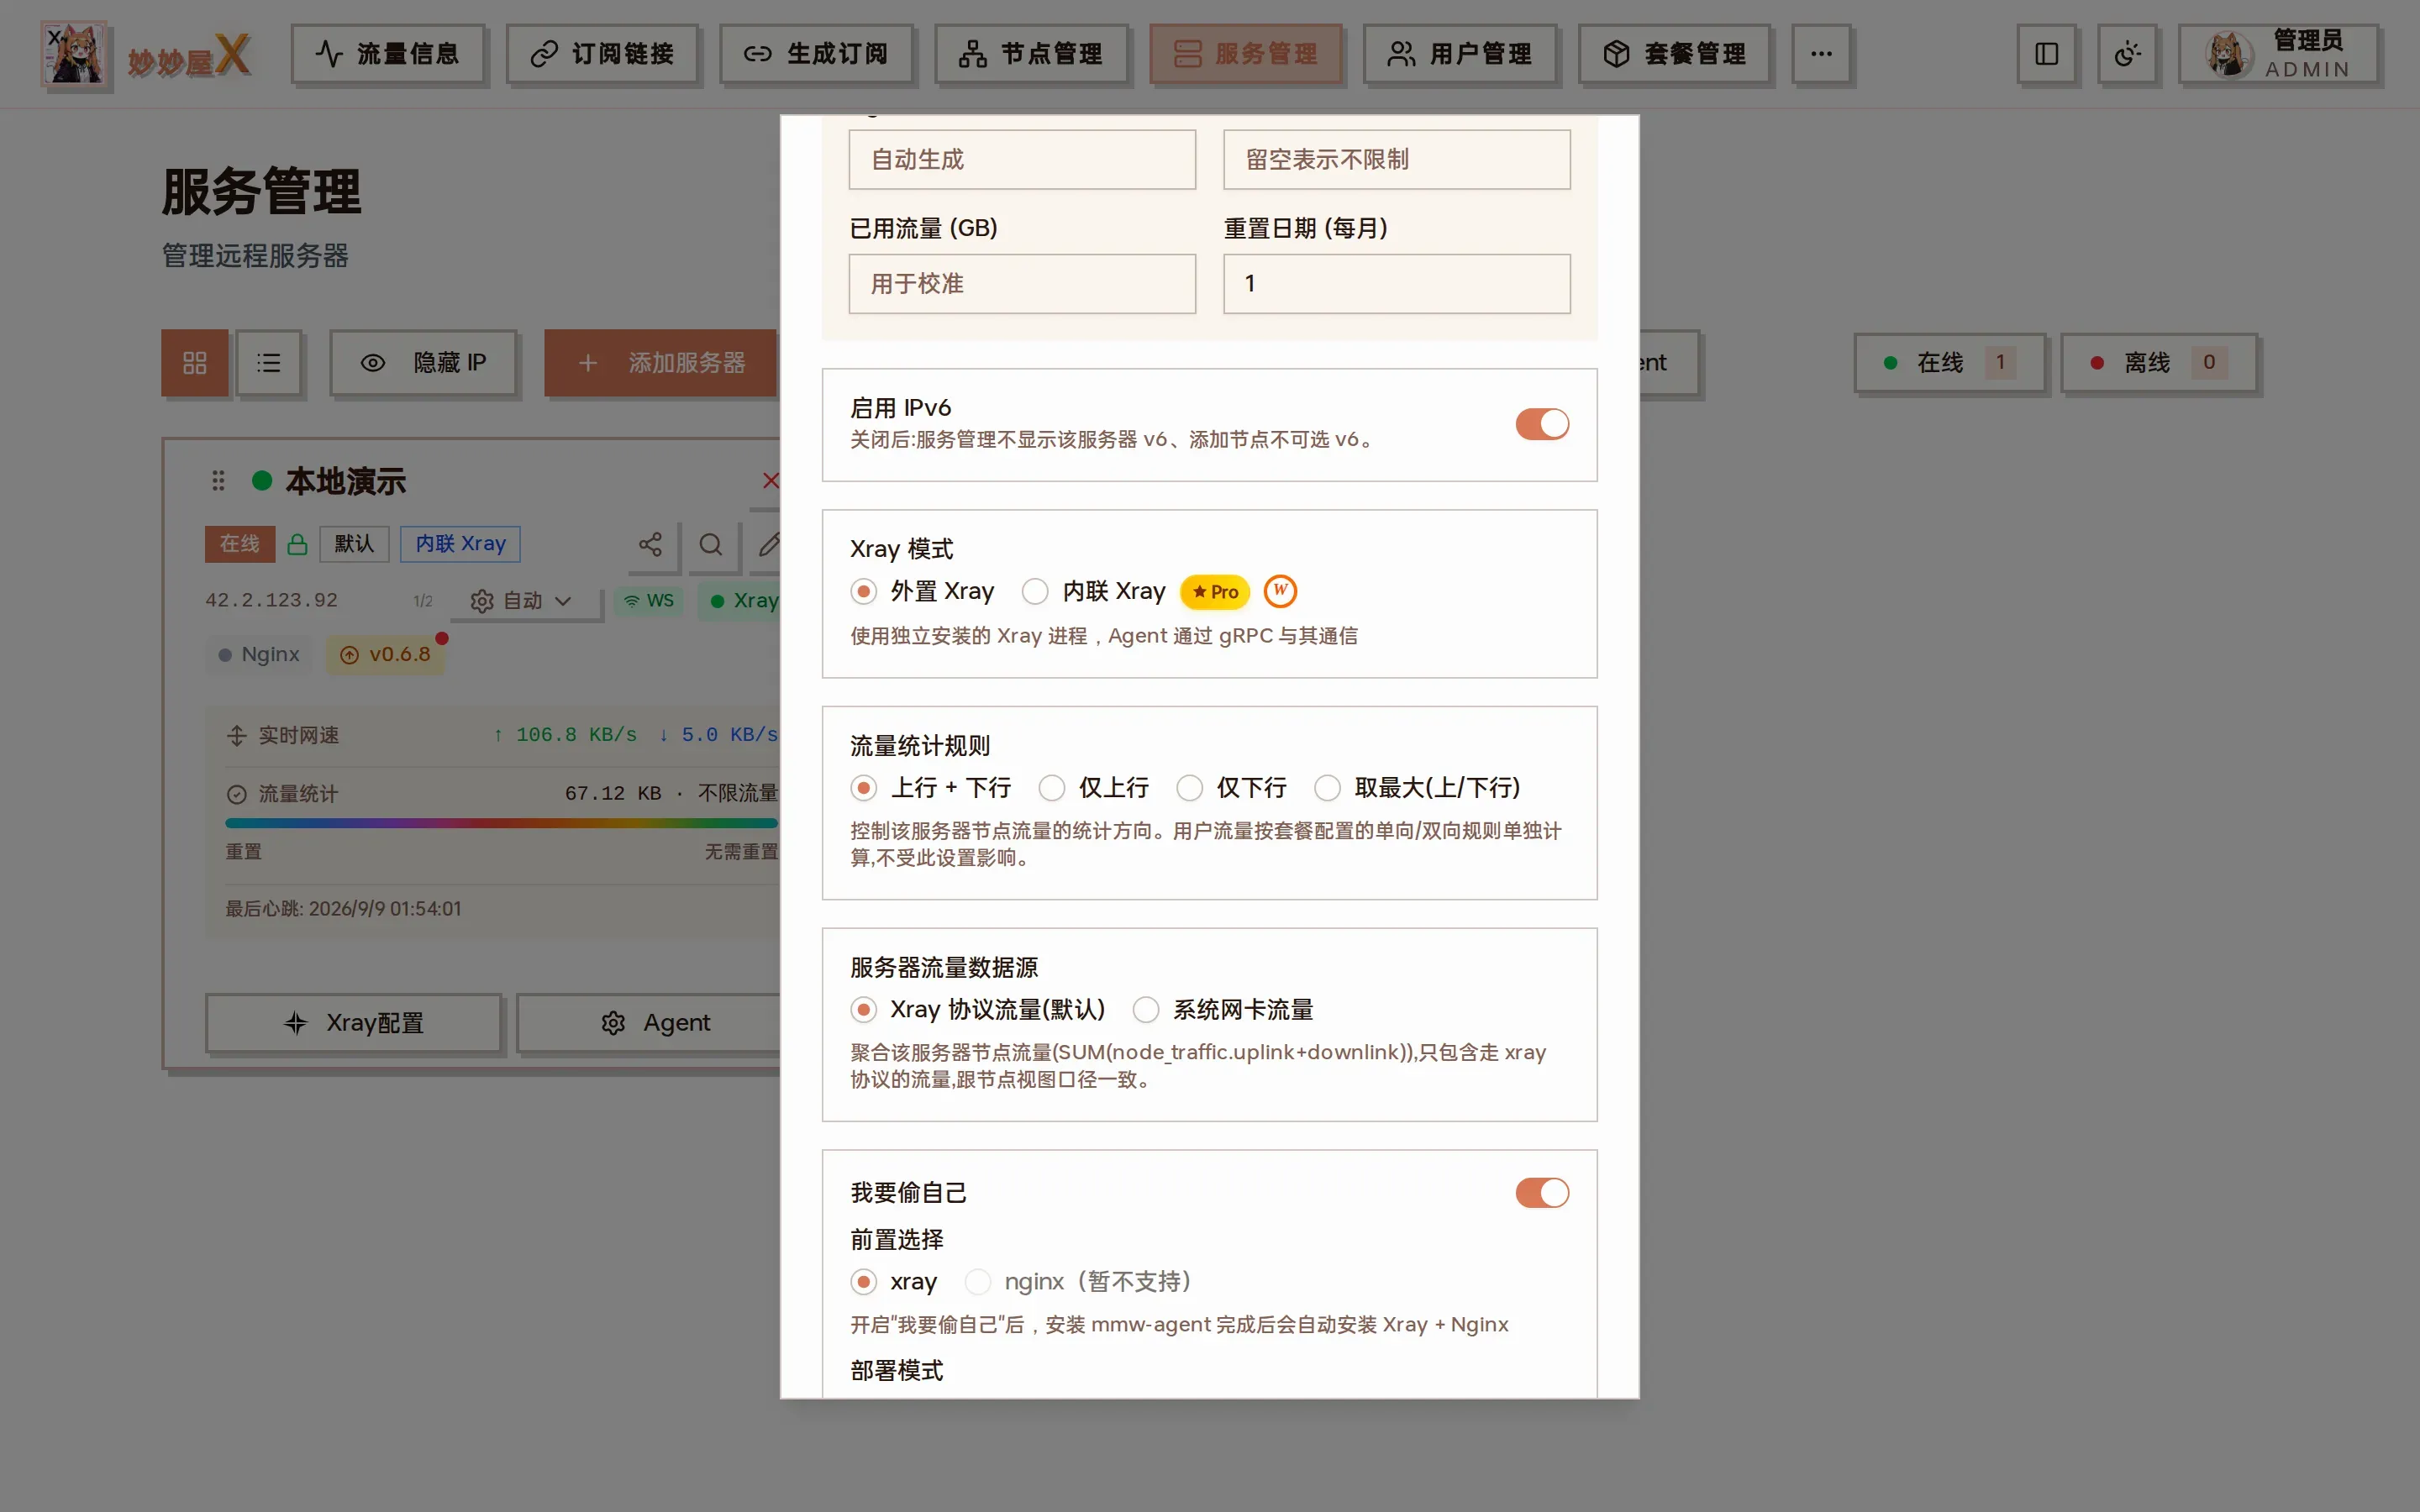
Fields revealed by “Steal self”: front end, deploy mode, port 443, domain, site type
Two deployment options: one-click script (bare metal + systemd) or the Docker image (embedded xray + nginx, host network required). Commands and caveats: Install Agent.
Monitor-only servers
Section titled “Monitor-only servers”Turn on “Monitor only (do not install Xray)” when adding a server and only the Agent is installed, for monitoring: online status, NIC traffic, speed and — once added to the probe page — CPU / memory / disk and latency. Xray is neither installed nor managed.
- Counts toward the quota: a monitor-only server uses one server slot like any other. When the total exceeds the license quota, servers later in the list lose Xray authorization; drag to reorder the list.
- What it cannot do: create nodes or be shared with another master.
- Forward groups are allowed: no restriction as an entry or relay; as the last hop of a chain it can only forward to a specified landing node (it has no Xray, so no landing inbound can be created on it). See Forwarding.
- Installing Xray later: choose “Convert to full server” in the card’s Agent menu; the Agent switches mode and restarts.
Edit a server
Section titled “Edit a server”The pencil icon on the card opens the edit dialog. Besides the fields from creation it adds:
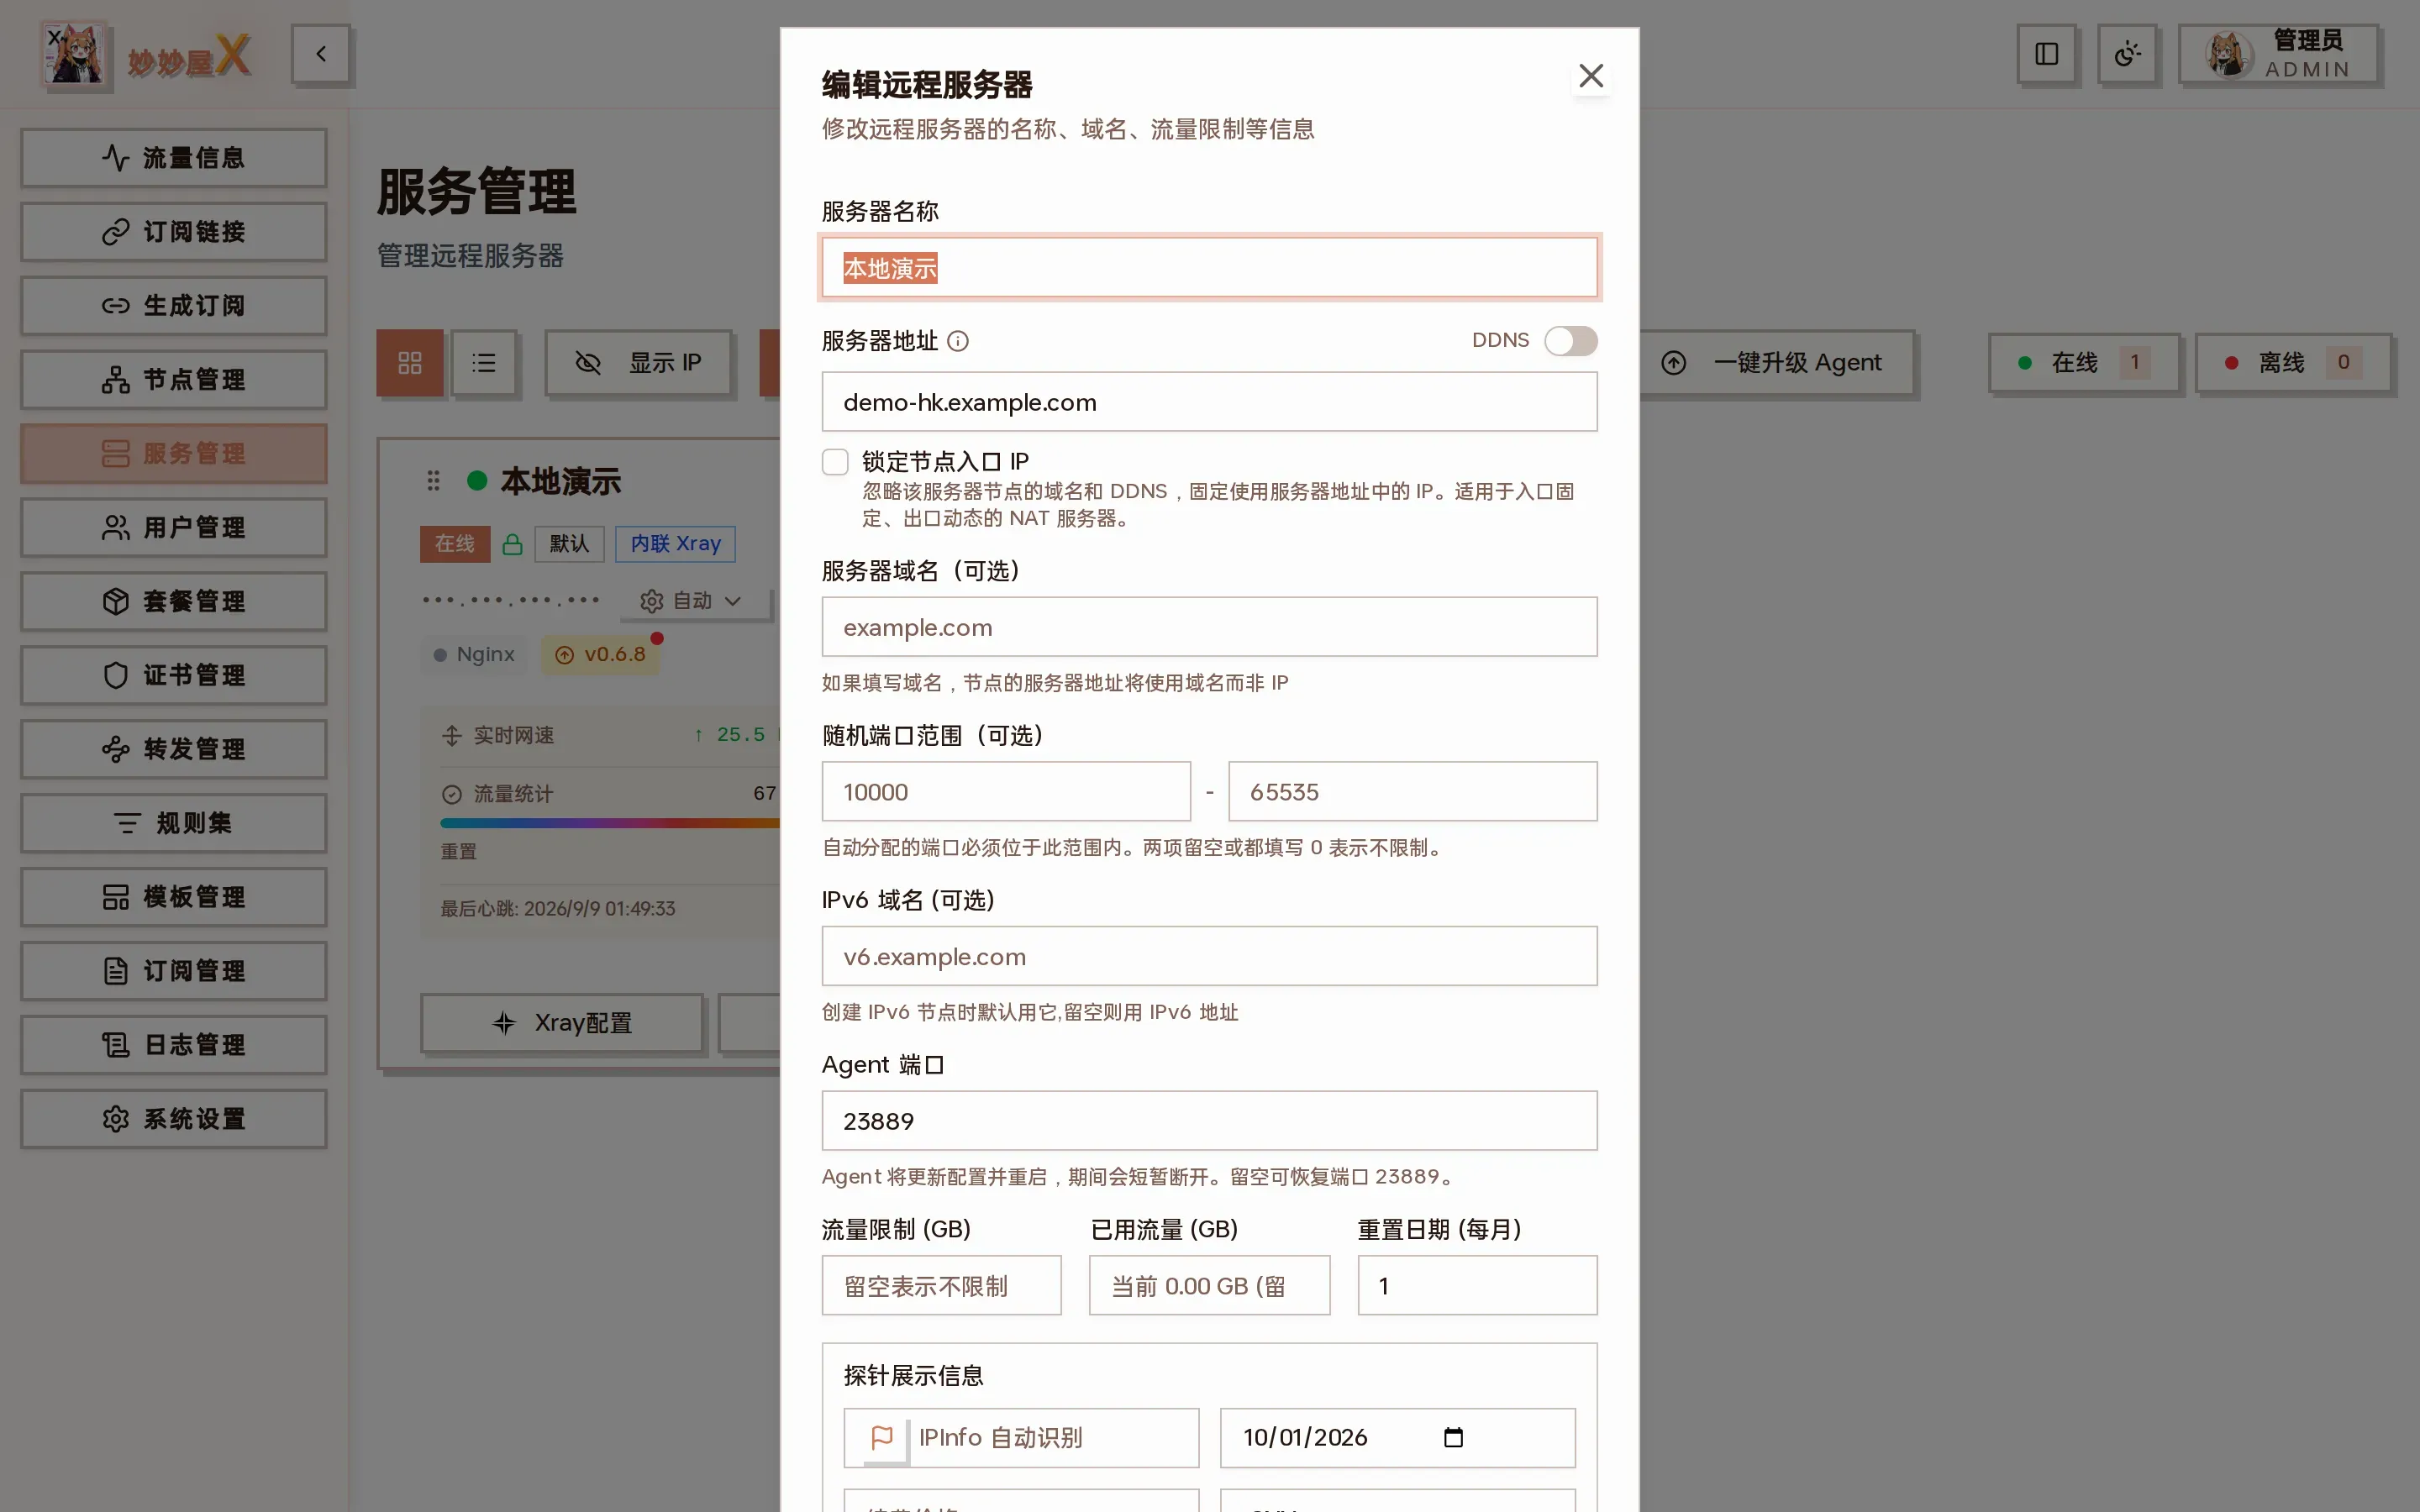
Edit remote server: lock entry IP, server domain, random port range, IPv6 domain, probe display info
| Field | Description |
|---|---|
| Lock node entry IP | Ignore domain and DDNS and always use the IP from the server address. For NAT servers with a fixed entry and dynamic exit |
| Server domain (optional) | Nodes use the domain instead of the IP |
| Random port range | Auto-assigned inbound ports must fall inside; leave both empty or 0 for no limit |
| IPv6 domain | Used by default when creating IPv6 nodes; empty = IPv6 address |
| Agent port | Changing it makes the Agent update its config and restart; empty restores 23889 |
| Probe display info | Shown on the public probe page: region (auto via IPInfo), renewal price and cycle, provider name and URL, expiry |
Connection modes
Section titled “Connection modes”Click the “Auto” dropdown on the card:
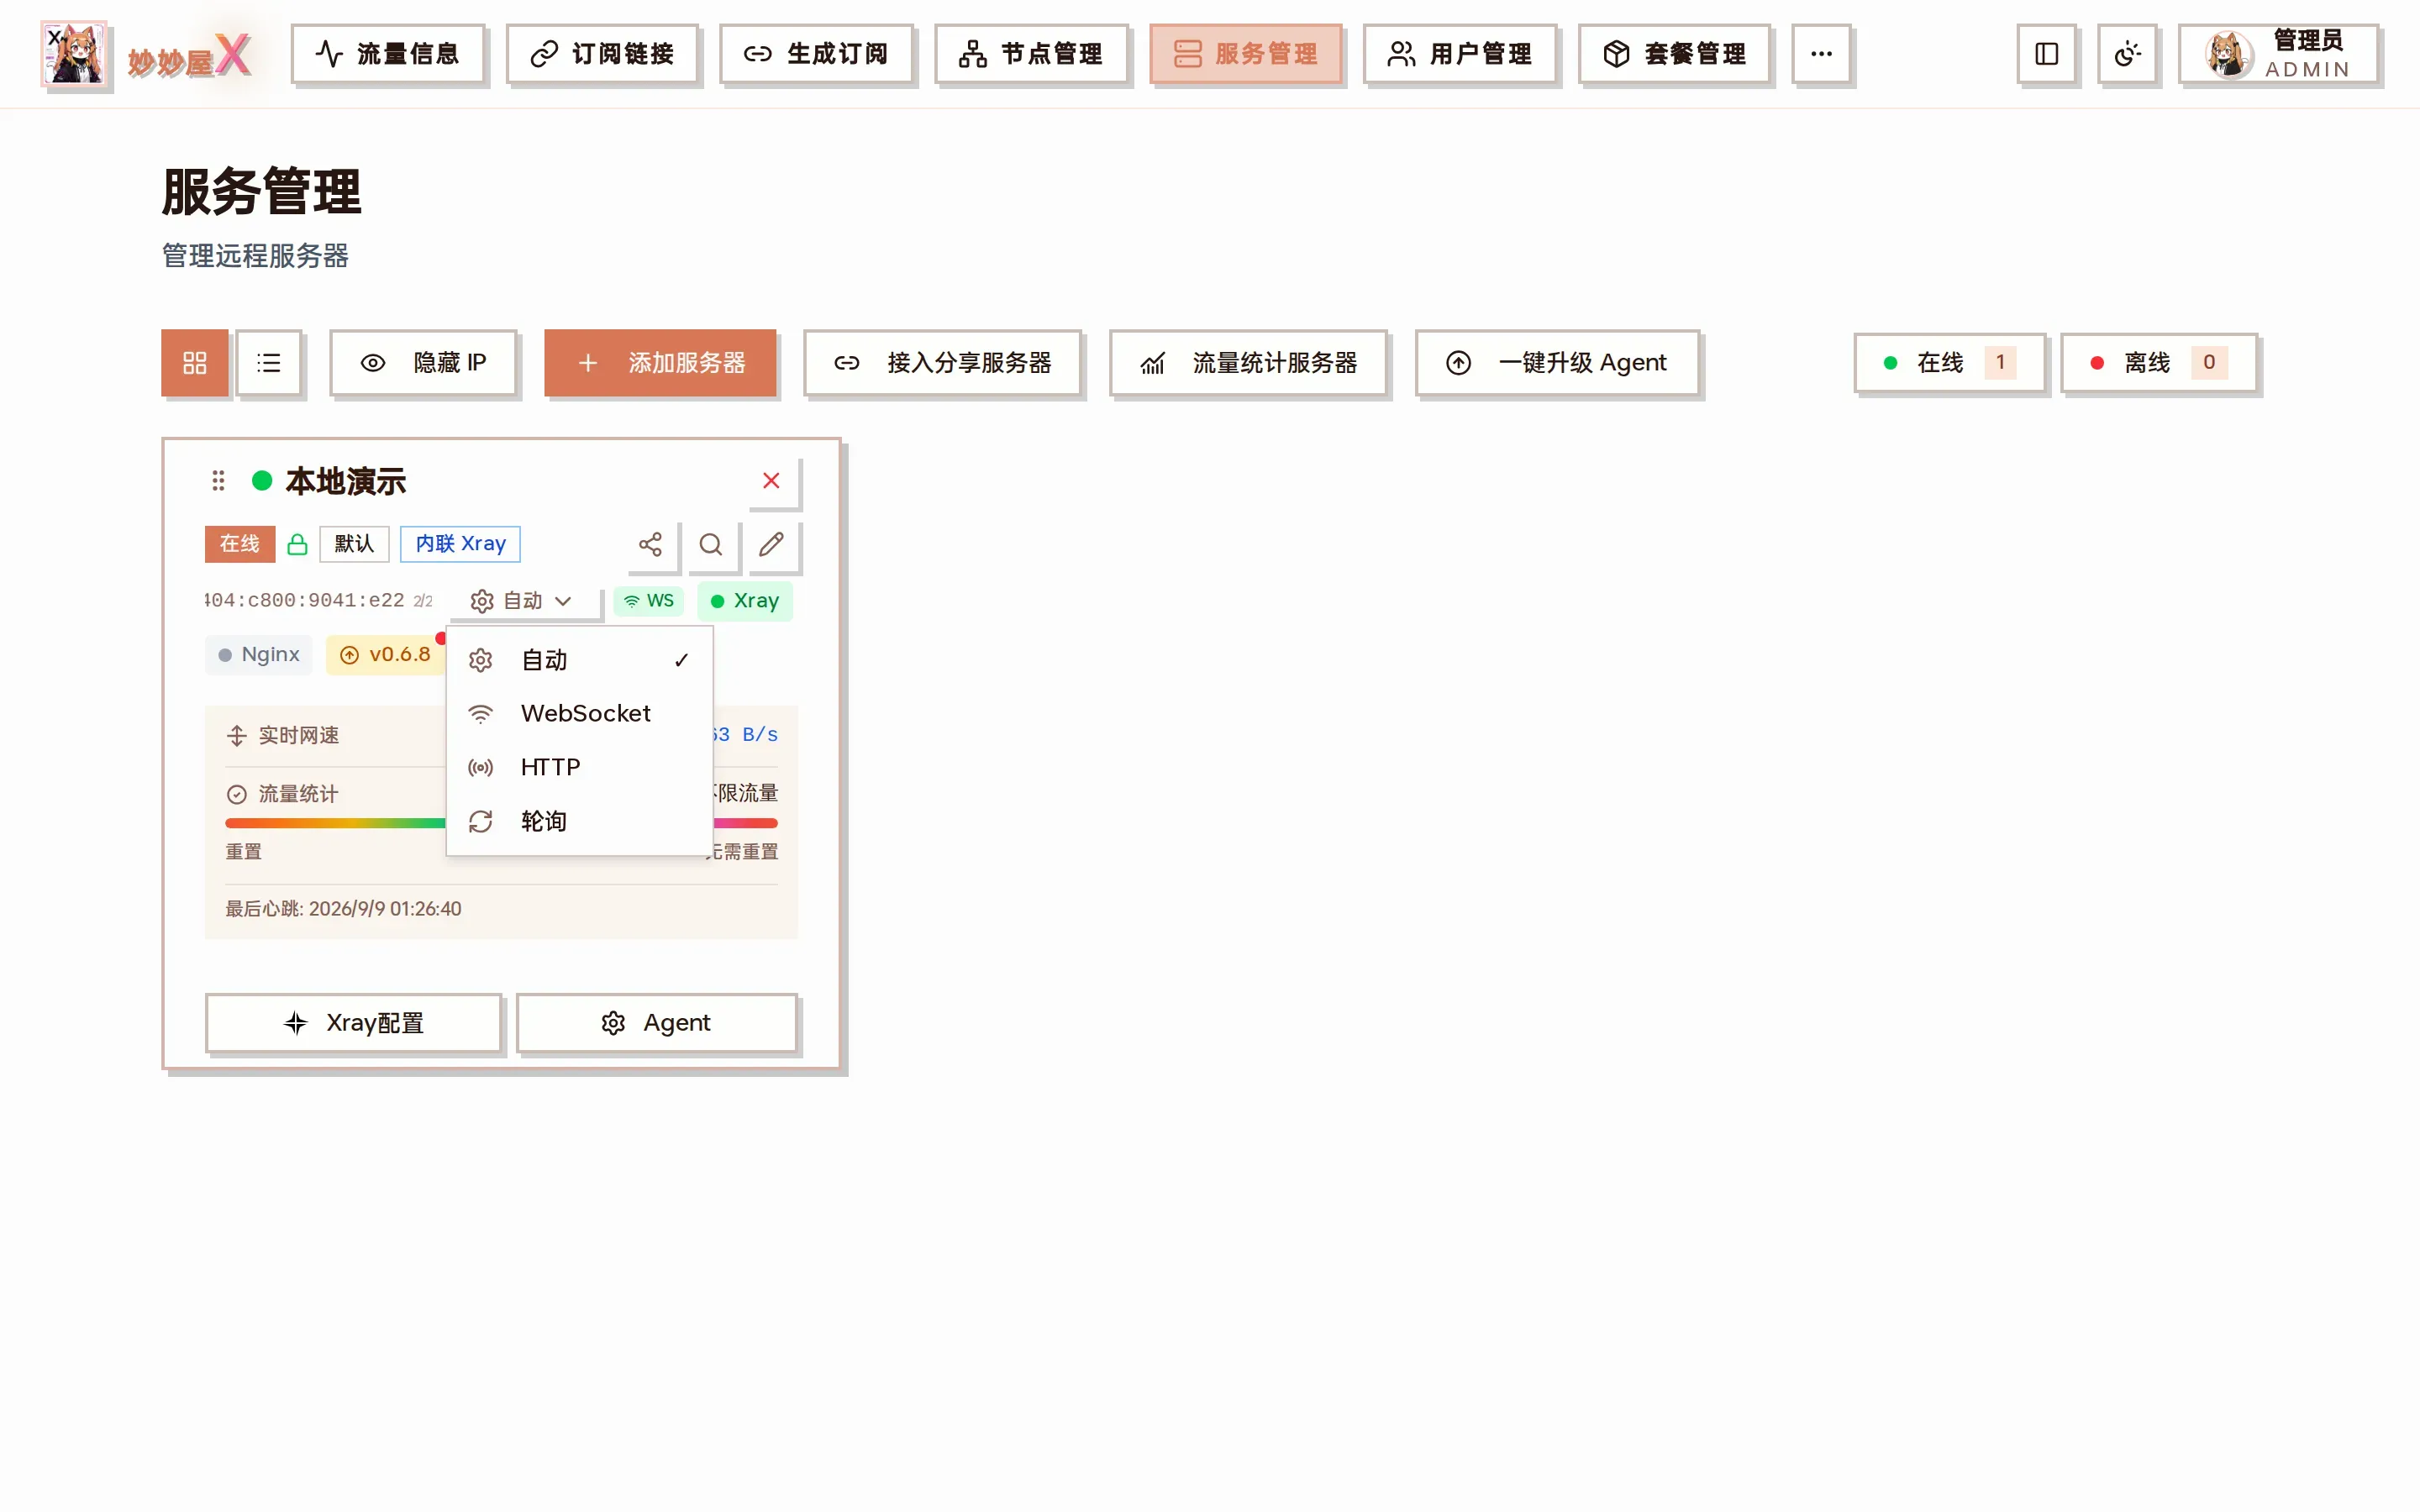
Connection mode: Auto / WebSocket / HTTP / Pull
WebSocket (recommended)
Section titled “WebSocket (recommended)”The Agent connects to the master and keeps a long-lived connection. Real-time bidirectional communication with scan-result push; the Agent’s local port is closed while connected (port hiding).
The master calls the Agent HTTP API directly. The Agent port (default 23889) must be reachable from the master.
The Agent periodically pulls commands from the master. For NAT or restricted firewalls.
Tries WebSocket → HTTP → Pull in order and picks the best available.
Agent menu
Section titled “Agent menu”The “Agent” button at the bottom of the card collects Agent operations:
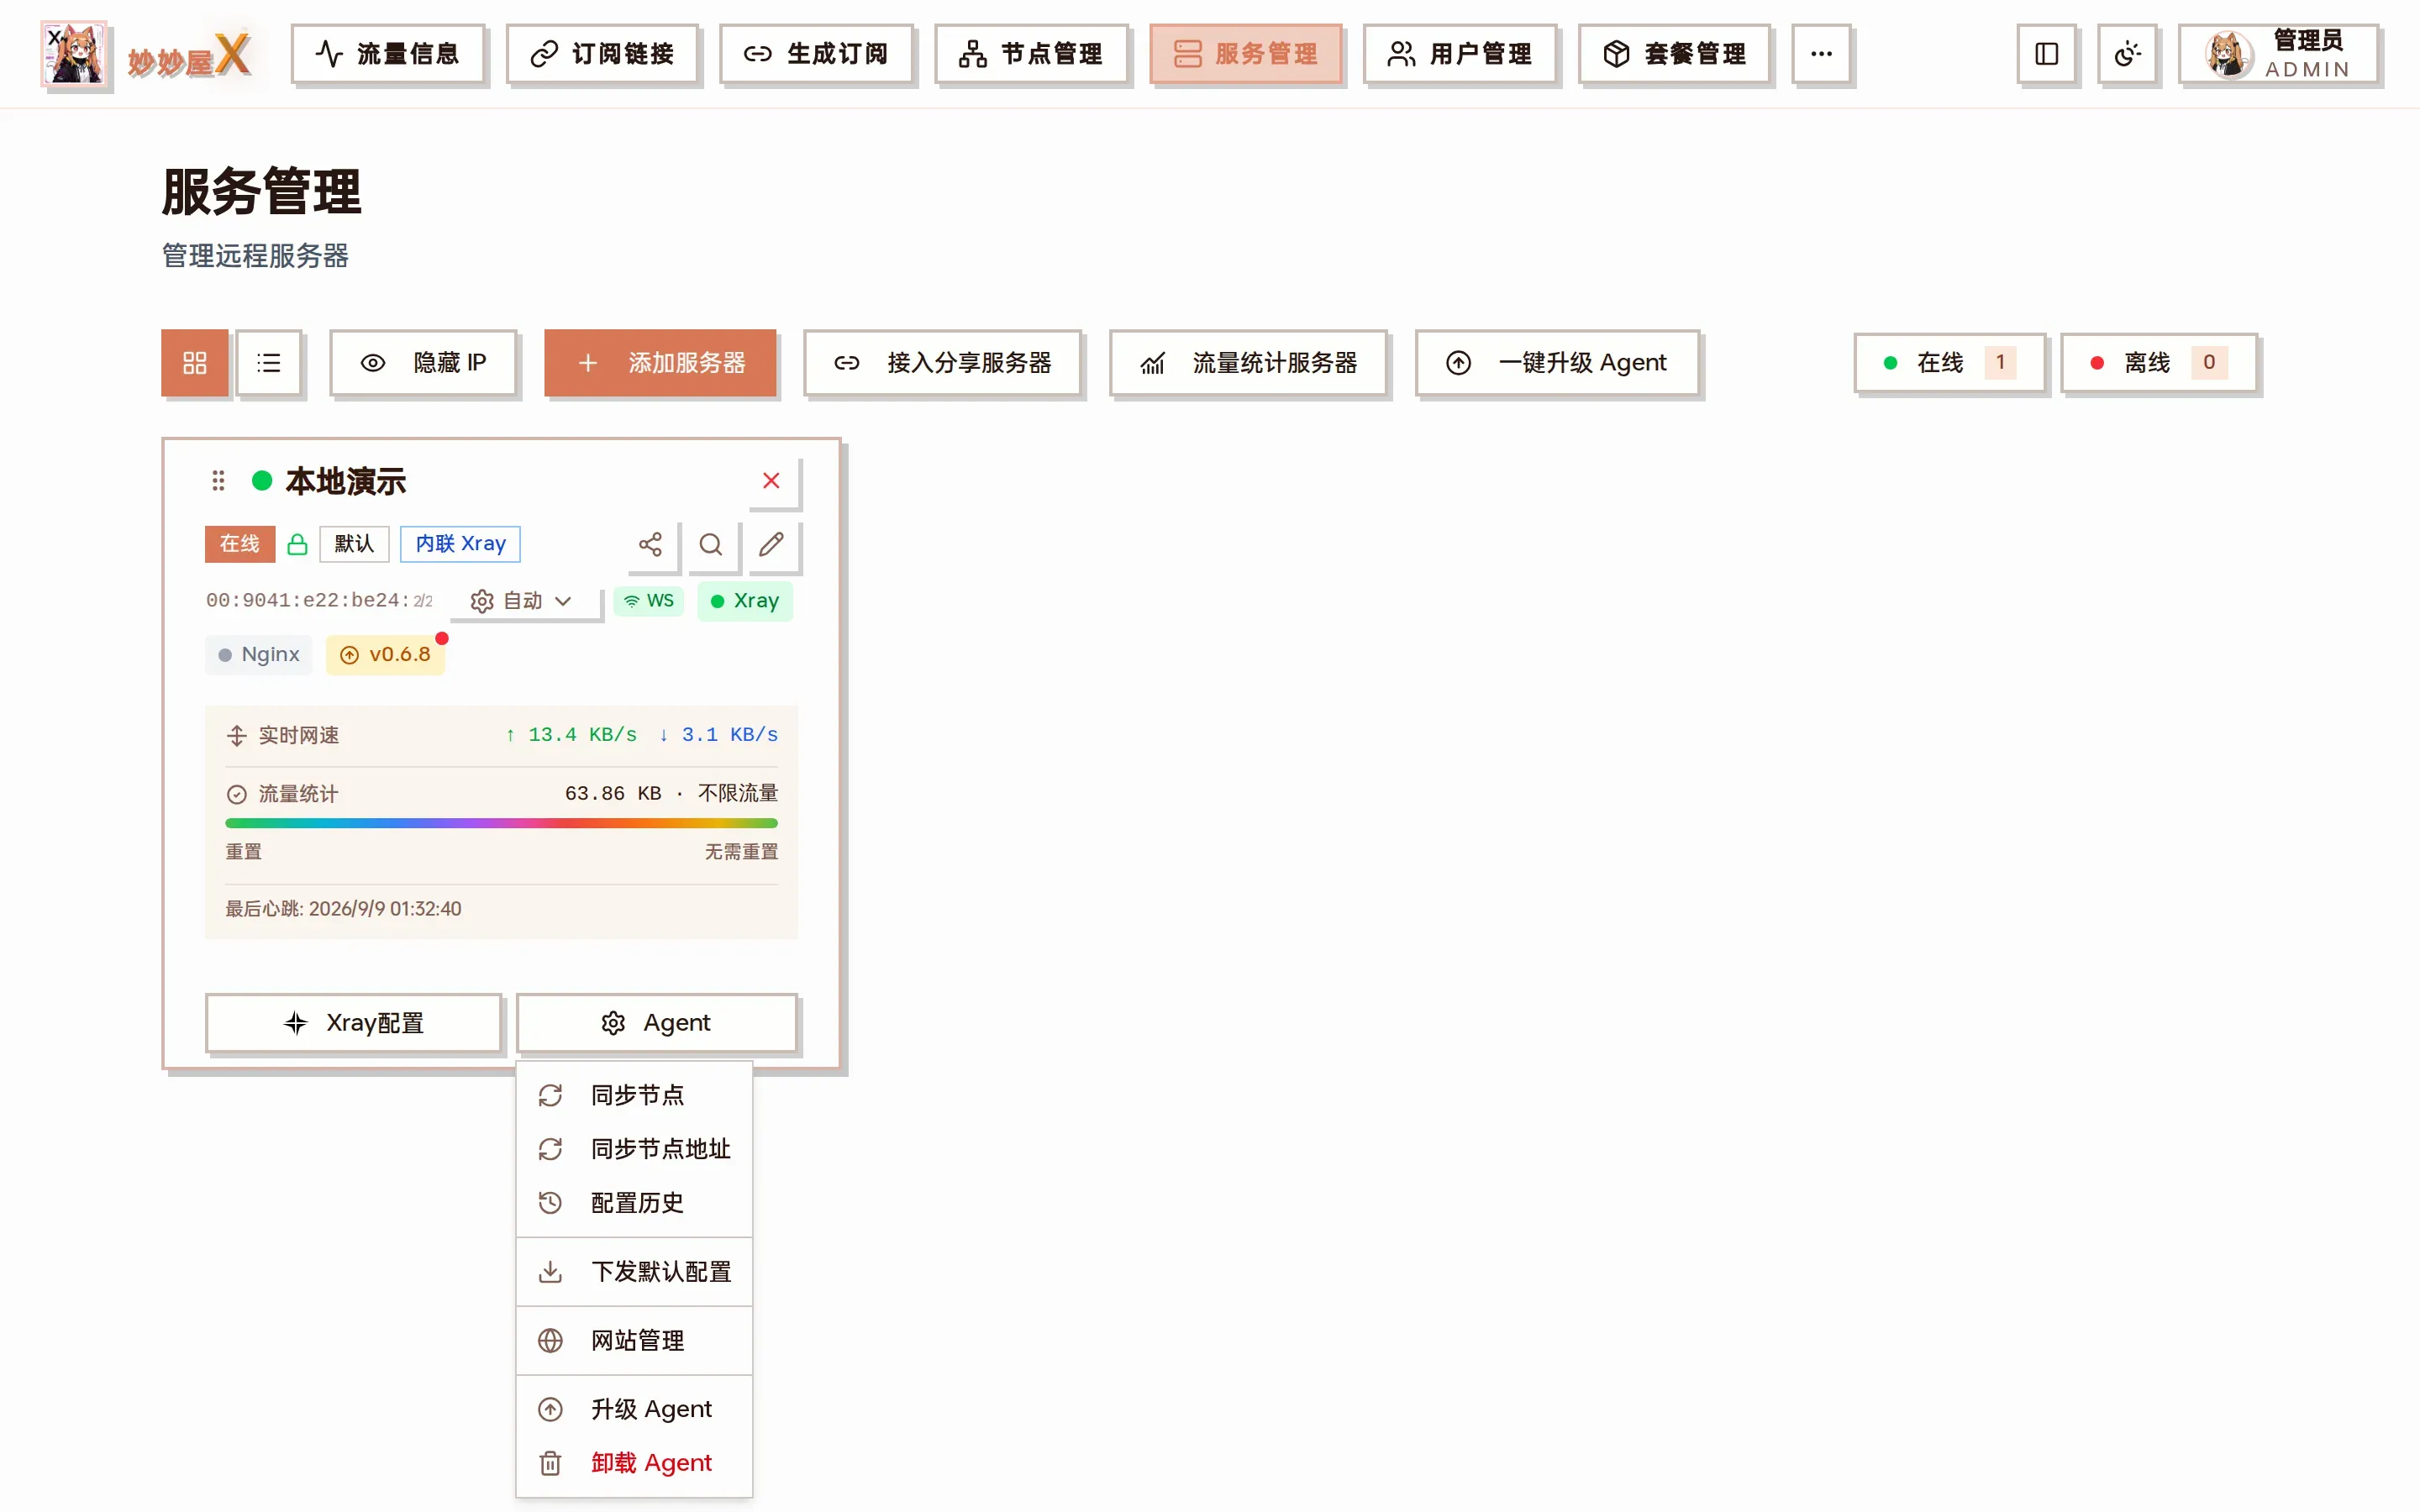
Agent menu: sync nodes, sync node addresses, config history, push default config, websites, upgrade Agent, uninstall Agent
| Item | Purpose |
|---|---|
| Sync nodes | Re-scan the server’s Xray inbounds and sync them to the node table (new inbounds become nodes) |
| Sync node addresses | Rewrite every node’s address on this server to the current domain / IP, handy after changing domains |
| Config history | Every Xray config snapshot saved by the master; preview any version or push it back to the Agent (xray test runs first) |
| Push default config | Overwrite the Agent config with the master’s default Xray config, to repair a broken config |
| Websites | Manage Nginx sites deployed on this server, see Nginx Websites |
| Upgrade Agent | Upgrade this Agent to the latest version |
| Uninstall Agent | Remove the Agent from the server |
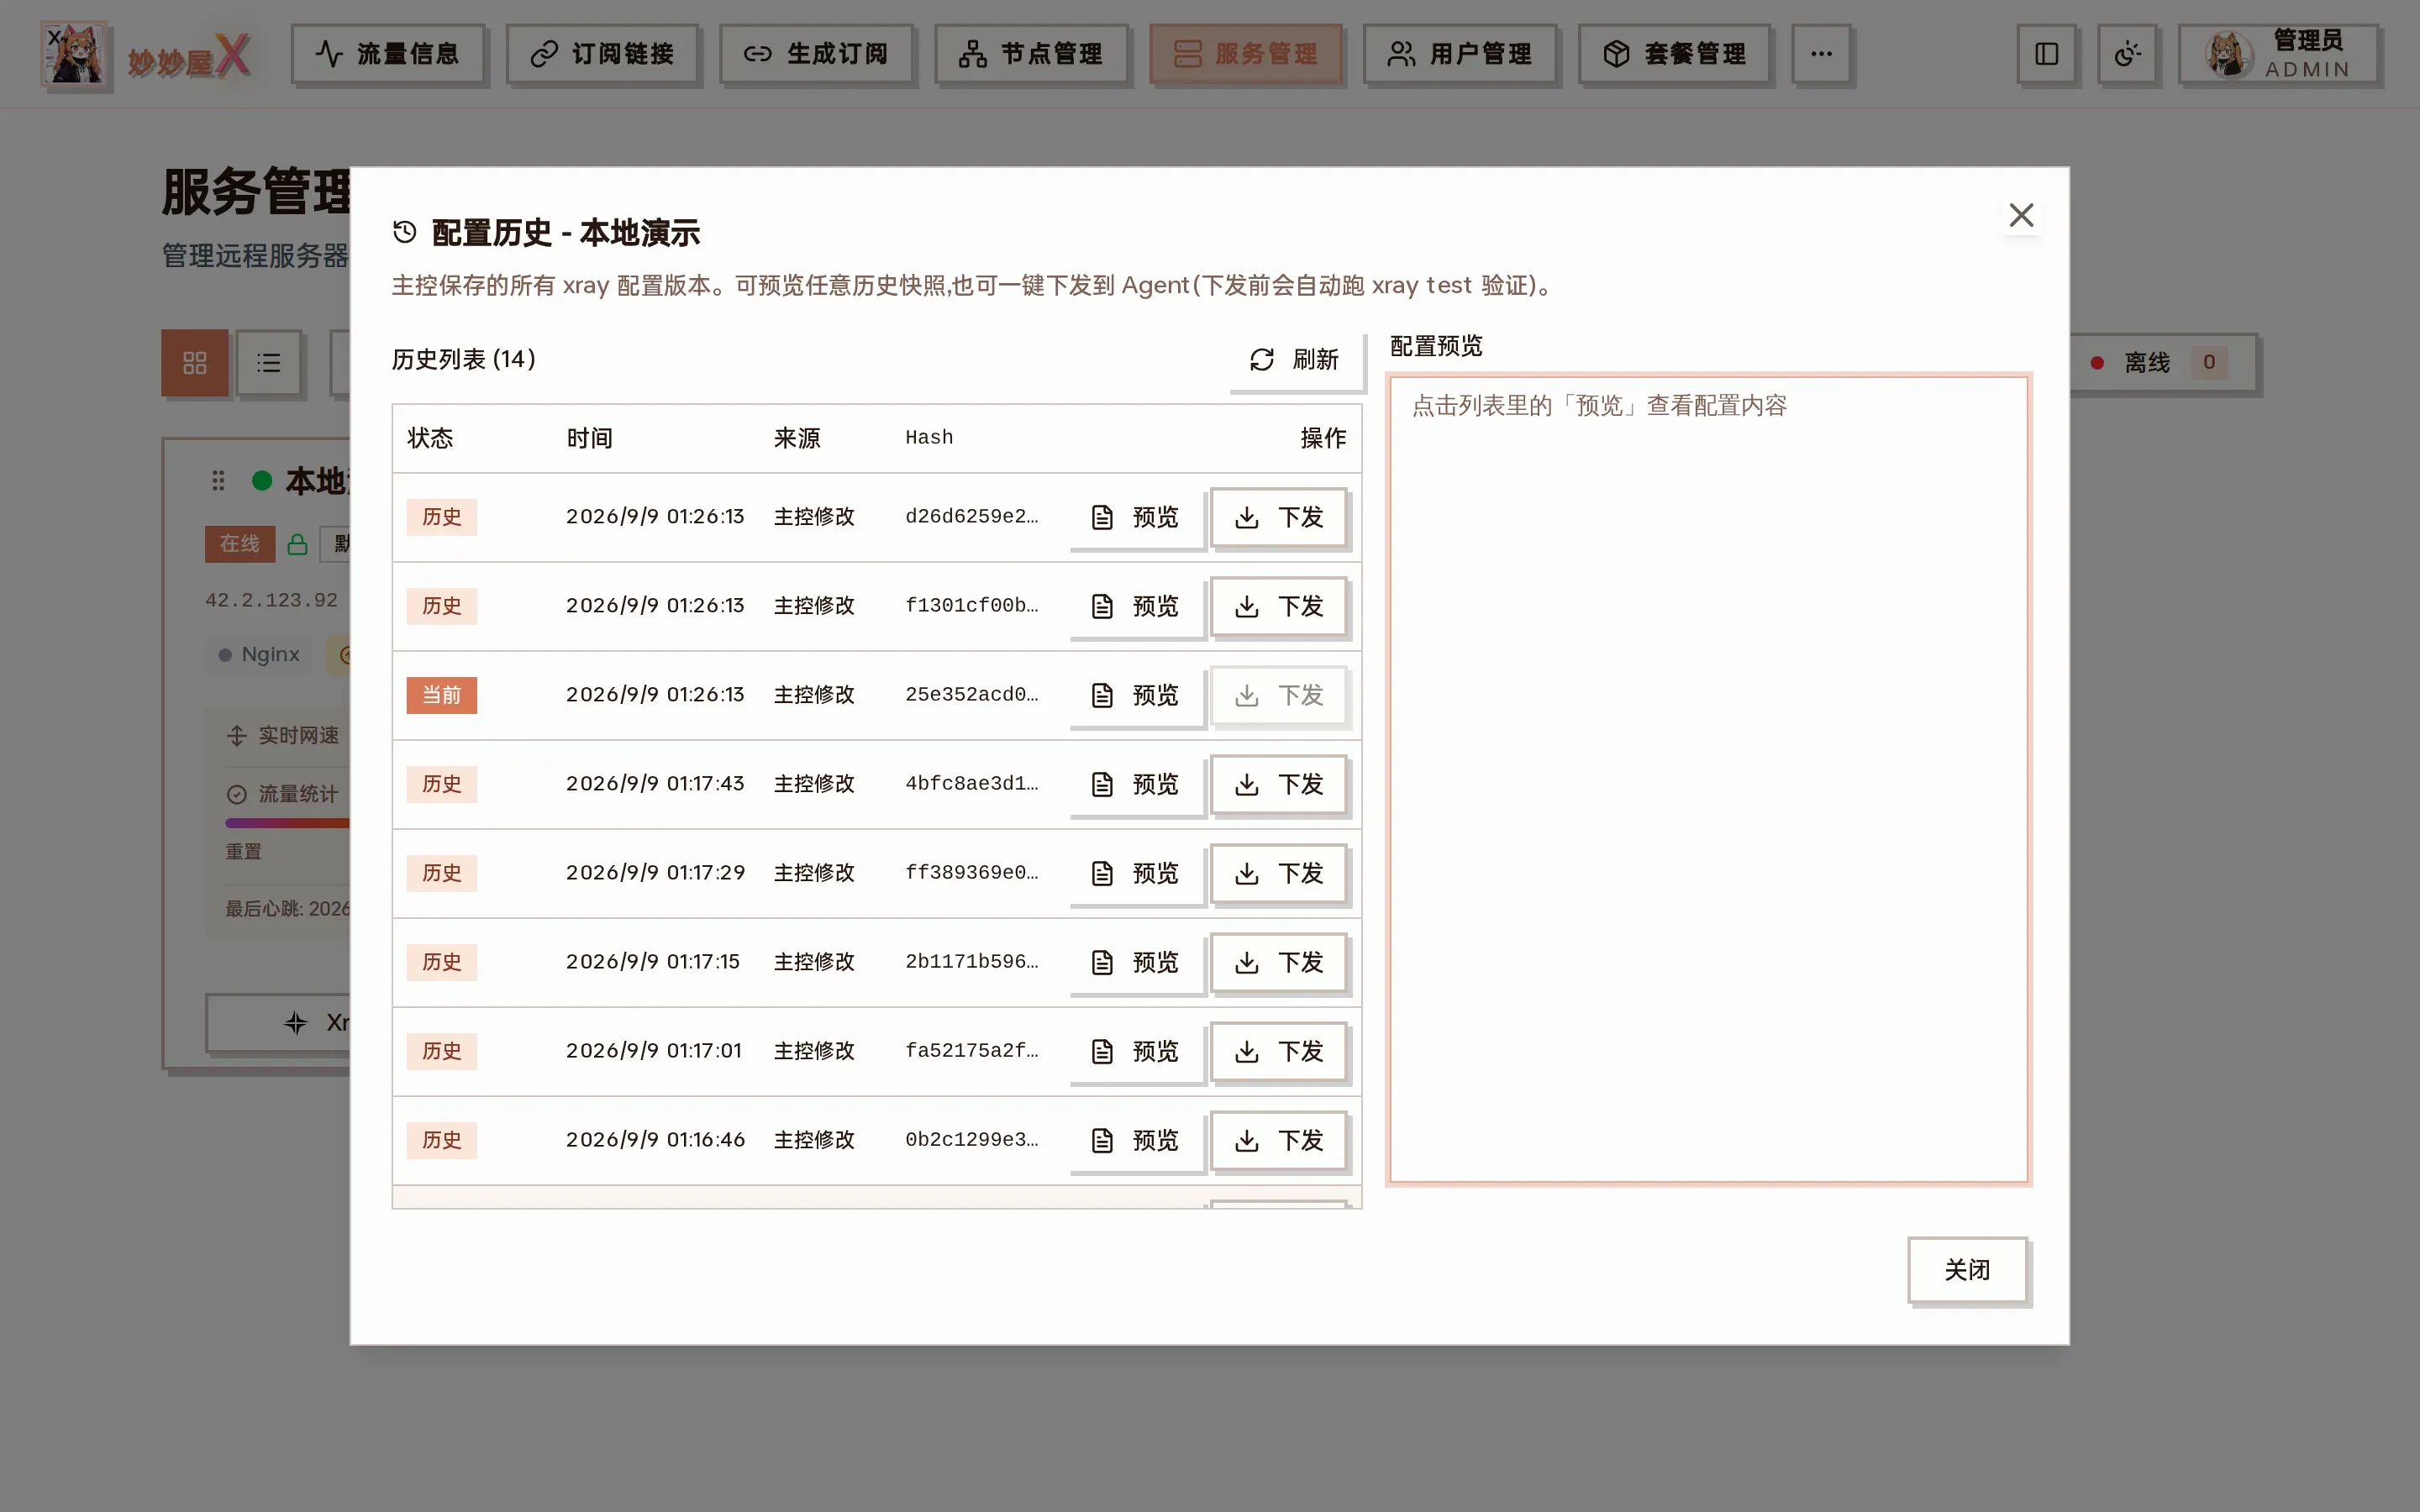
Config history: every master change and Agent report leaves a snapshot with hash and source; preview / push
Xray management
Section titled “Xray management”“Xray Config” opens the Xray management dialog with four tabs for the config file, inbounds, outbounds and routing, plus start / stop / restart and the running state:
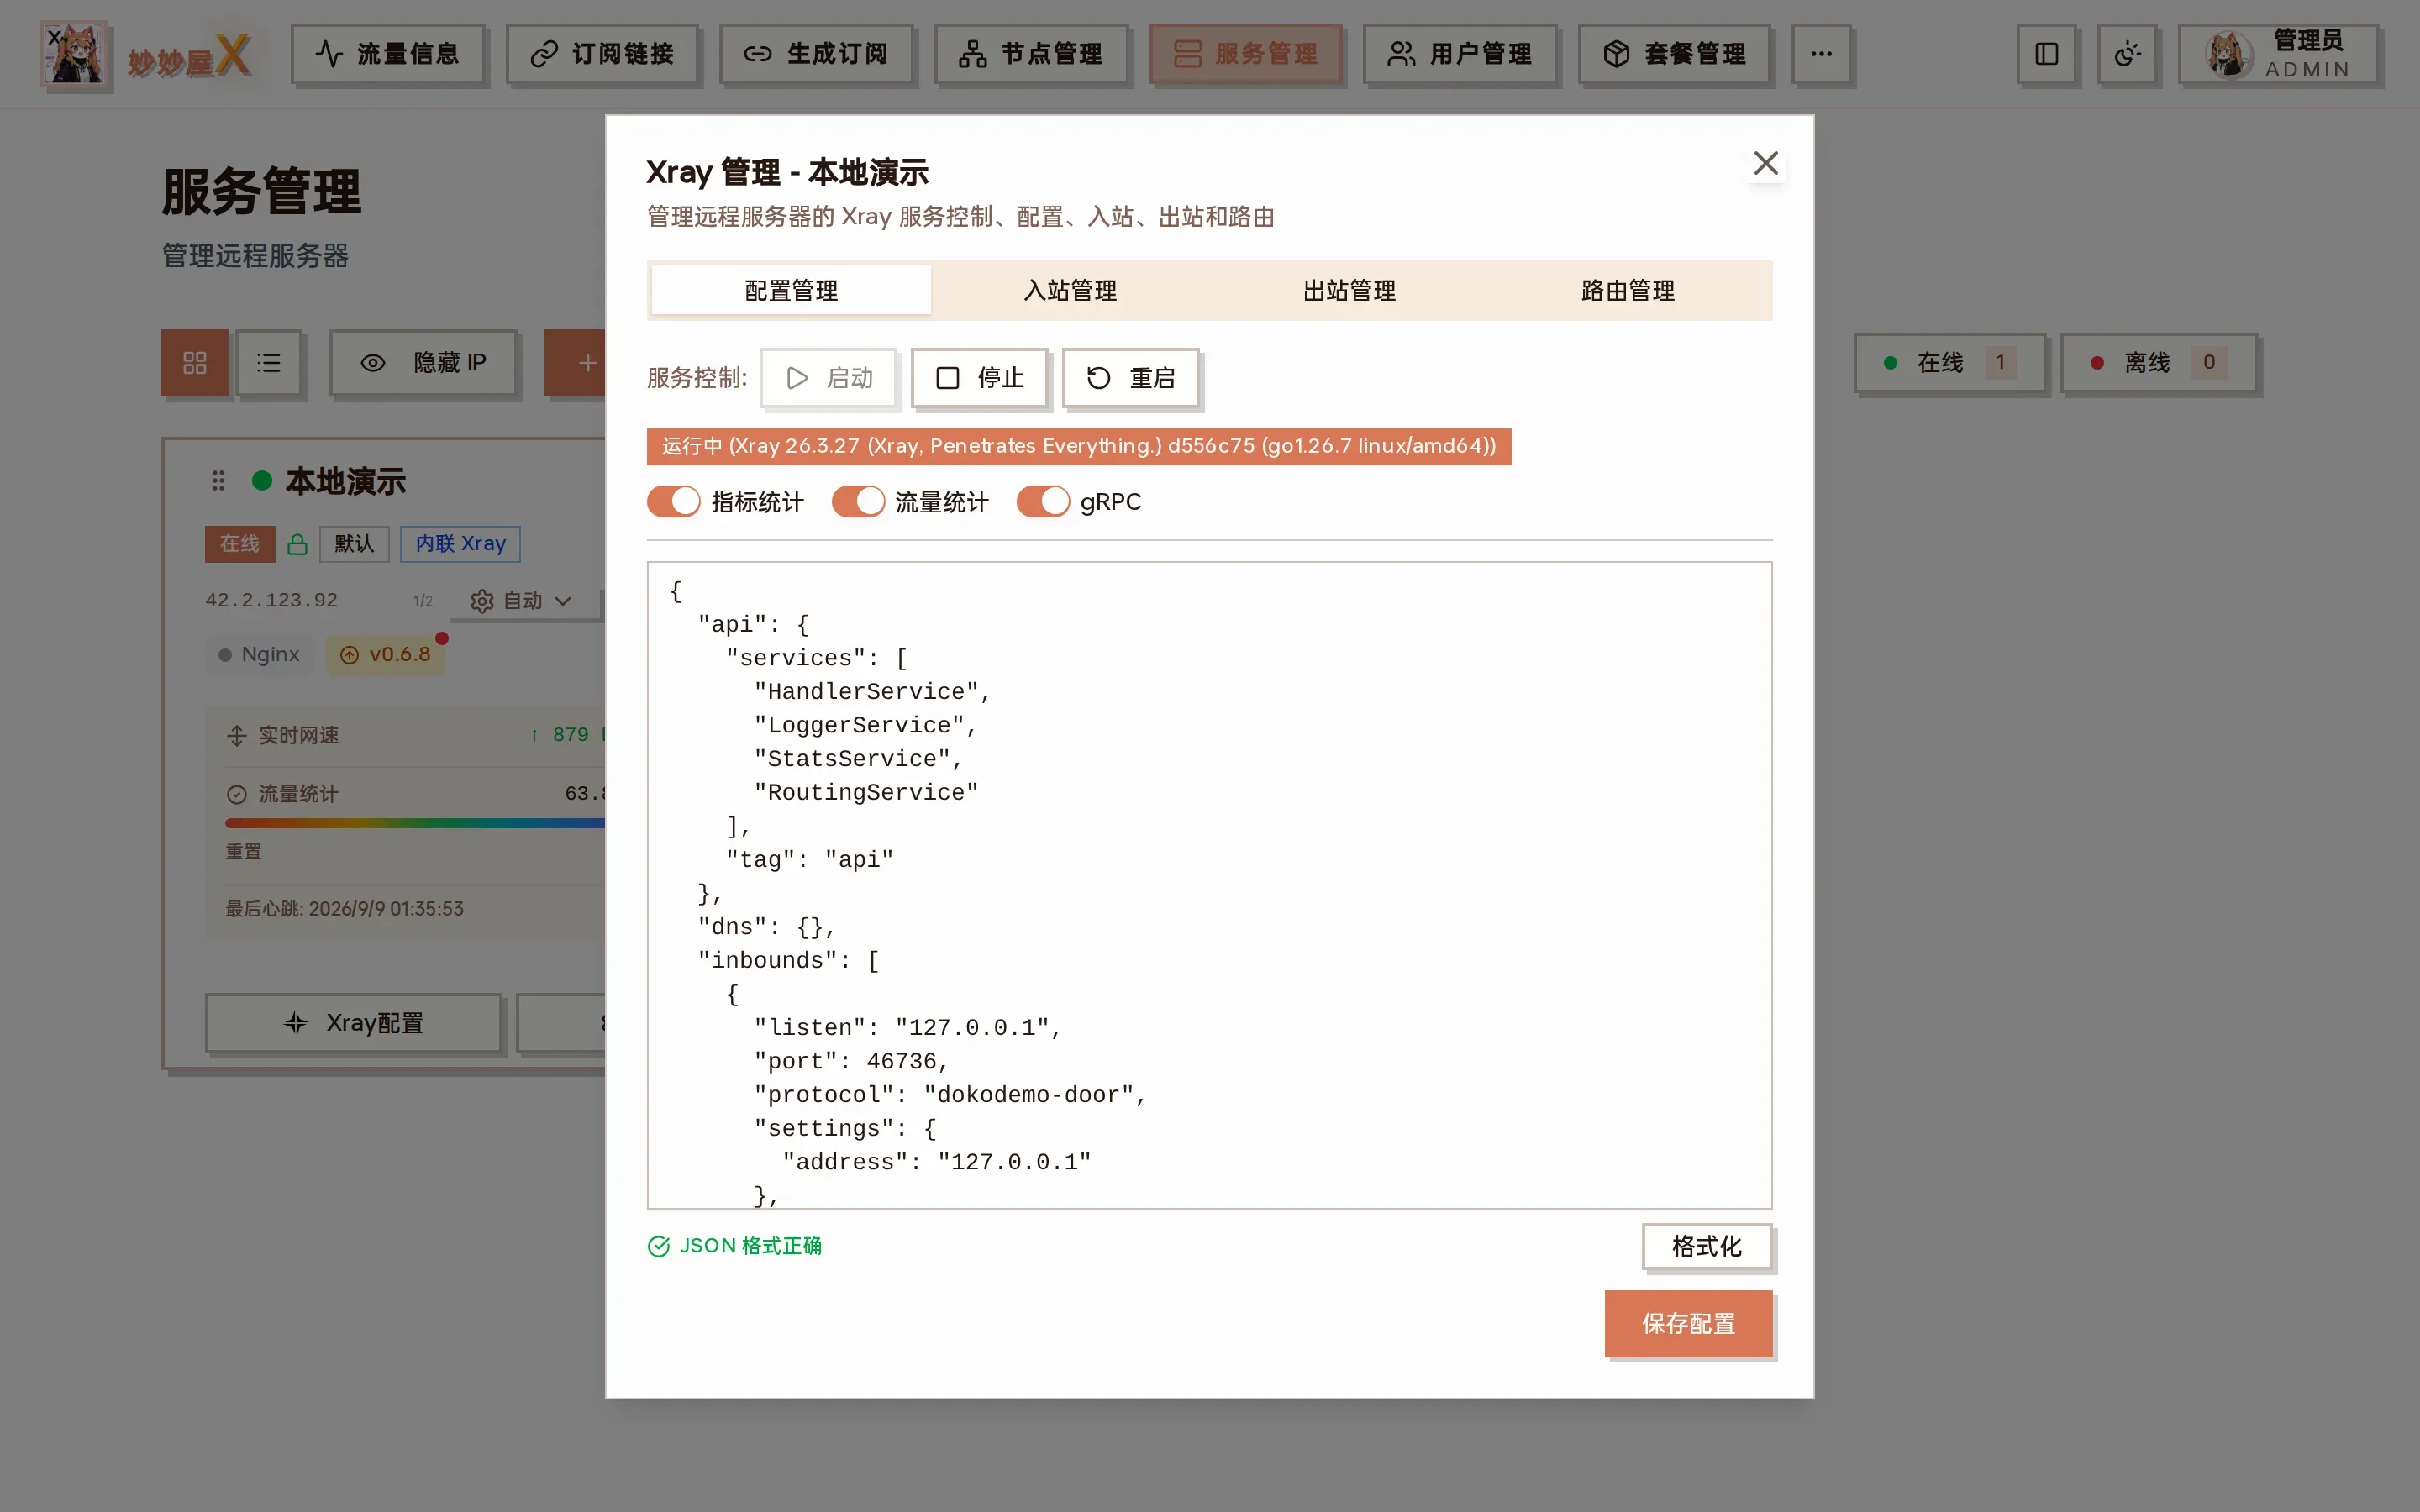
Xray management → Config: service control, metrics / stats / gRPC status, editable full config
The tabs are described in Xray Service, Xray Inbounds, Xray Outbounds and Xray Routing.
Token management
Section titled “Token management”Each server has two tokens:
- Server Token: used by the Agent to connect to the master
- Agent Token: used by the master to call the Agent API
Both can be reset in the edit dialog. After a reset the Agent receives the new token over WebSocket automatically.
Server status
Section titled “Server status”| Status | Meaning |
|---|---|
| connected | Agent connected, manageable |
| disconnected | Agent disconnected |
| pending | Waiting for the first connection |
List view and Hide IP
Section titled “List view and Hide IP”With many servers switch to list view, one row per server; “Hide IP” masks every IP on the cards for screenshots or demos (the screenshots on this page have it on).
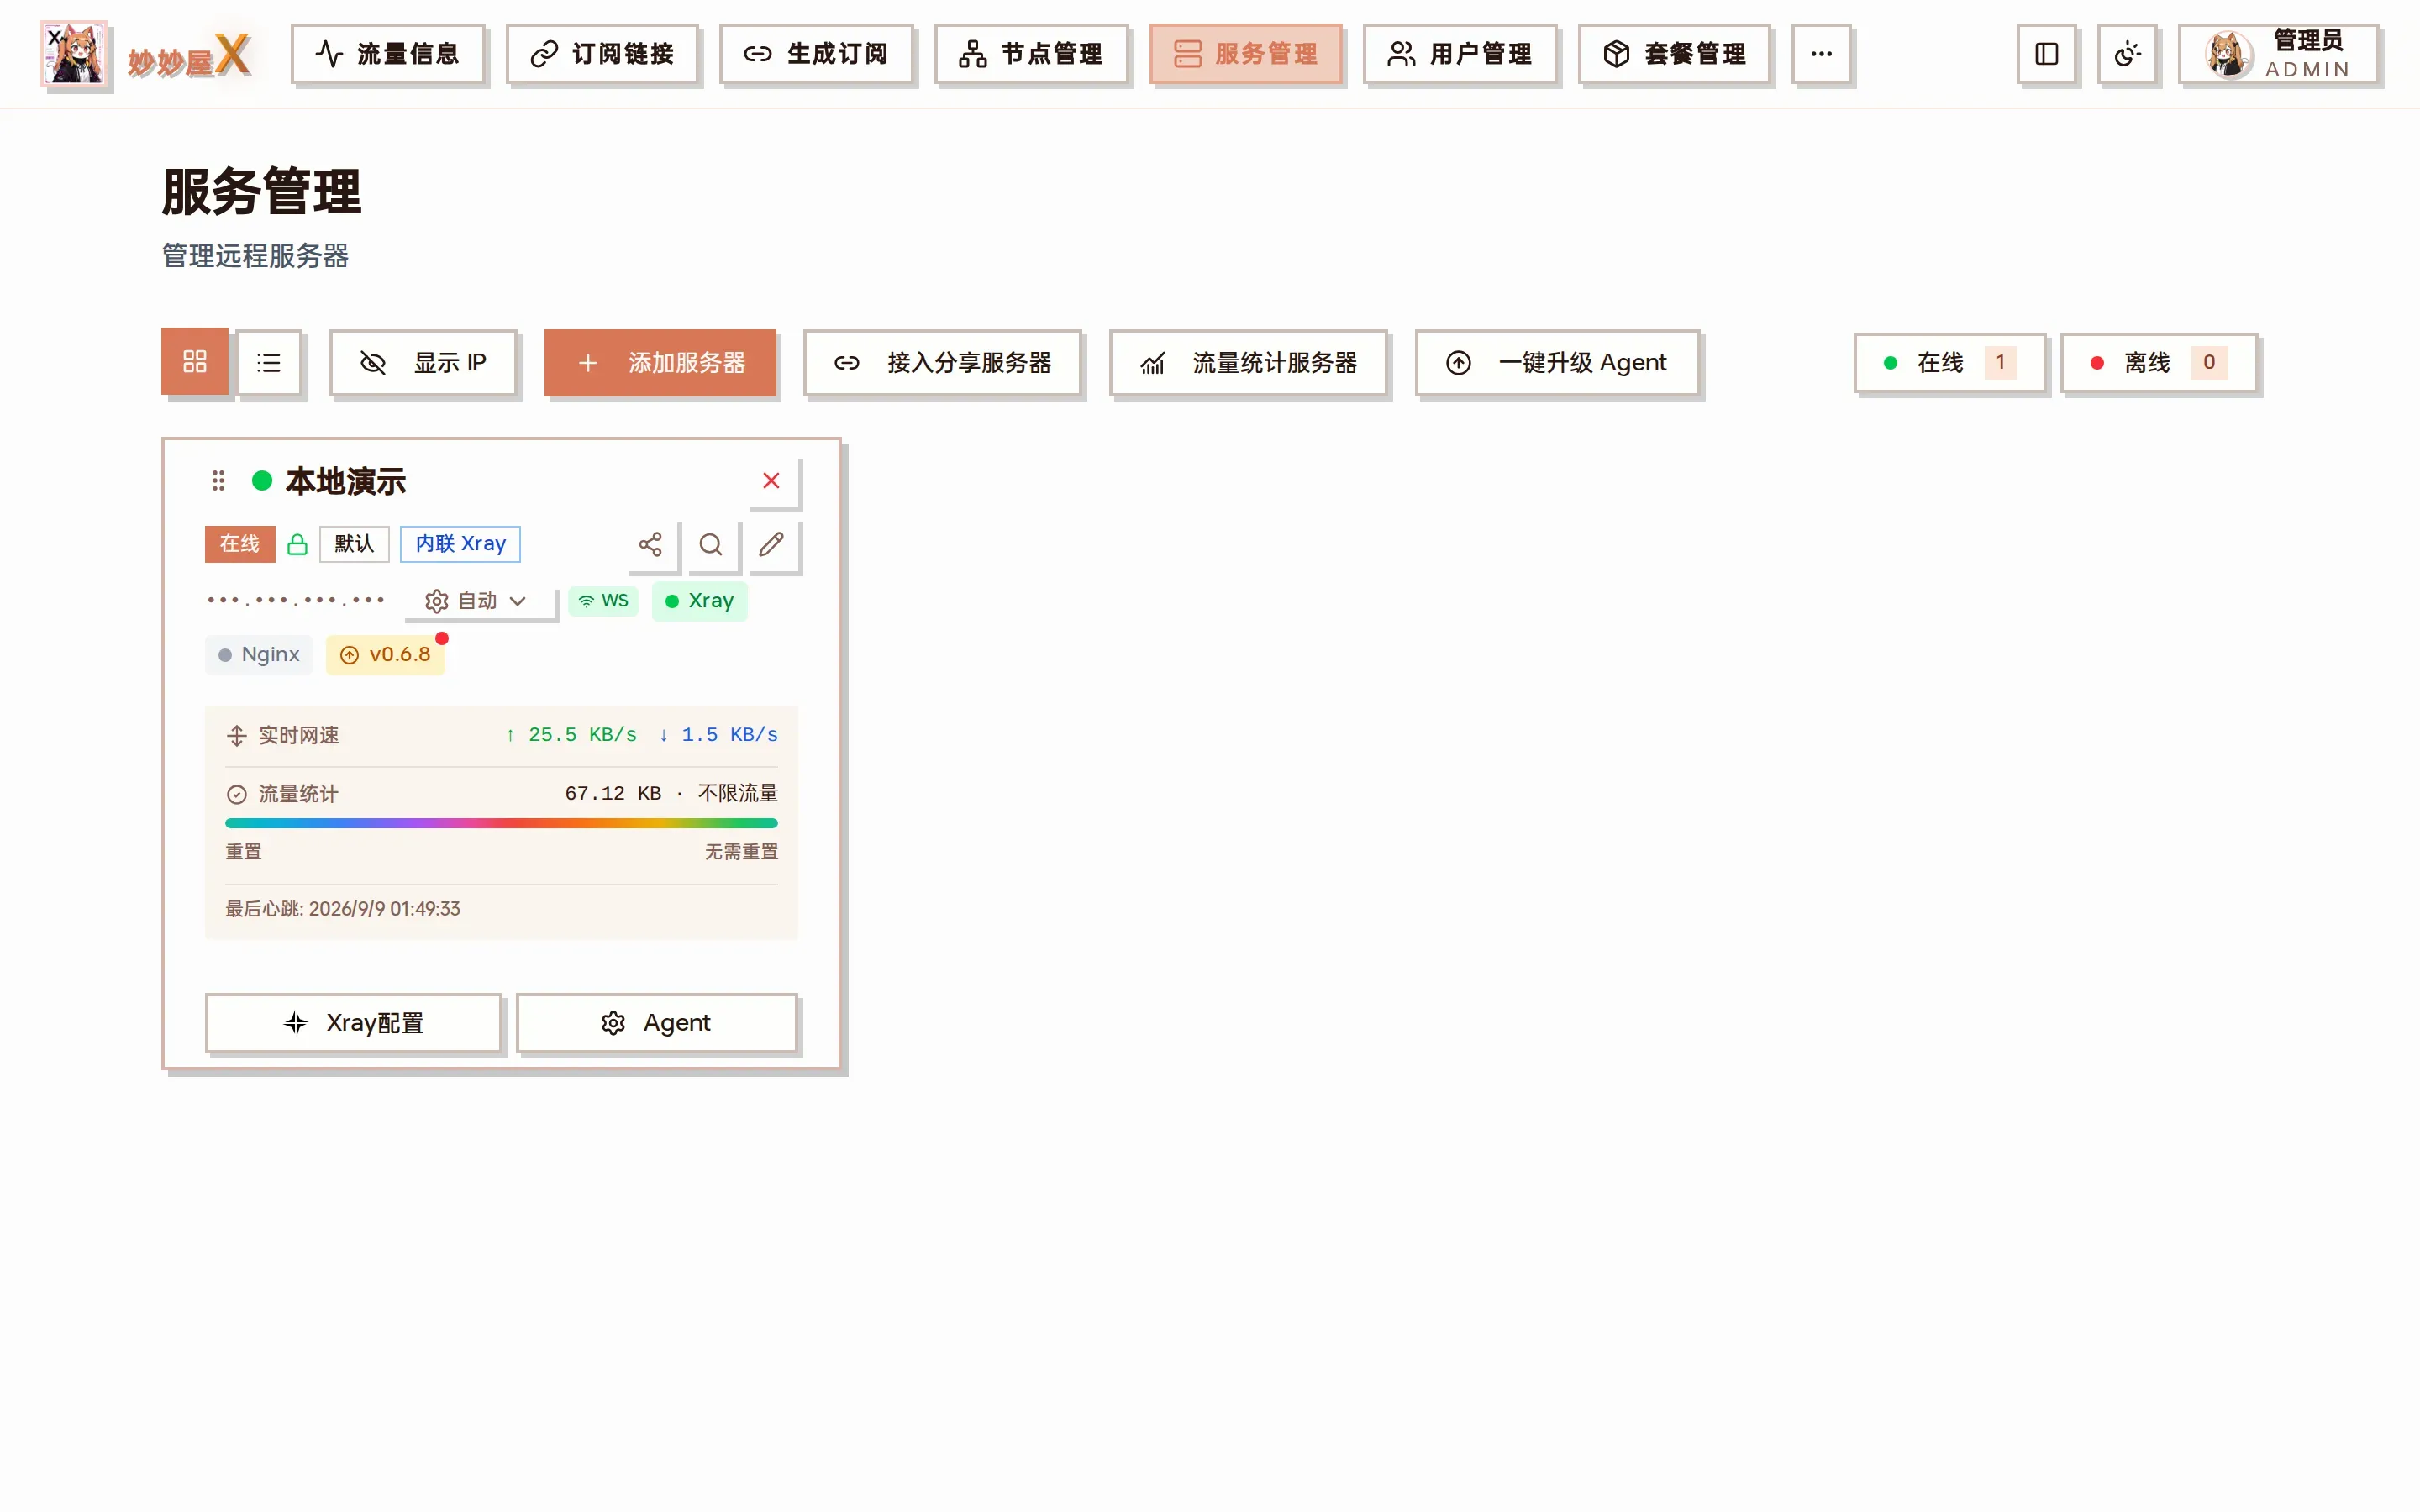
List view
Traffic-stat servers
Section titled “Traffic-stat servers”“Traffic-stat servers” chooses which servers feed the admin home page totals:
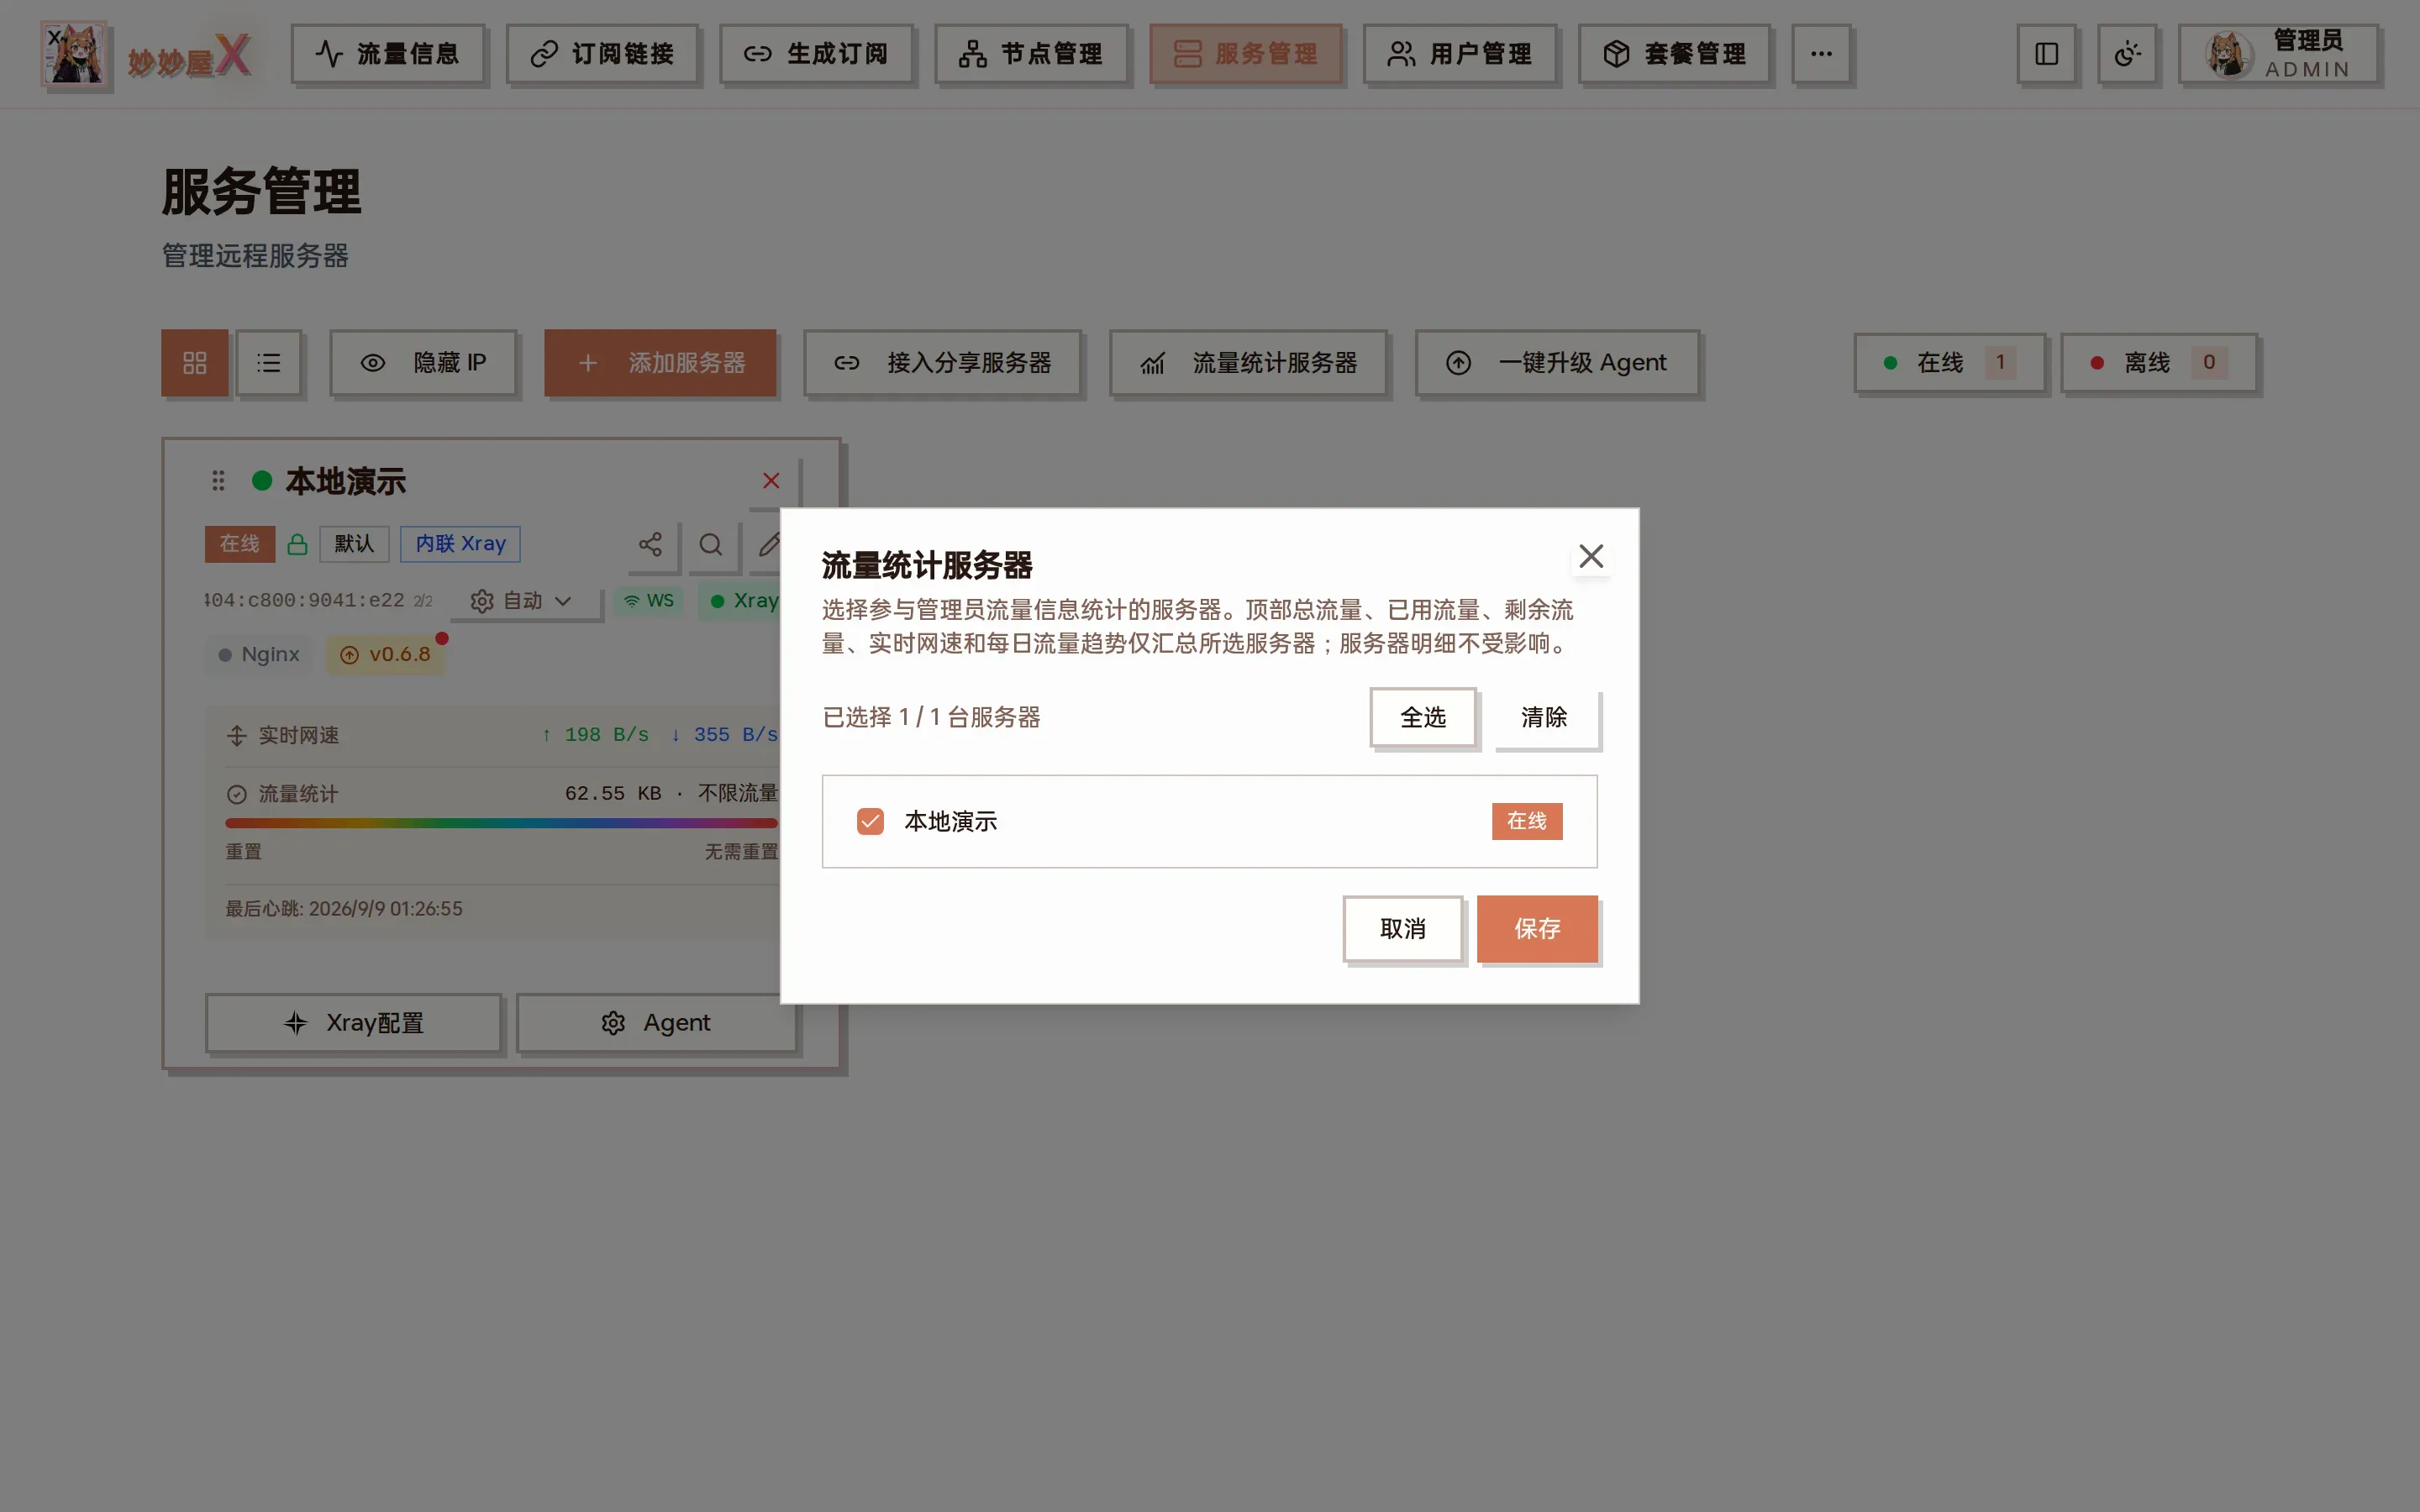
Traffic-stat servers: total / used / remaining / live speed / daily trend on the home page only aggregate the ticked servers; per-server details are unaffected
Server traffic dimensions
Section titled “Server traffic dimensions”The “used traffic” and quota on the Servers page support two data sources, chosen with “Traffic data source” in the add / edit dialog. The default is “Xray protocol traffic”; switch to “System NIC traffic” to match the VPS provider’s bill:
System NIC traffic
Section titled “System NIC traffic”Read by the Agent from /proc/net/dev (physical NIC RX / TX totals), including Xray forwarding, SSH, system updates, monitoring reports and tunnel overhead. Usually closest to the provider’s meter, though sampling may still differ. Excludes virtual NICs such as WARP / Tailscale / Docker / WireGuard.
Xray protocol traffic
Section titled “Xray protocol traffic”Aggregates the server’s Xray inbound + outbound counters from node_traffic, counting only traffic through Xray. The node view additionally attributes users, splits routed child nodes and deducts parents, so the two pages need not match.
The “traffic counting rule” (up / down / both / max) applies to both sources.
The card’s live upload/download speed always comes from the system NIC regardless of source or rule.
Node view, user view and package threshold enforcement always use the Xray dimension (NIC traffic cannot be split by tag or user).
Servers cards, home totals, traffic info and the public probe do not share the same time range. Formulas and per-page differences: Traffic Accounting.
Upgrade Agents
Section titled “Upgrade Agents”When a new version is released the version badge shows a red dot. Click it to upgrade that server; “Upgrade Agents” at the top upgrades every server with a newer version at once, no SSH needed. The Agent restarts during the upgrade.
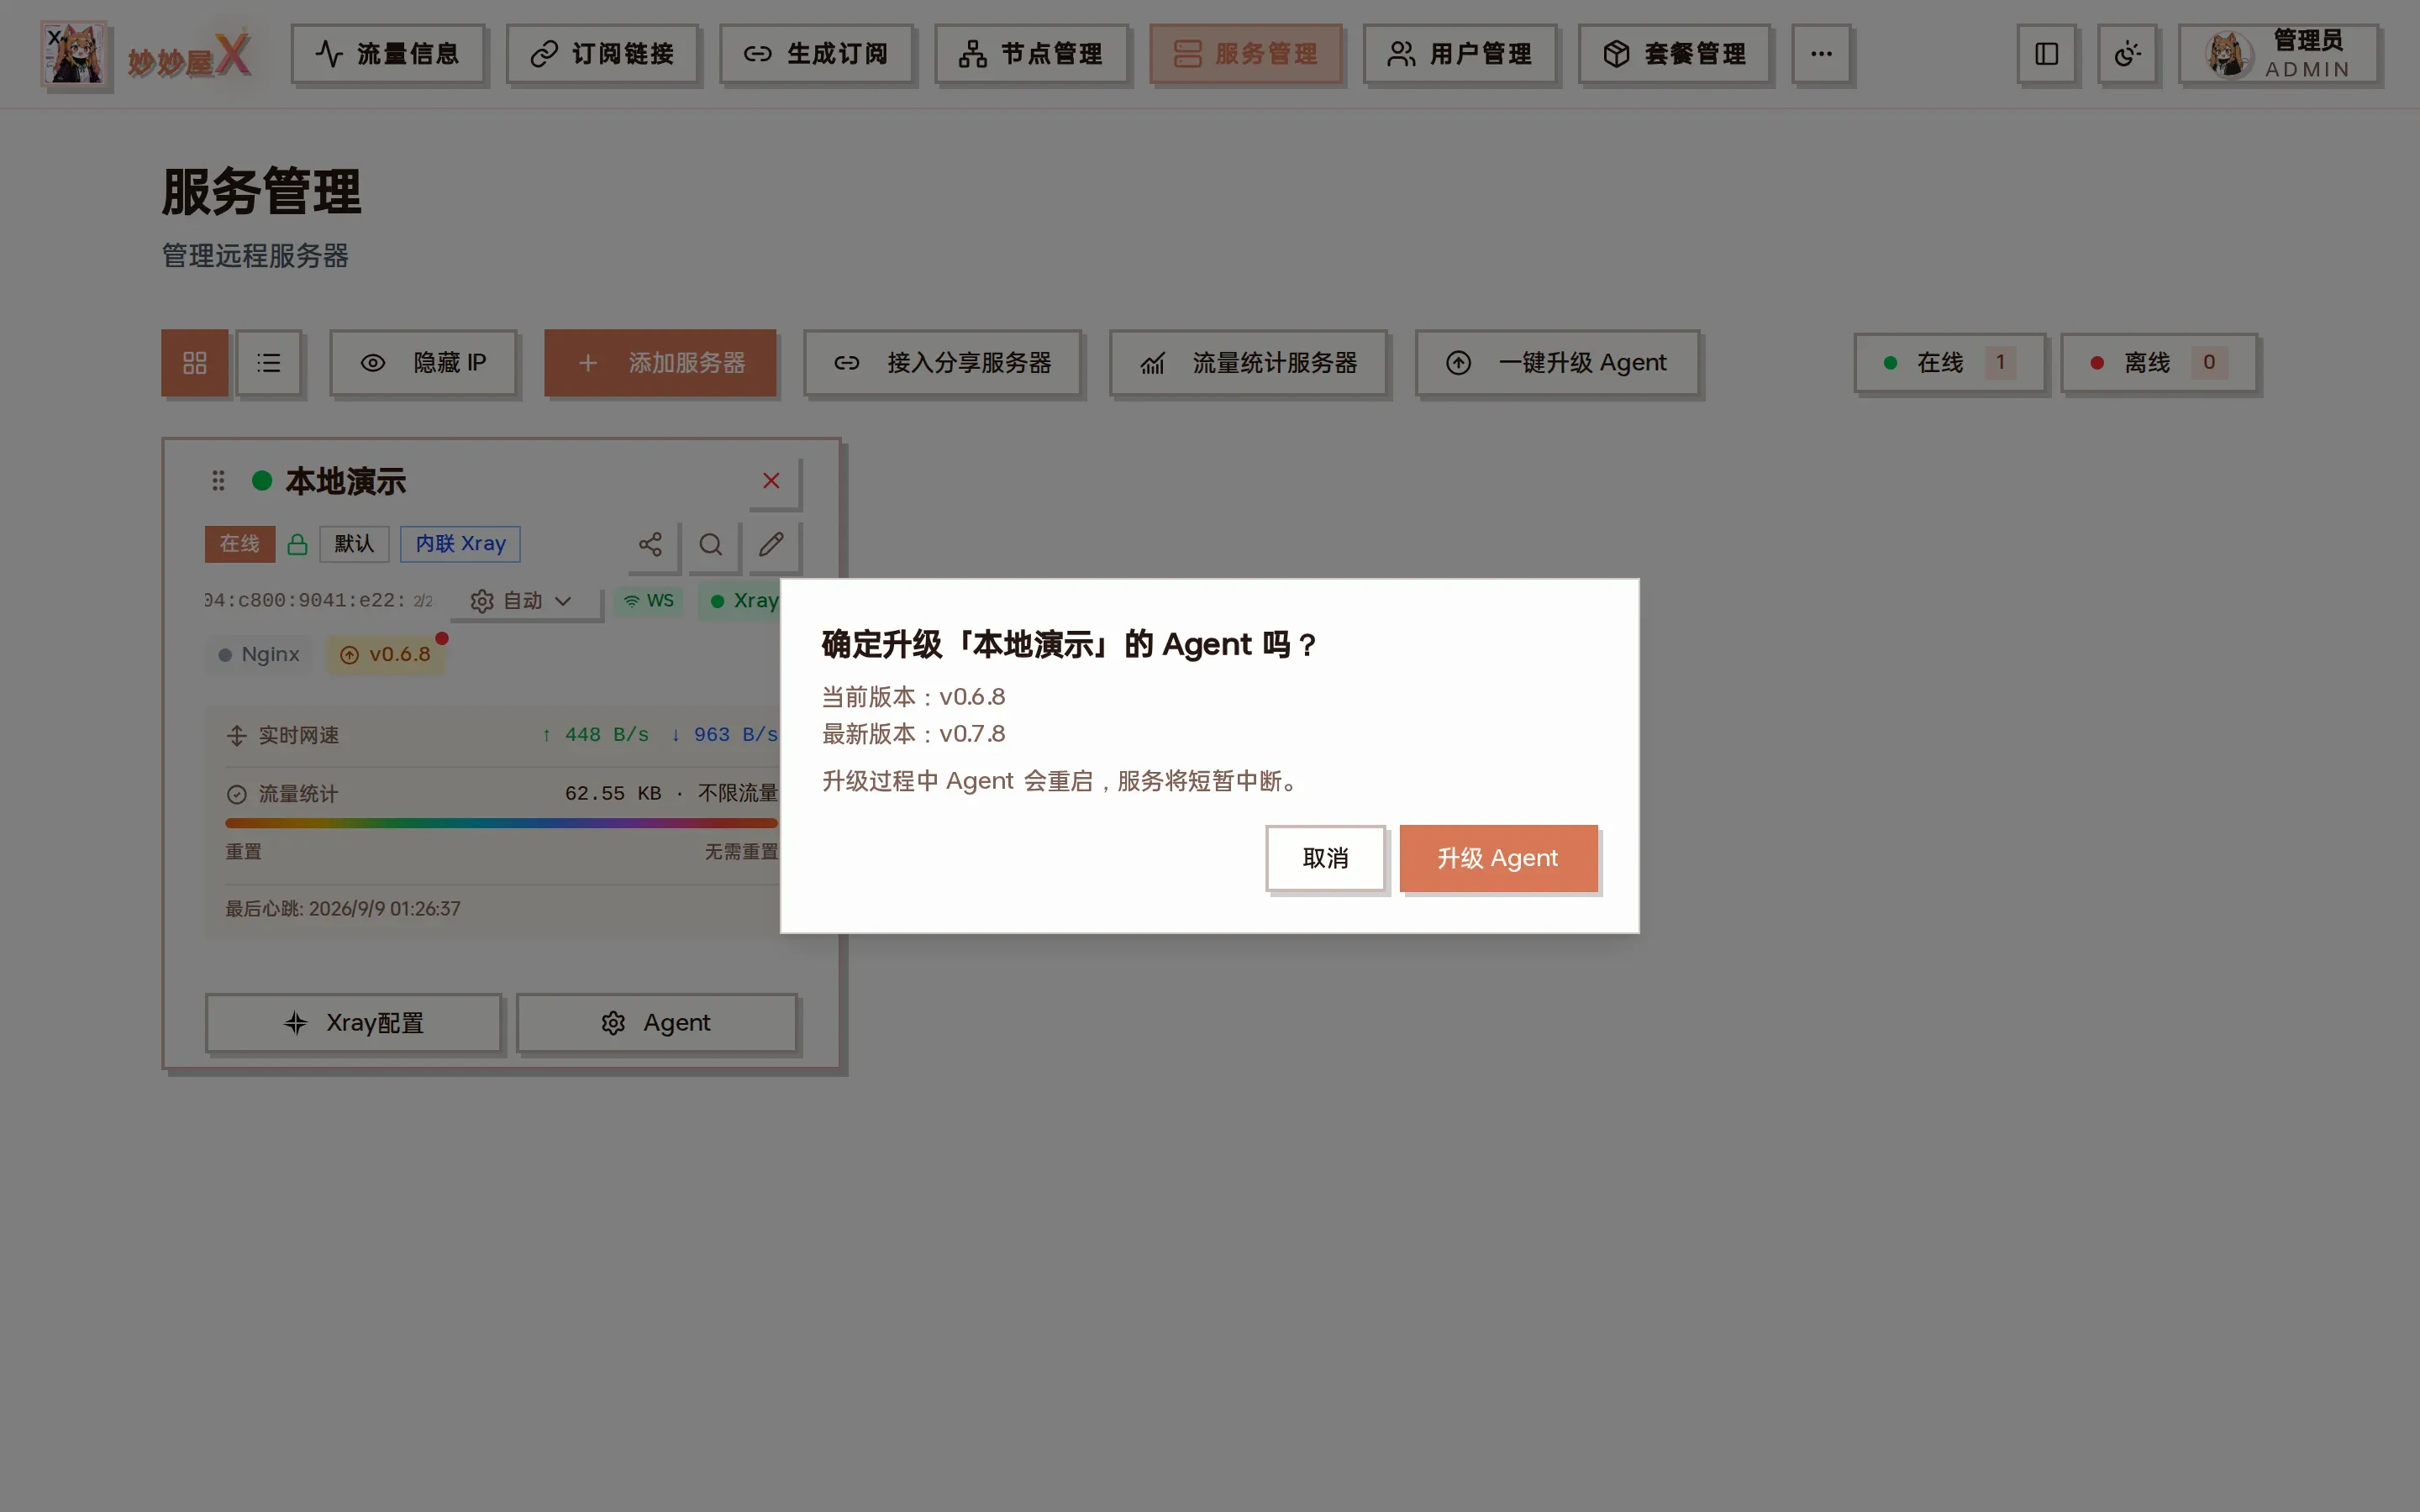
Upgrade one Agent: current vs latest version
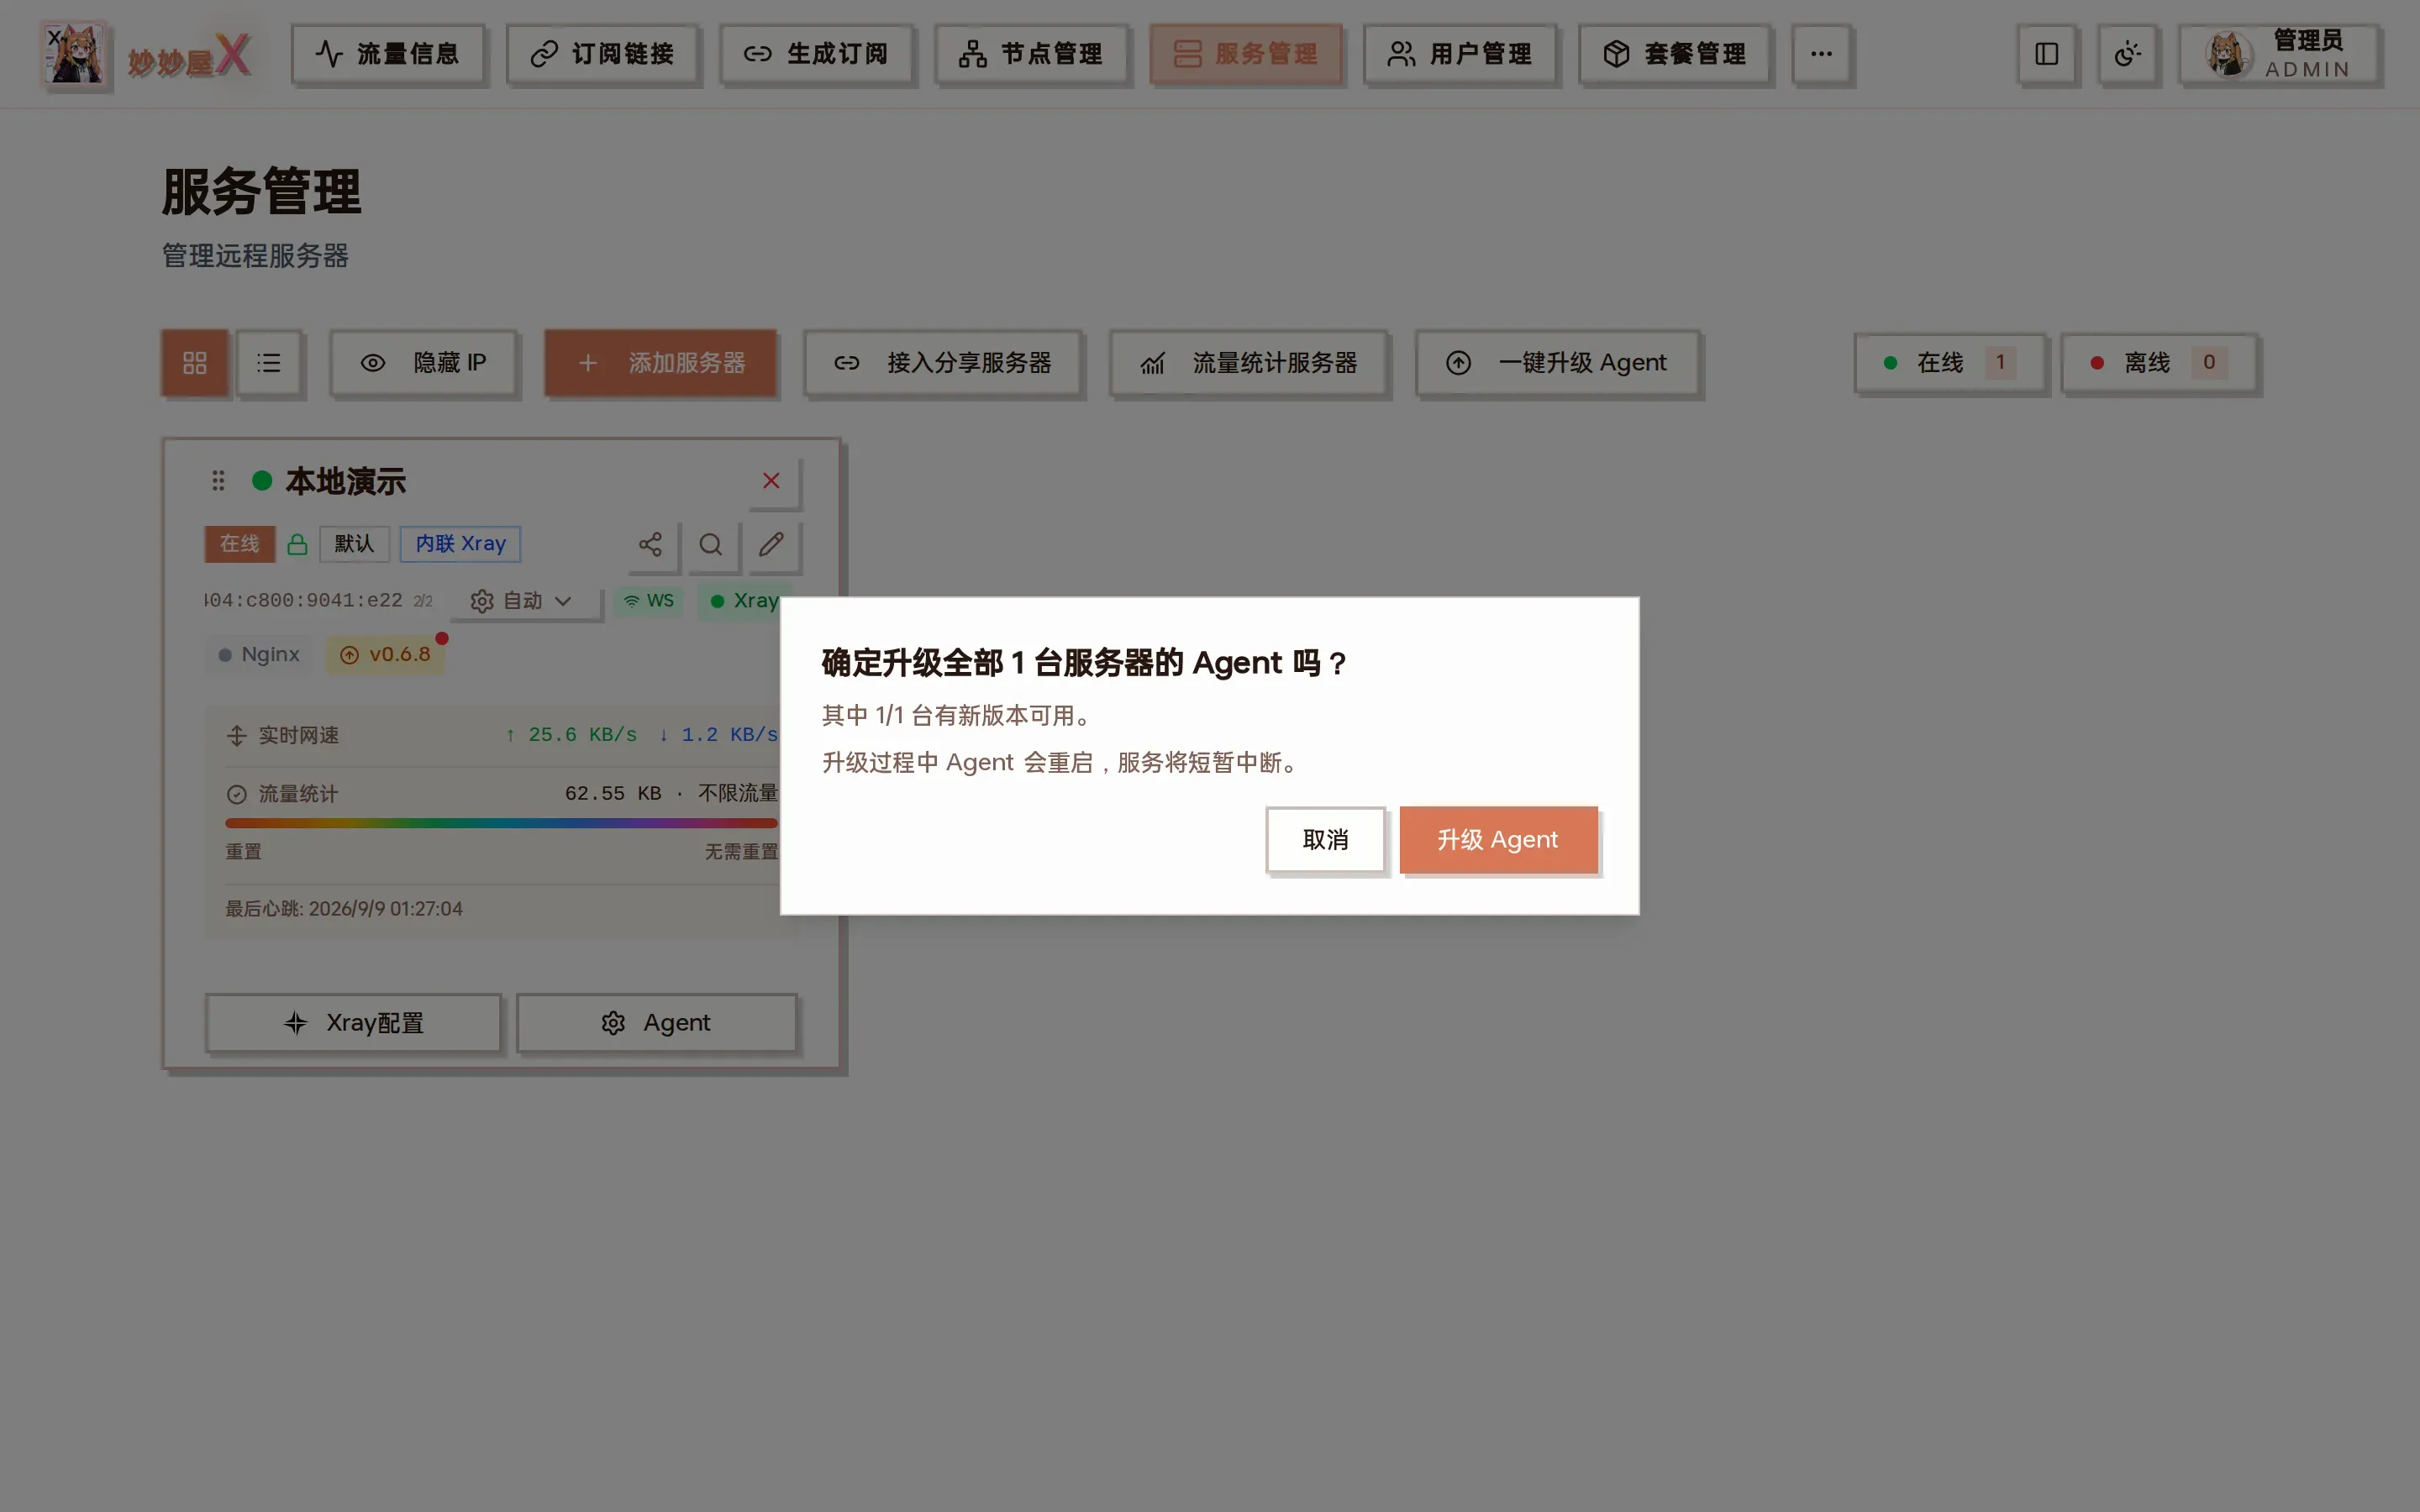
One-click upgrade: shows how many servers can be upgraded
Share a server with another MiaoMiaoWu X
Section titled “Share a server with another MiaoMiaoWu X”You can share one of your servers with someone else’s master so they can manage it from their panel (create inbounds, nodes) without handing over the Agent token.
Click the share icon on the card, “Generate share token” and hand the “owner address + share token” to the other side. By default the receiver can only manage inbounds they created and cannot see other inbounds or the full Xray config.
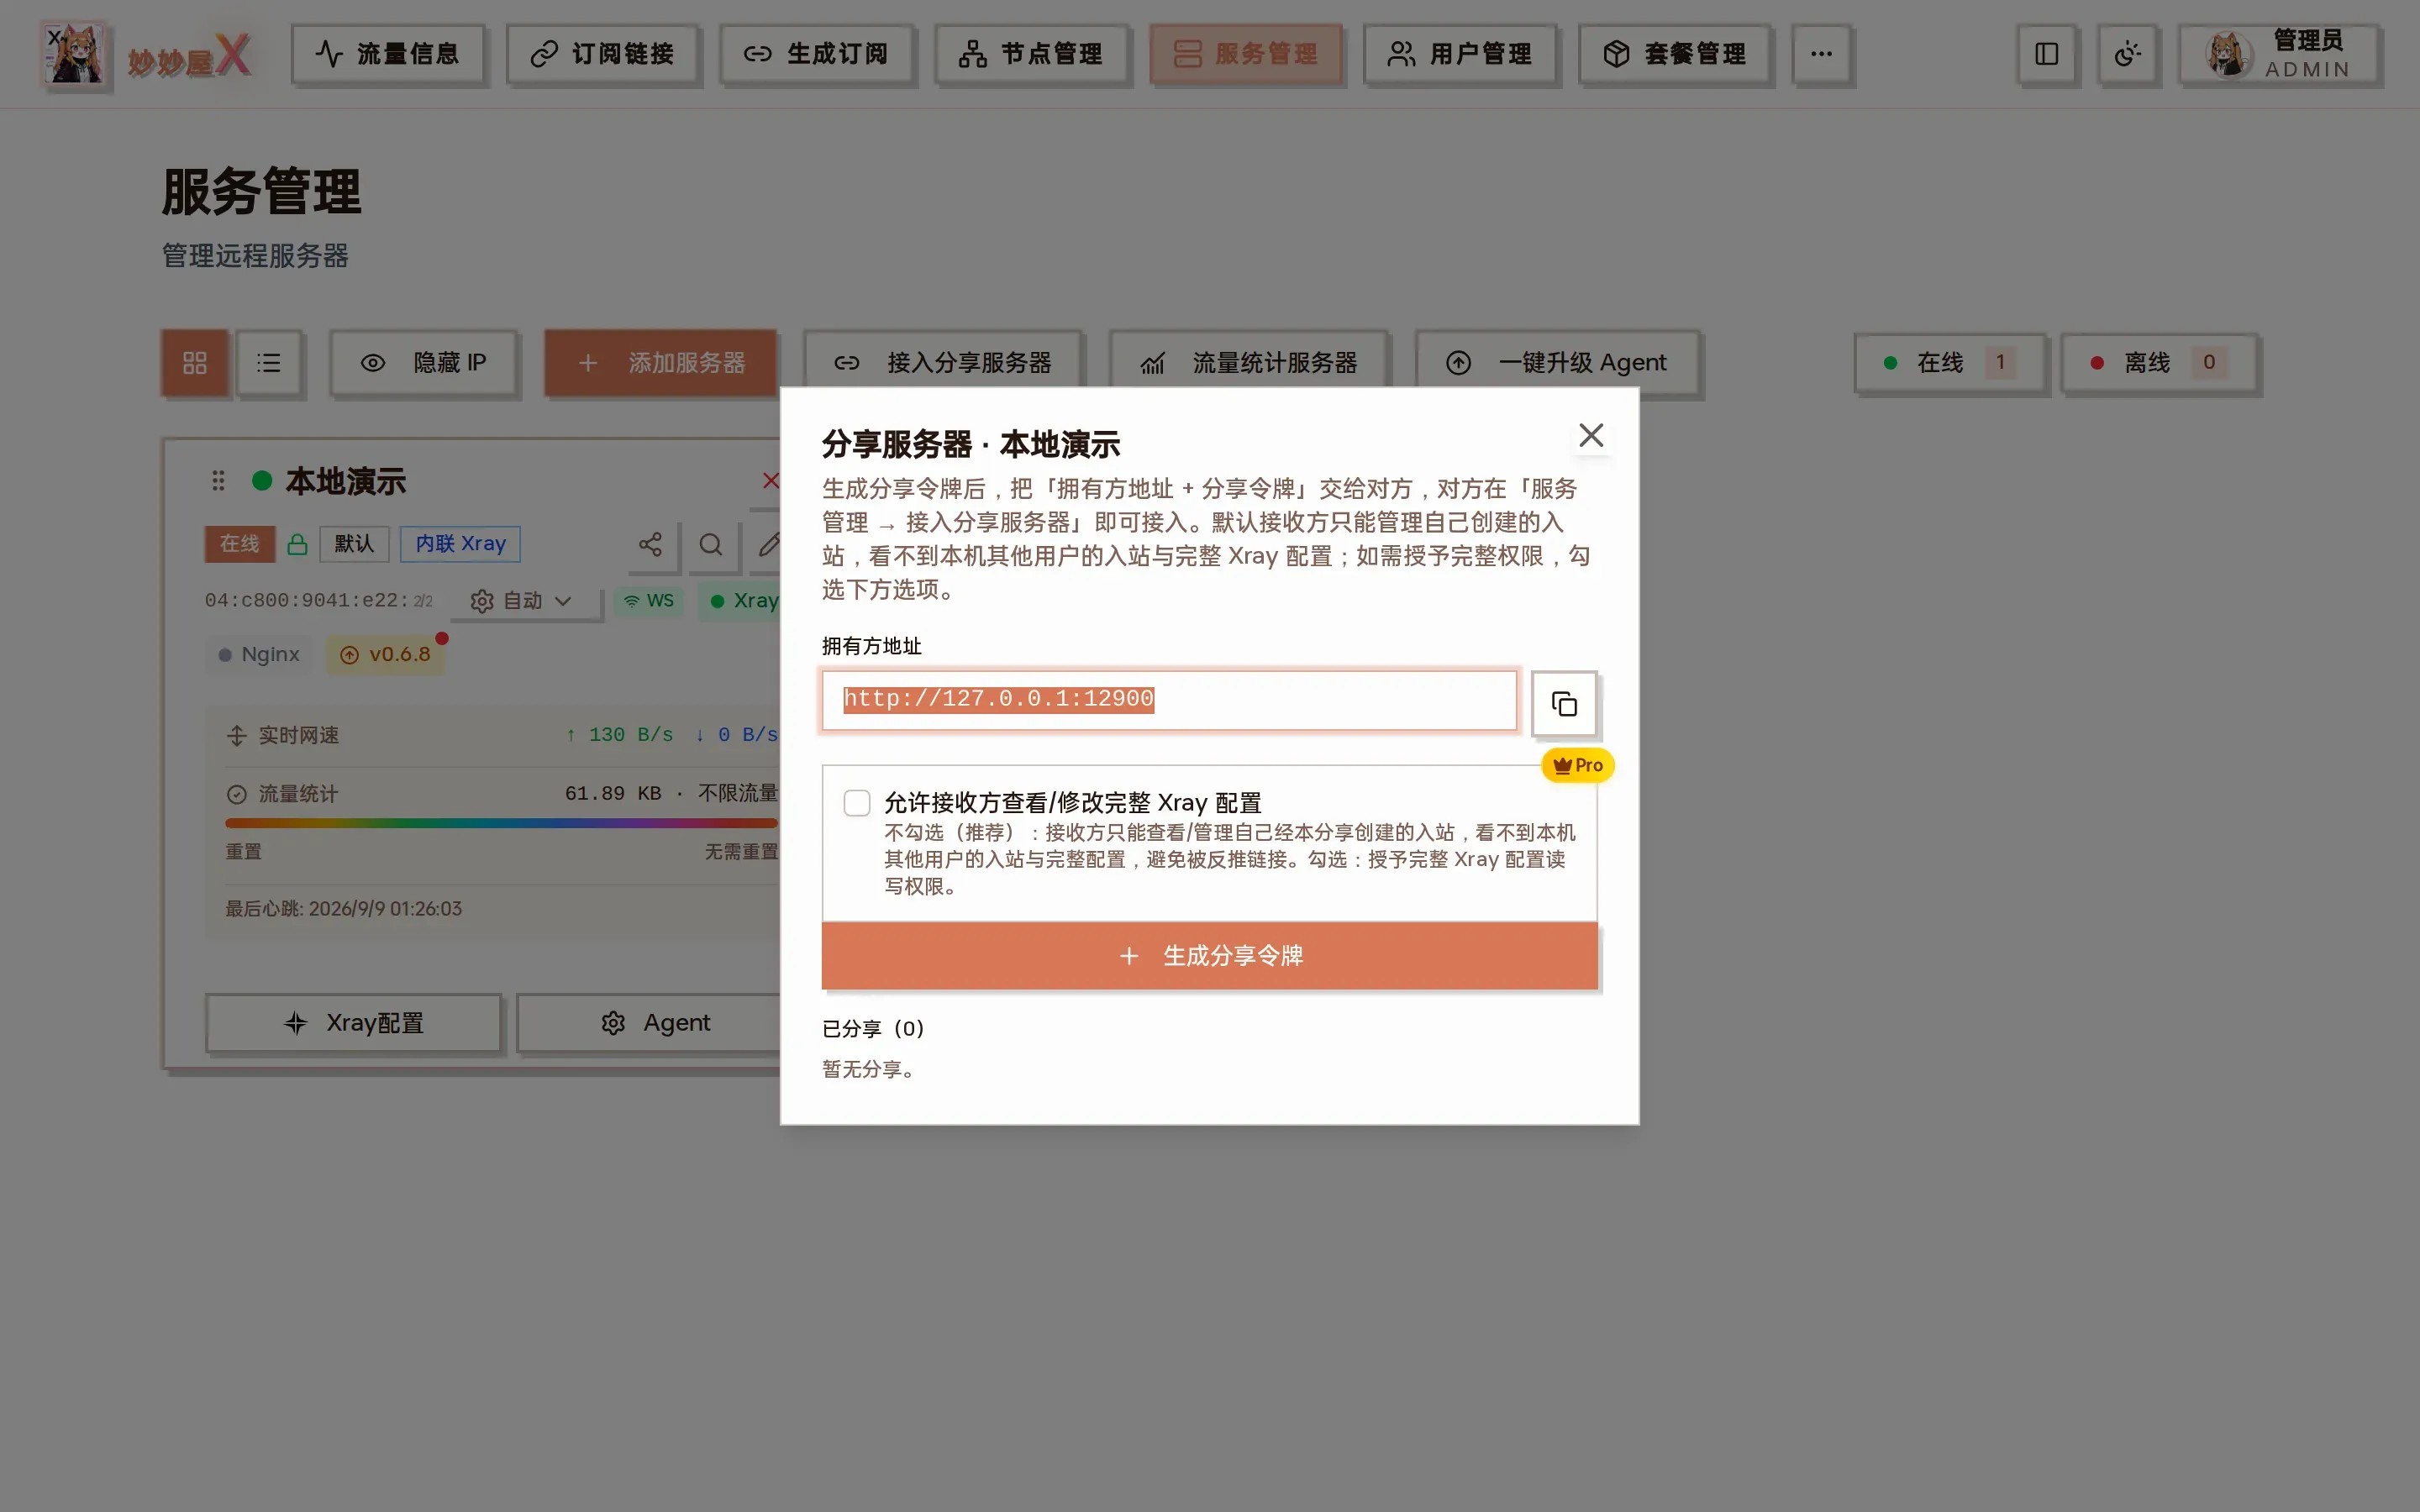
Share server: generate a token, optionally allow the receiver to view / edit the full Xray config
Receiver
Section titled “Receiver”Click “Join shared server” at the top and enter the owner address and share token. The server appears as a federated server in your list, its status refreshed from the owner; inbounds / nodes / Tunnel management all work.
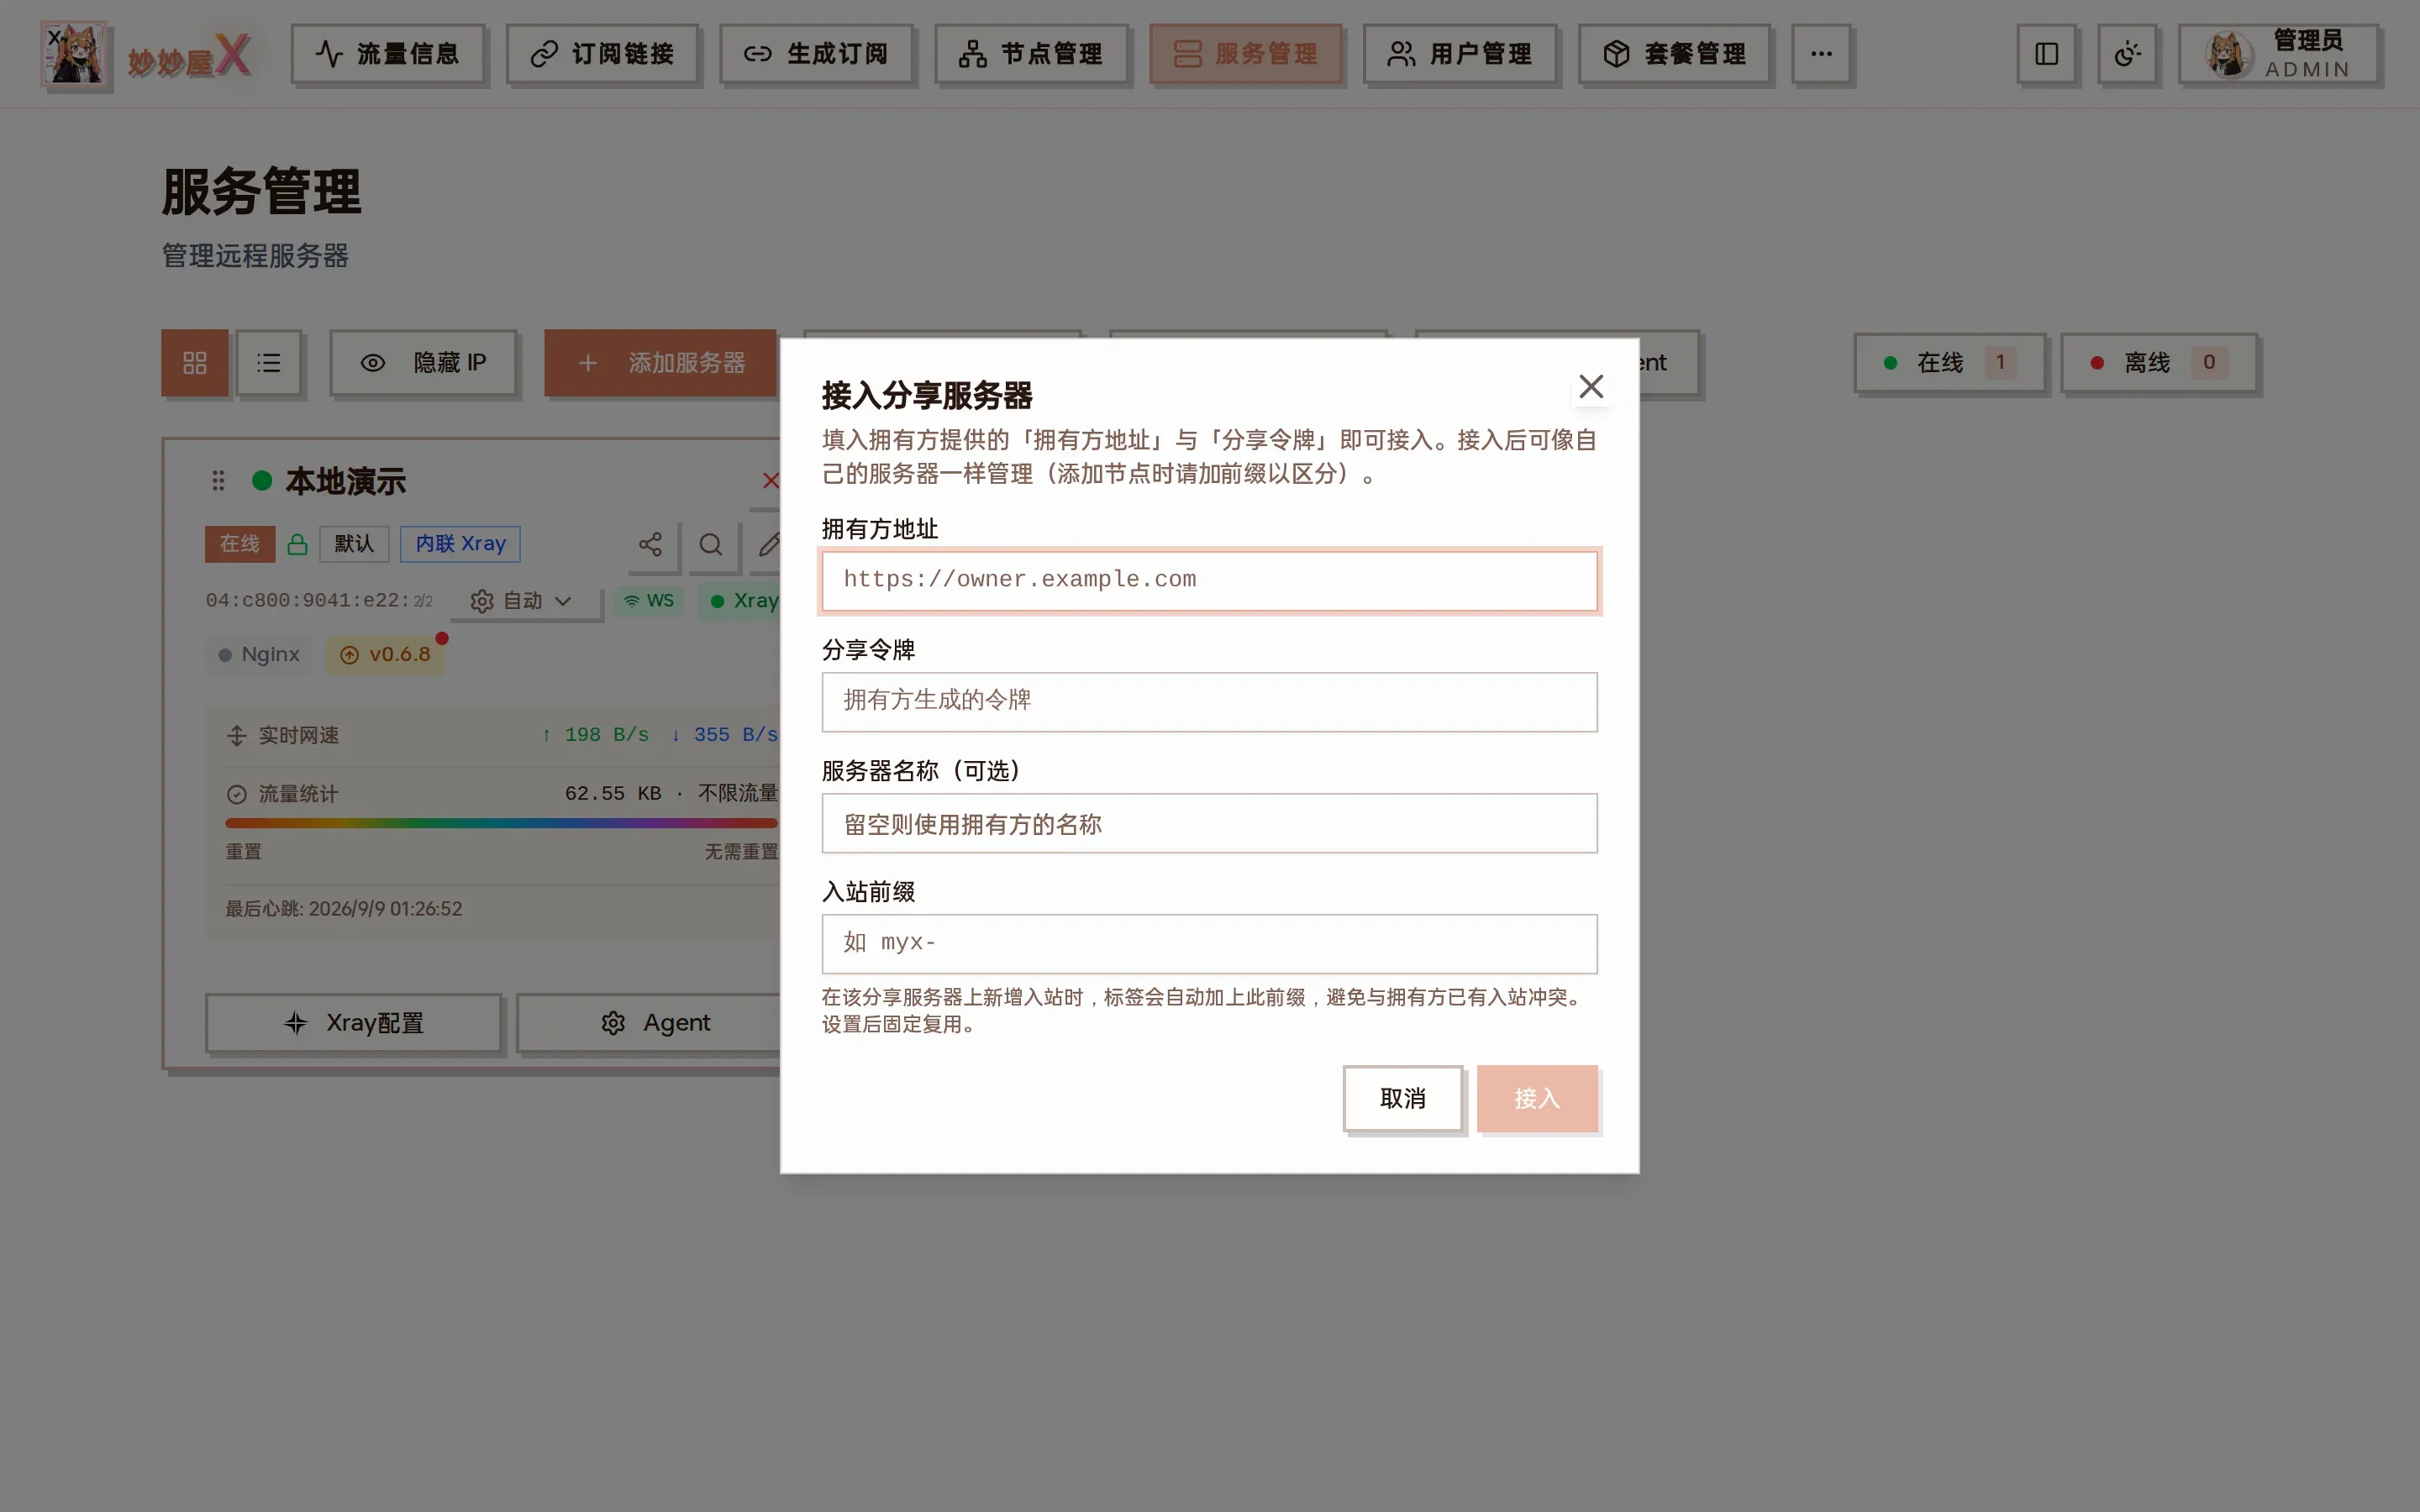
Join shared server: owner address, share token, server name, inbound prefix
Full details: Server Sharing. Master↔Agent and master↔master federation traffic use an encrypted channel (key exchange + session cache); token rotation does not interrupt management.