
Quick Start
Six steps to a working MiaoMiaoWu X: deploy the master → add a server → install Xray → create an inbound → sync nodes → generate a subscription. For full screenshots and field descriptions of every step read the Beginner Tutorial.
1 Deploy the Master
Section titled “1 Deploy the Master”The one-click script is recommended (it creates the systemd service; upgrade and uninstall use the same command):
# One-click install (interactive: local/Docker and SQLite/PostgreSQL 18)curl -sL https://raw.githubusercontent.com/iluobei/miaomiaowuX/main/install.sh | sudo bash
# After installation open http://SERVER_IP:12889 for the setup wizard
The installer handles database initialization: SQLite needs no extra service; choosing PostgreSQL installs PostgreSQL 18, creates the account and writes the connection config. Docker mode uses Compose with data persisted in the install directory.
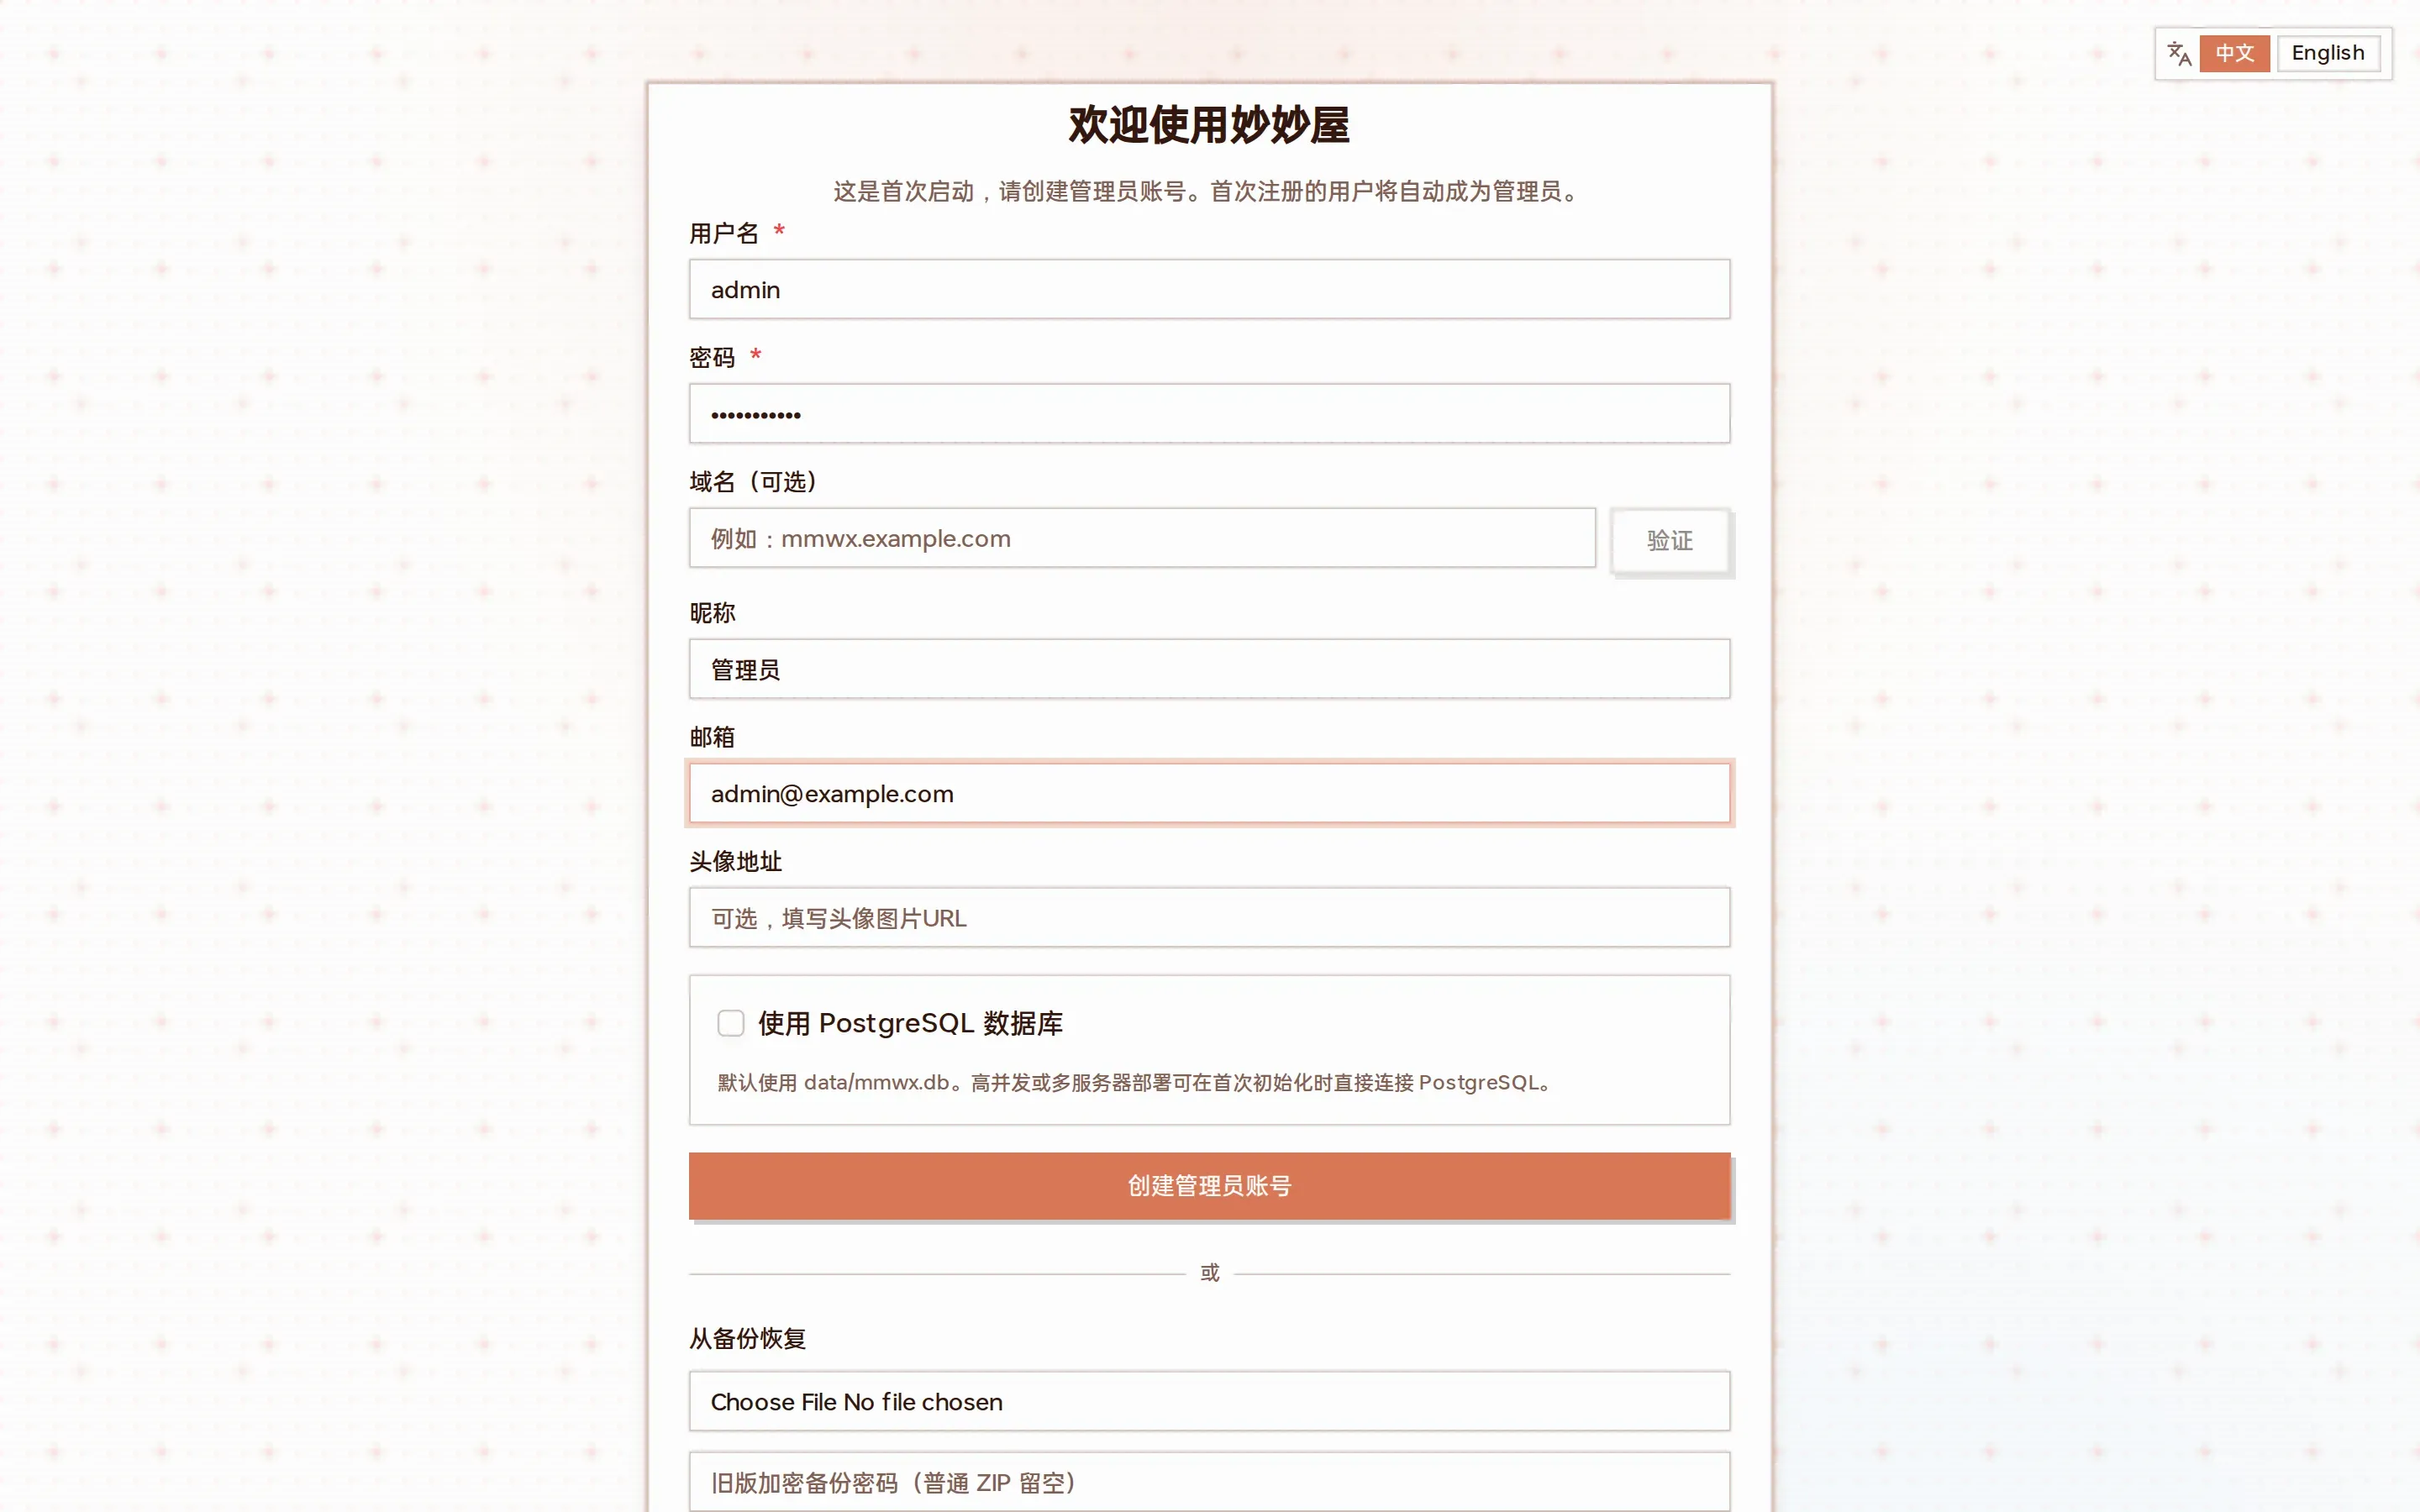
The first visit opens the setup wizard; the first account created is the administrator
Other methods: Docker Install or Direct Install.
2 Add a Remote Server
Section titled “2 Add a Remote Server”- Log in and open “Servers”
- Click “Add Server”, enter a name, the server address (domain or IP) and choose the Xray mode
- Click “Generate Token”; the dialog shows the one-click install command
- Run it on the remote server to deploy the Agent (see Agent Deployment)
- Once the Agent connects, the server card shows “Online”
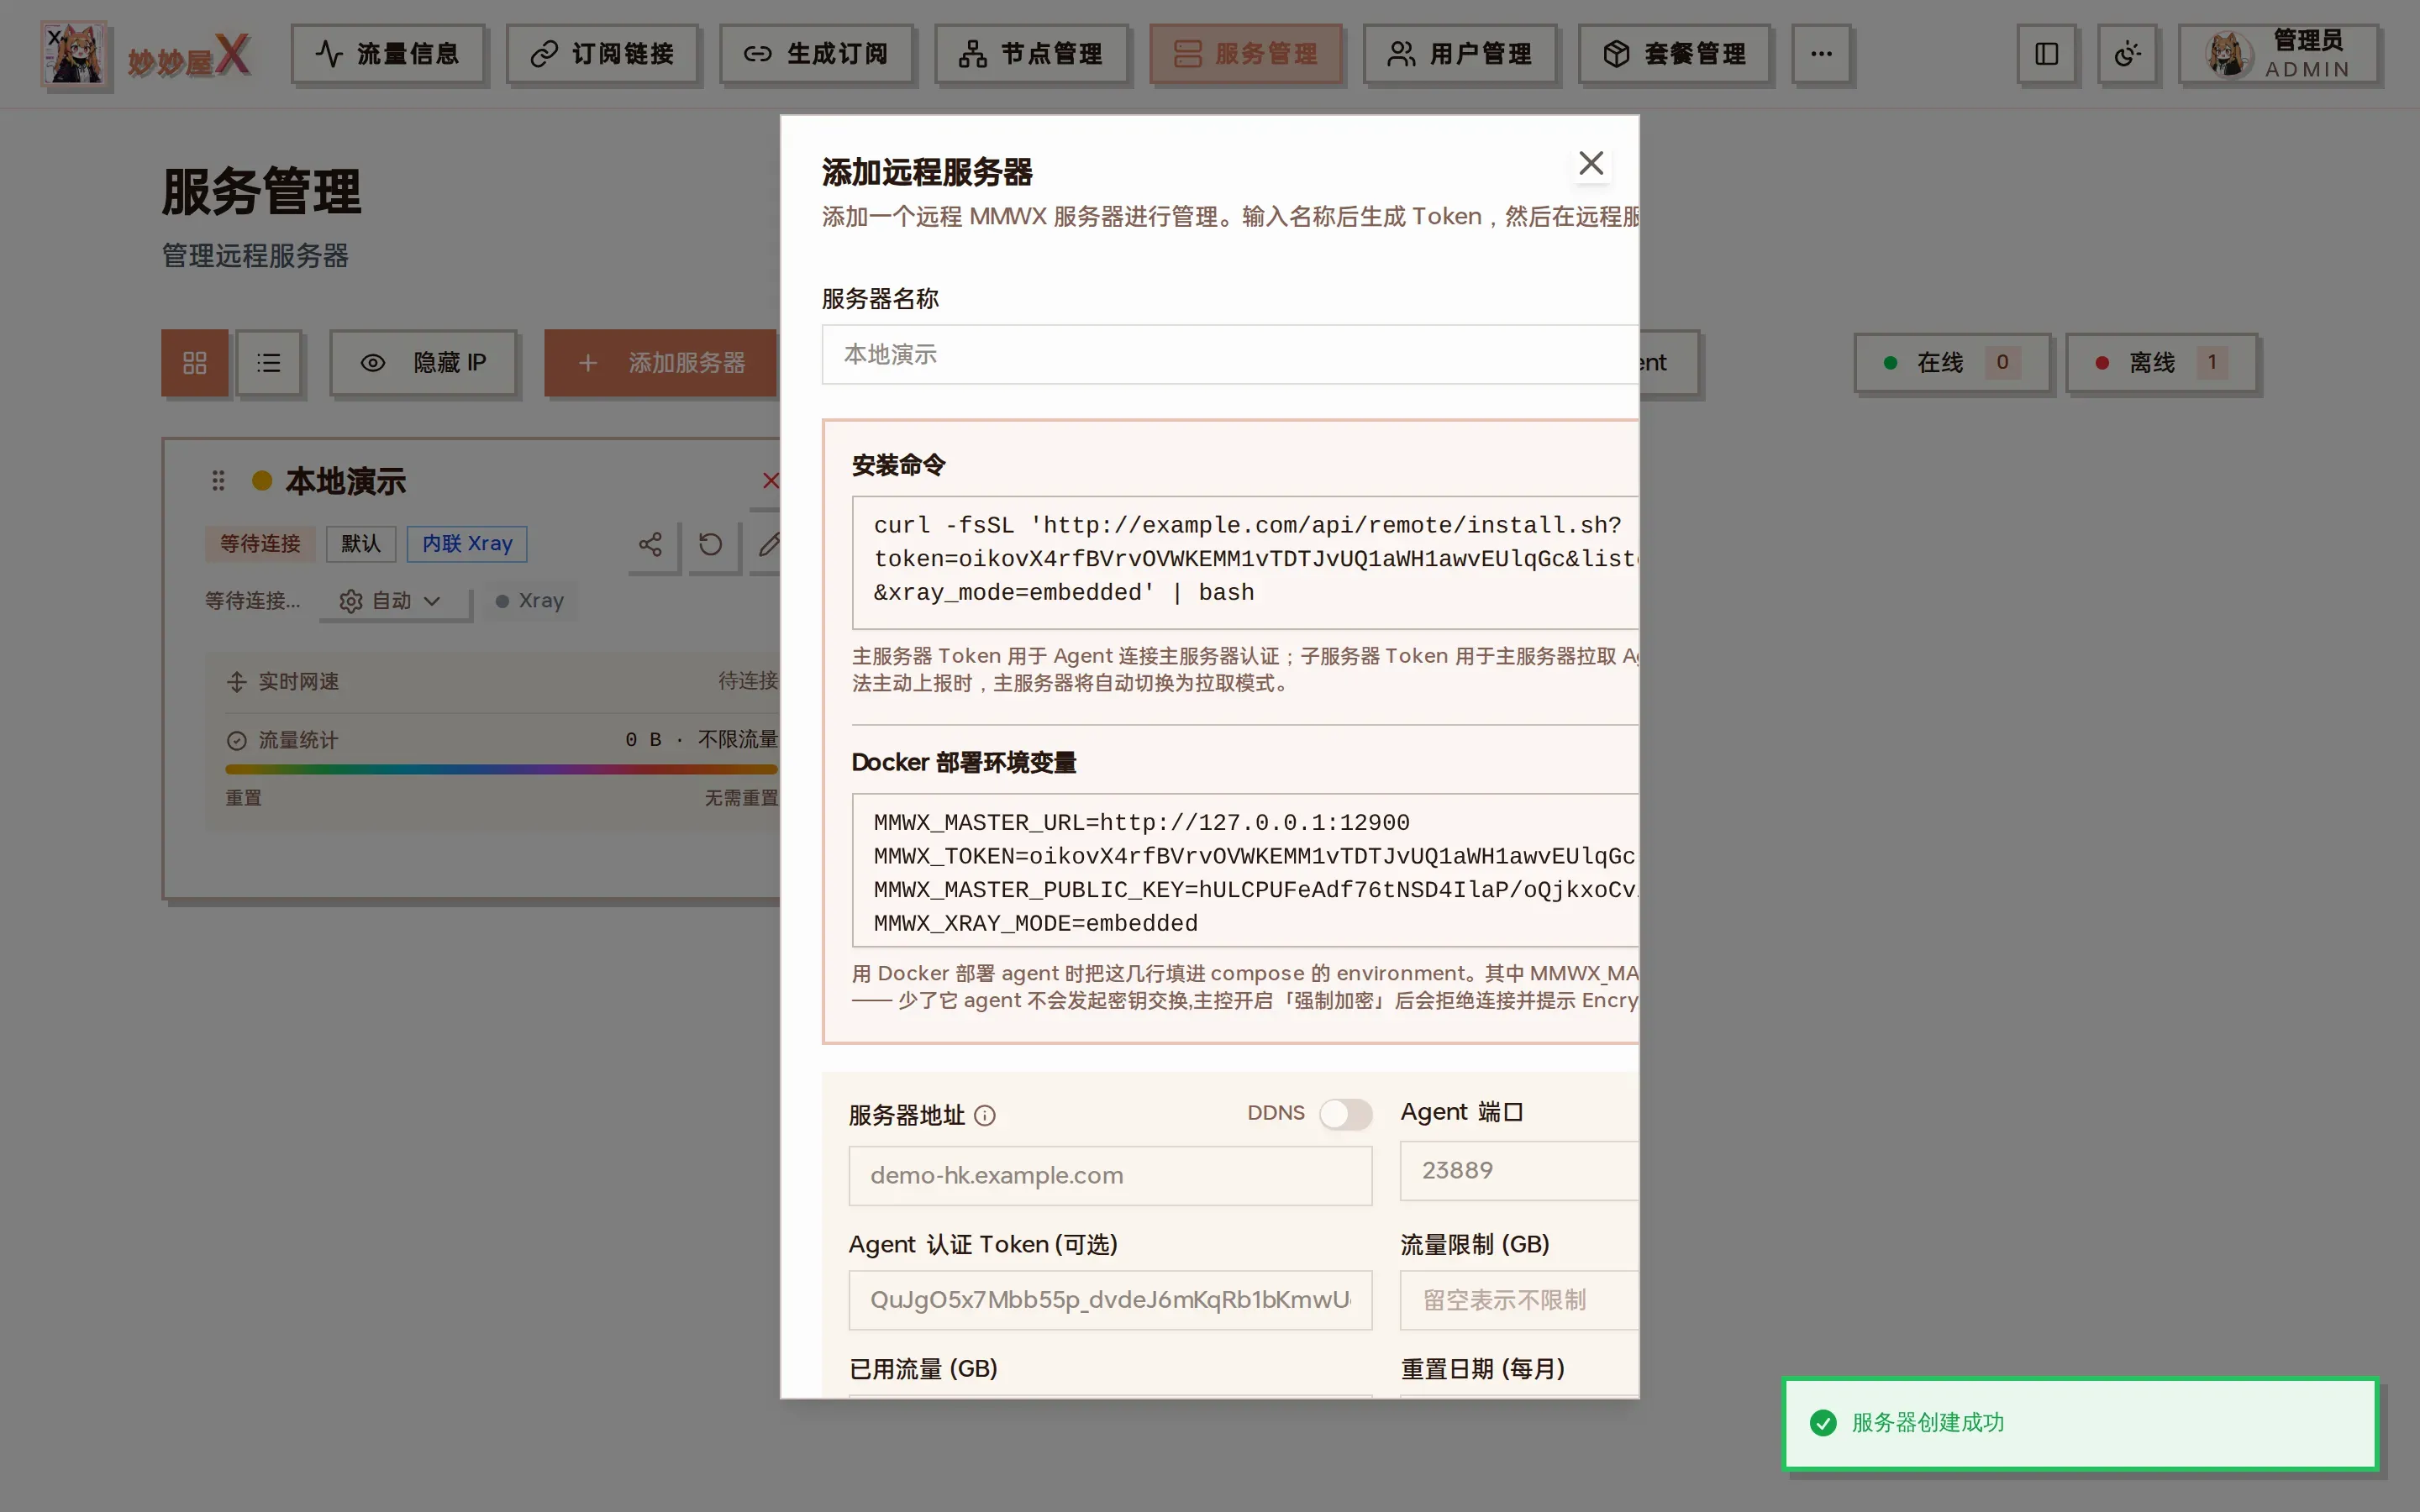
Copy the install command shown after generating the token and run it on the target server
3 Install Xray
Section titled “3 Install Xray”With “Embedded Xray” (PRO) the Agent ships xray-core, so Xray is ready as soon as the Agent installs; with “External Xray” the installer sets up a standalone Xray service. See Embedded Xray for the differences.
Once the Agent is online the card shows Xray status, Nginx status and the Agent version; “Xray Config” lets you start/stop Xray, edit its config and manage inbounds / outbounds / routing.
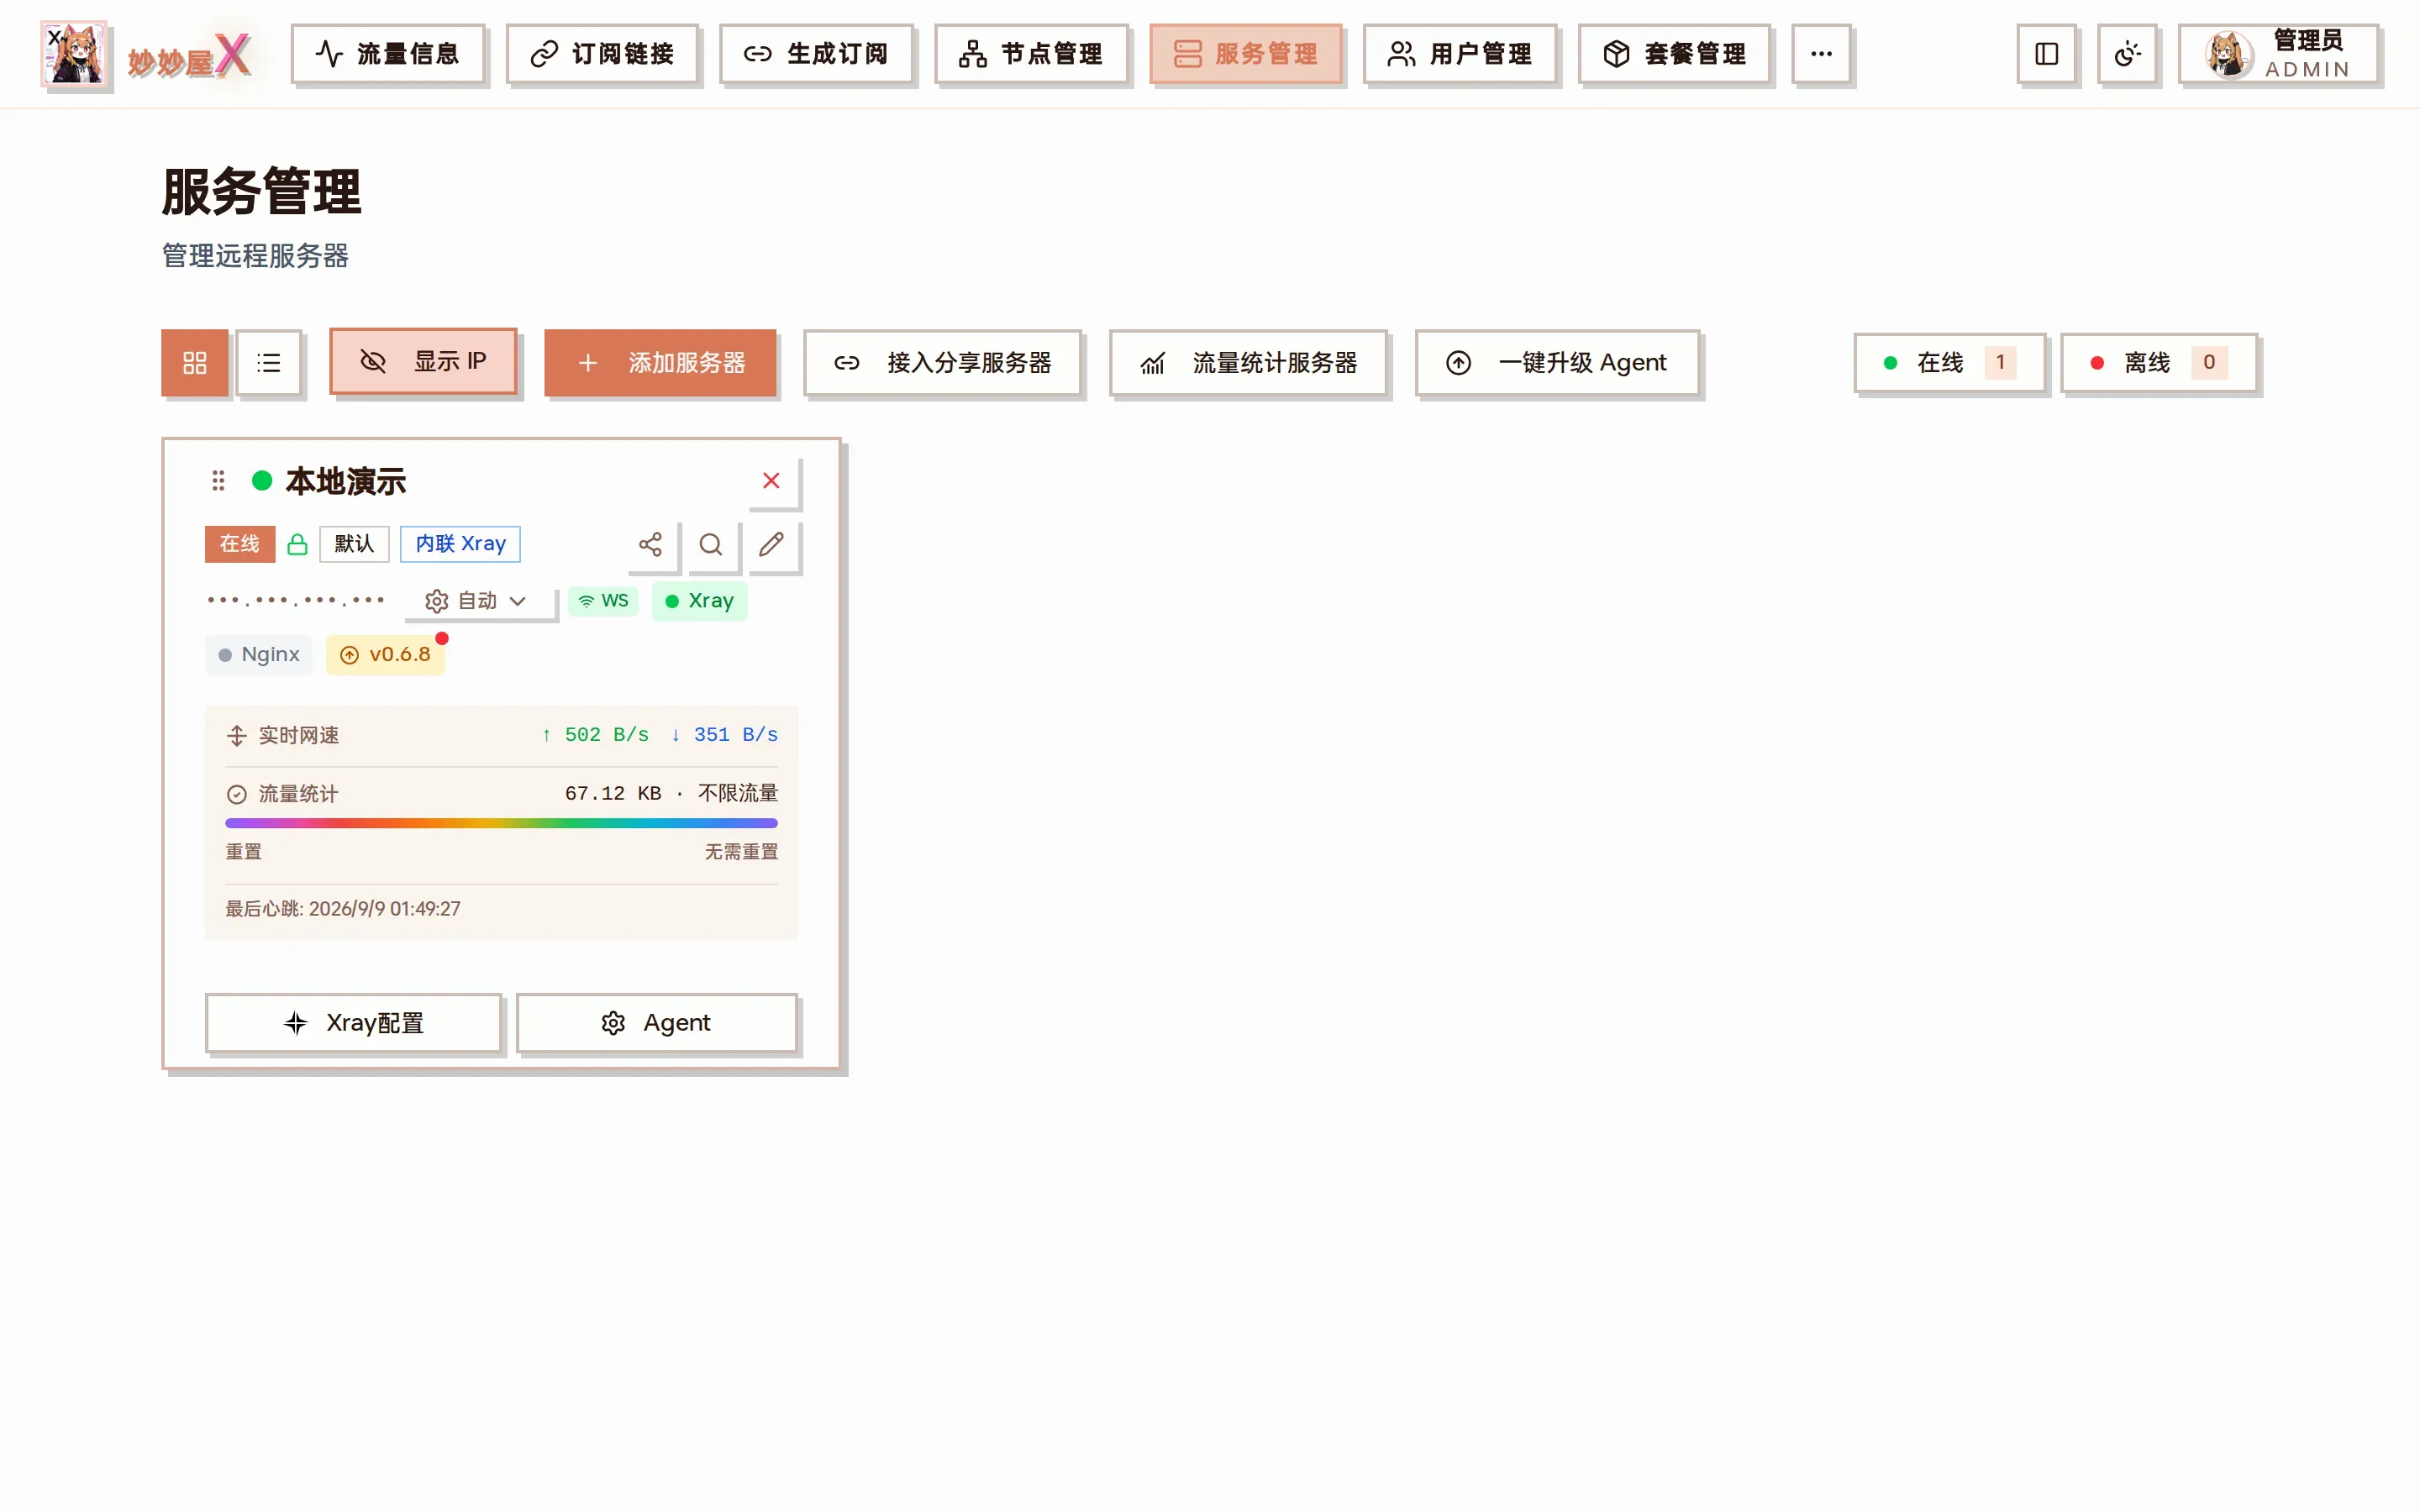
Server card: online, embedded Xray, WS connection, Xray running, Agent version
4 Create an Inbound
Section titled “4 Create an Inbound”Open “Nodes” → “Add Node” (or “Xray Inbounds” → “Add Inbound”) and use the wizard:
- Choose a protocol (VLESS / VMess / Trojan / Shadowsocks / Hysteria2 / AnyTLS / Snell / Mieru …)
- Choose a transport (TCP / WebSocket / gRPC / XHTTP)
- Choose a security layer (REALITY / TLS / XTLS-Vision / none)
- Simple mode generates port and credentials; expert mode lets you edit everything
- Click “Submit”; the inbound is deployed to the remote server
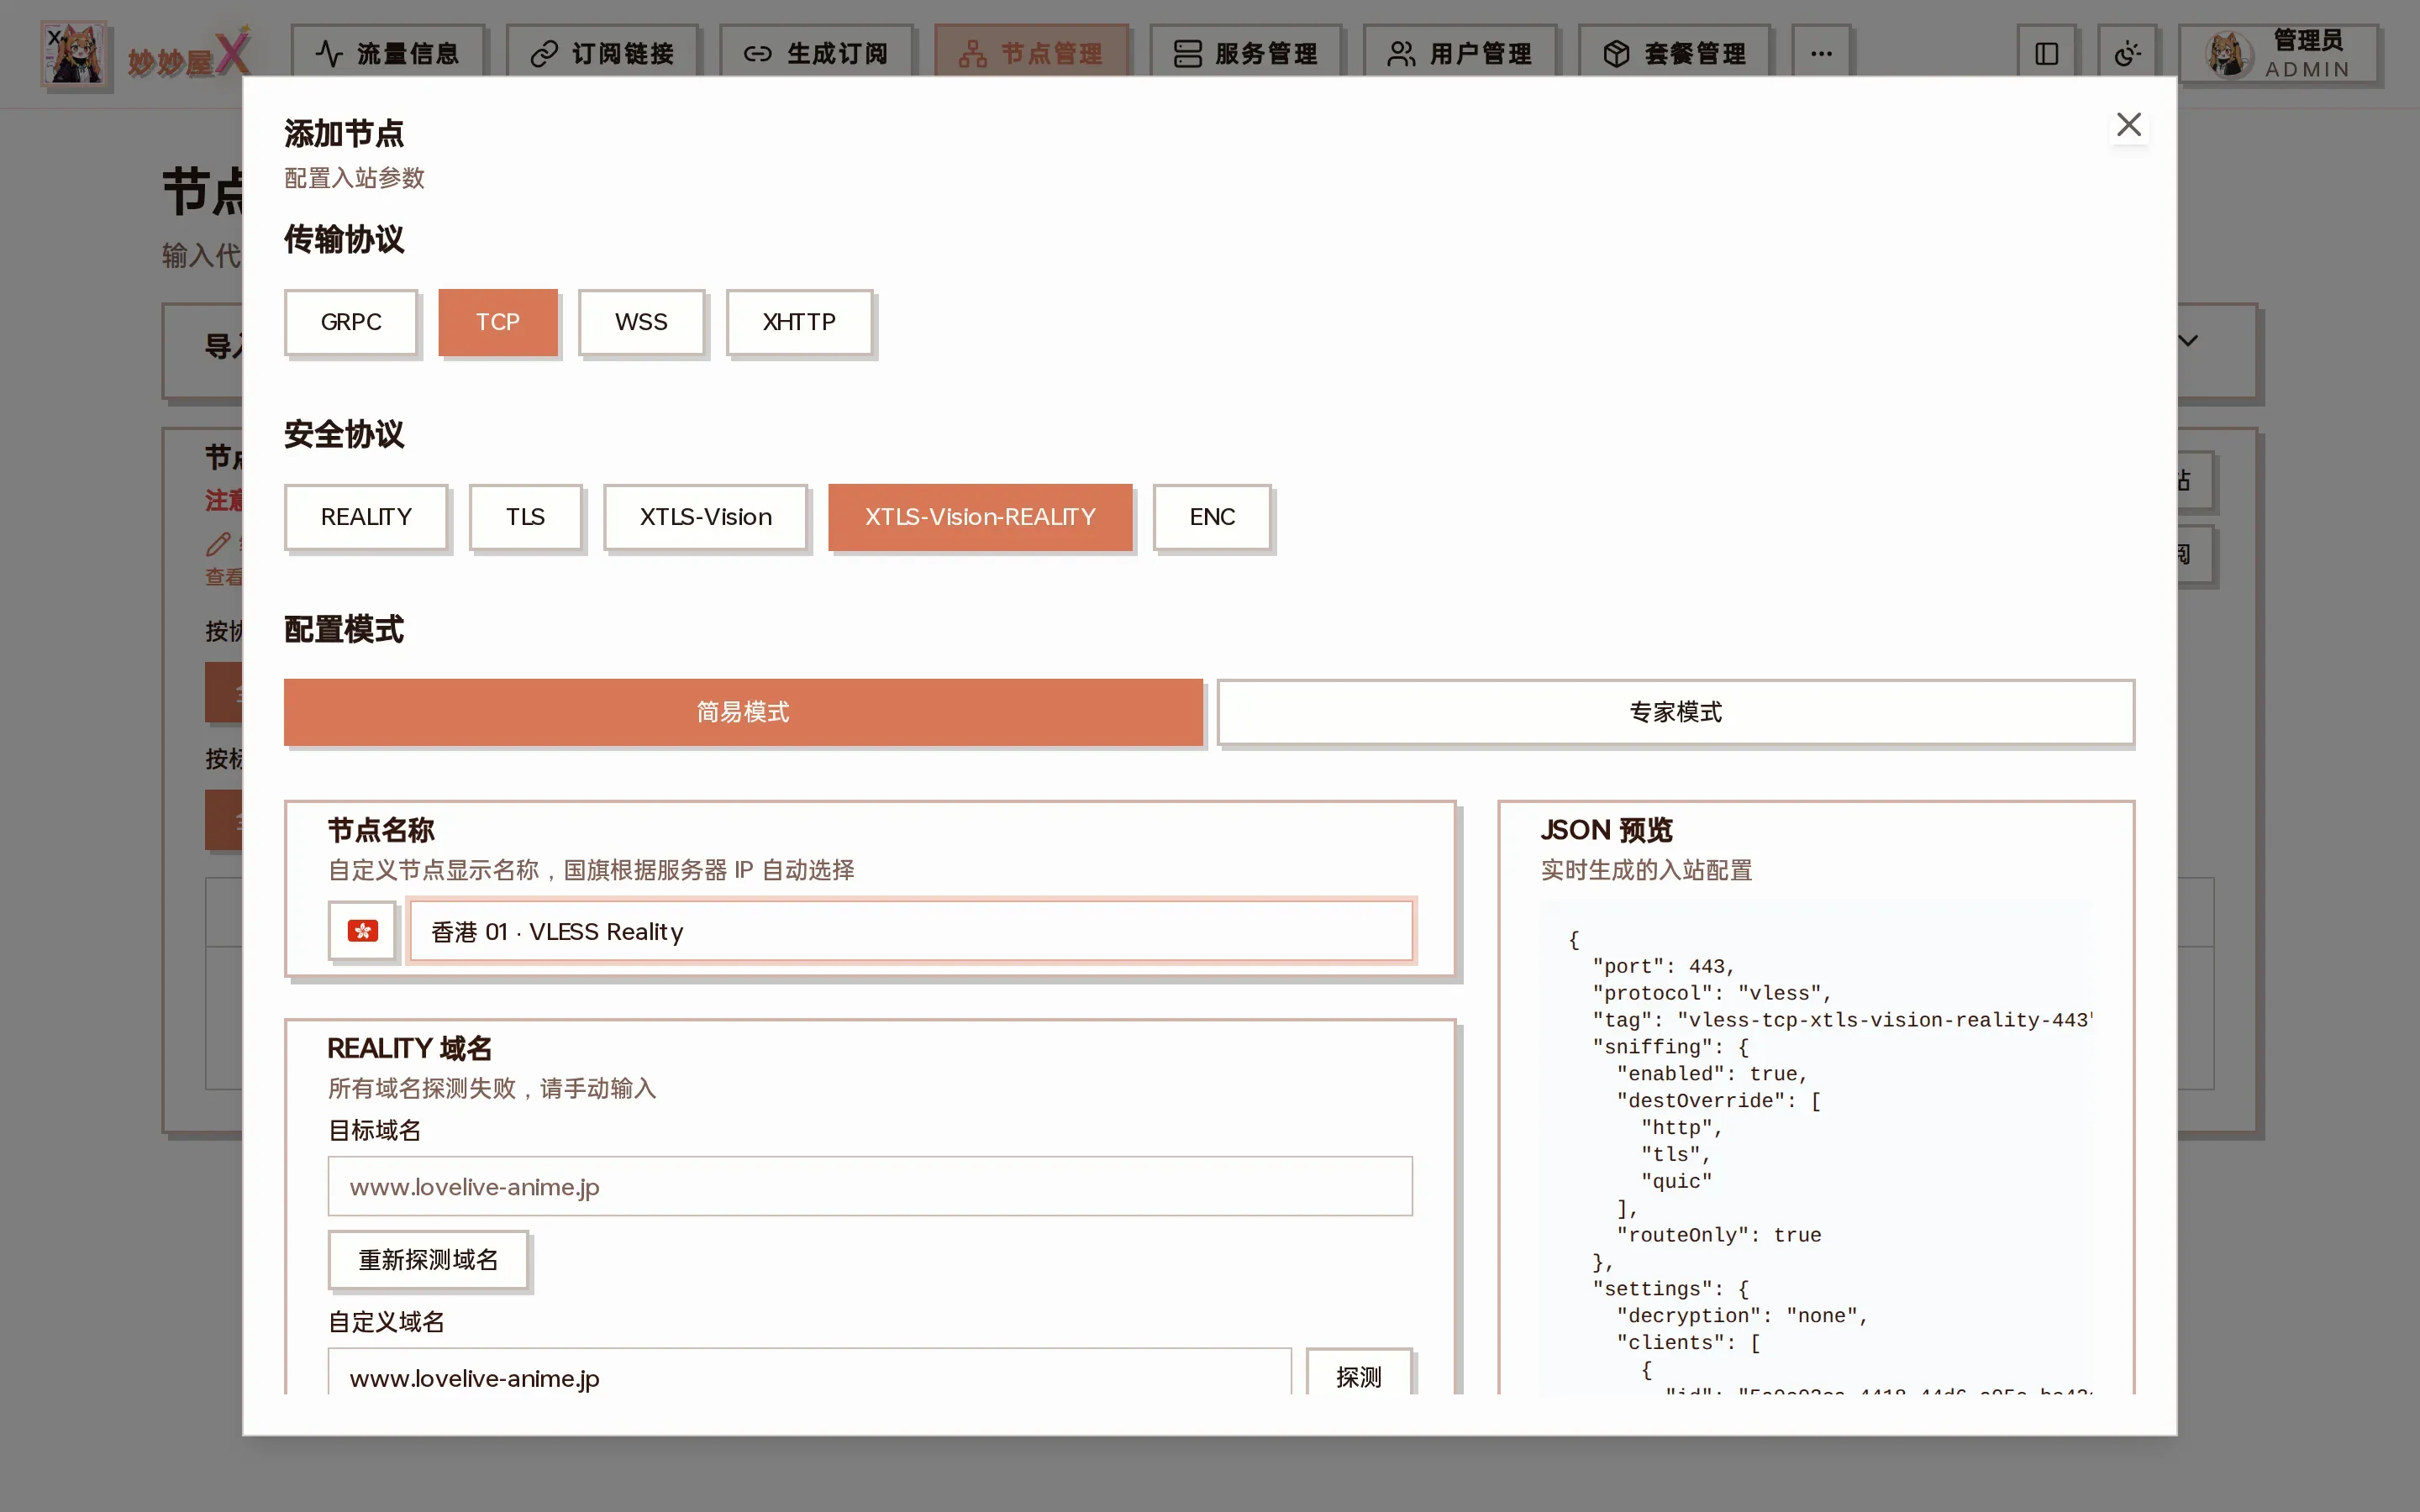
Add node wizard: VLESS + TCP + XTLS-Vision-REALITY with live JSON preview on the right
Supported combinations: Protocol Matrix
5 Sync Nodes
Section titled “5 Sync Nodes”After the inbound is created it is synced to a node automatically and appears in “Nodes”. You can also trigger “Sync nodes” manually from the server card’s “Agent” menu.
Synced nodes are converted to mihomo/Clash compatible proxy configs.
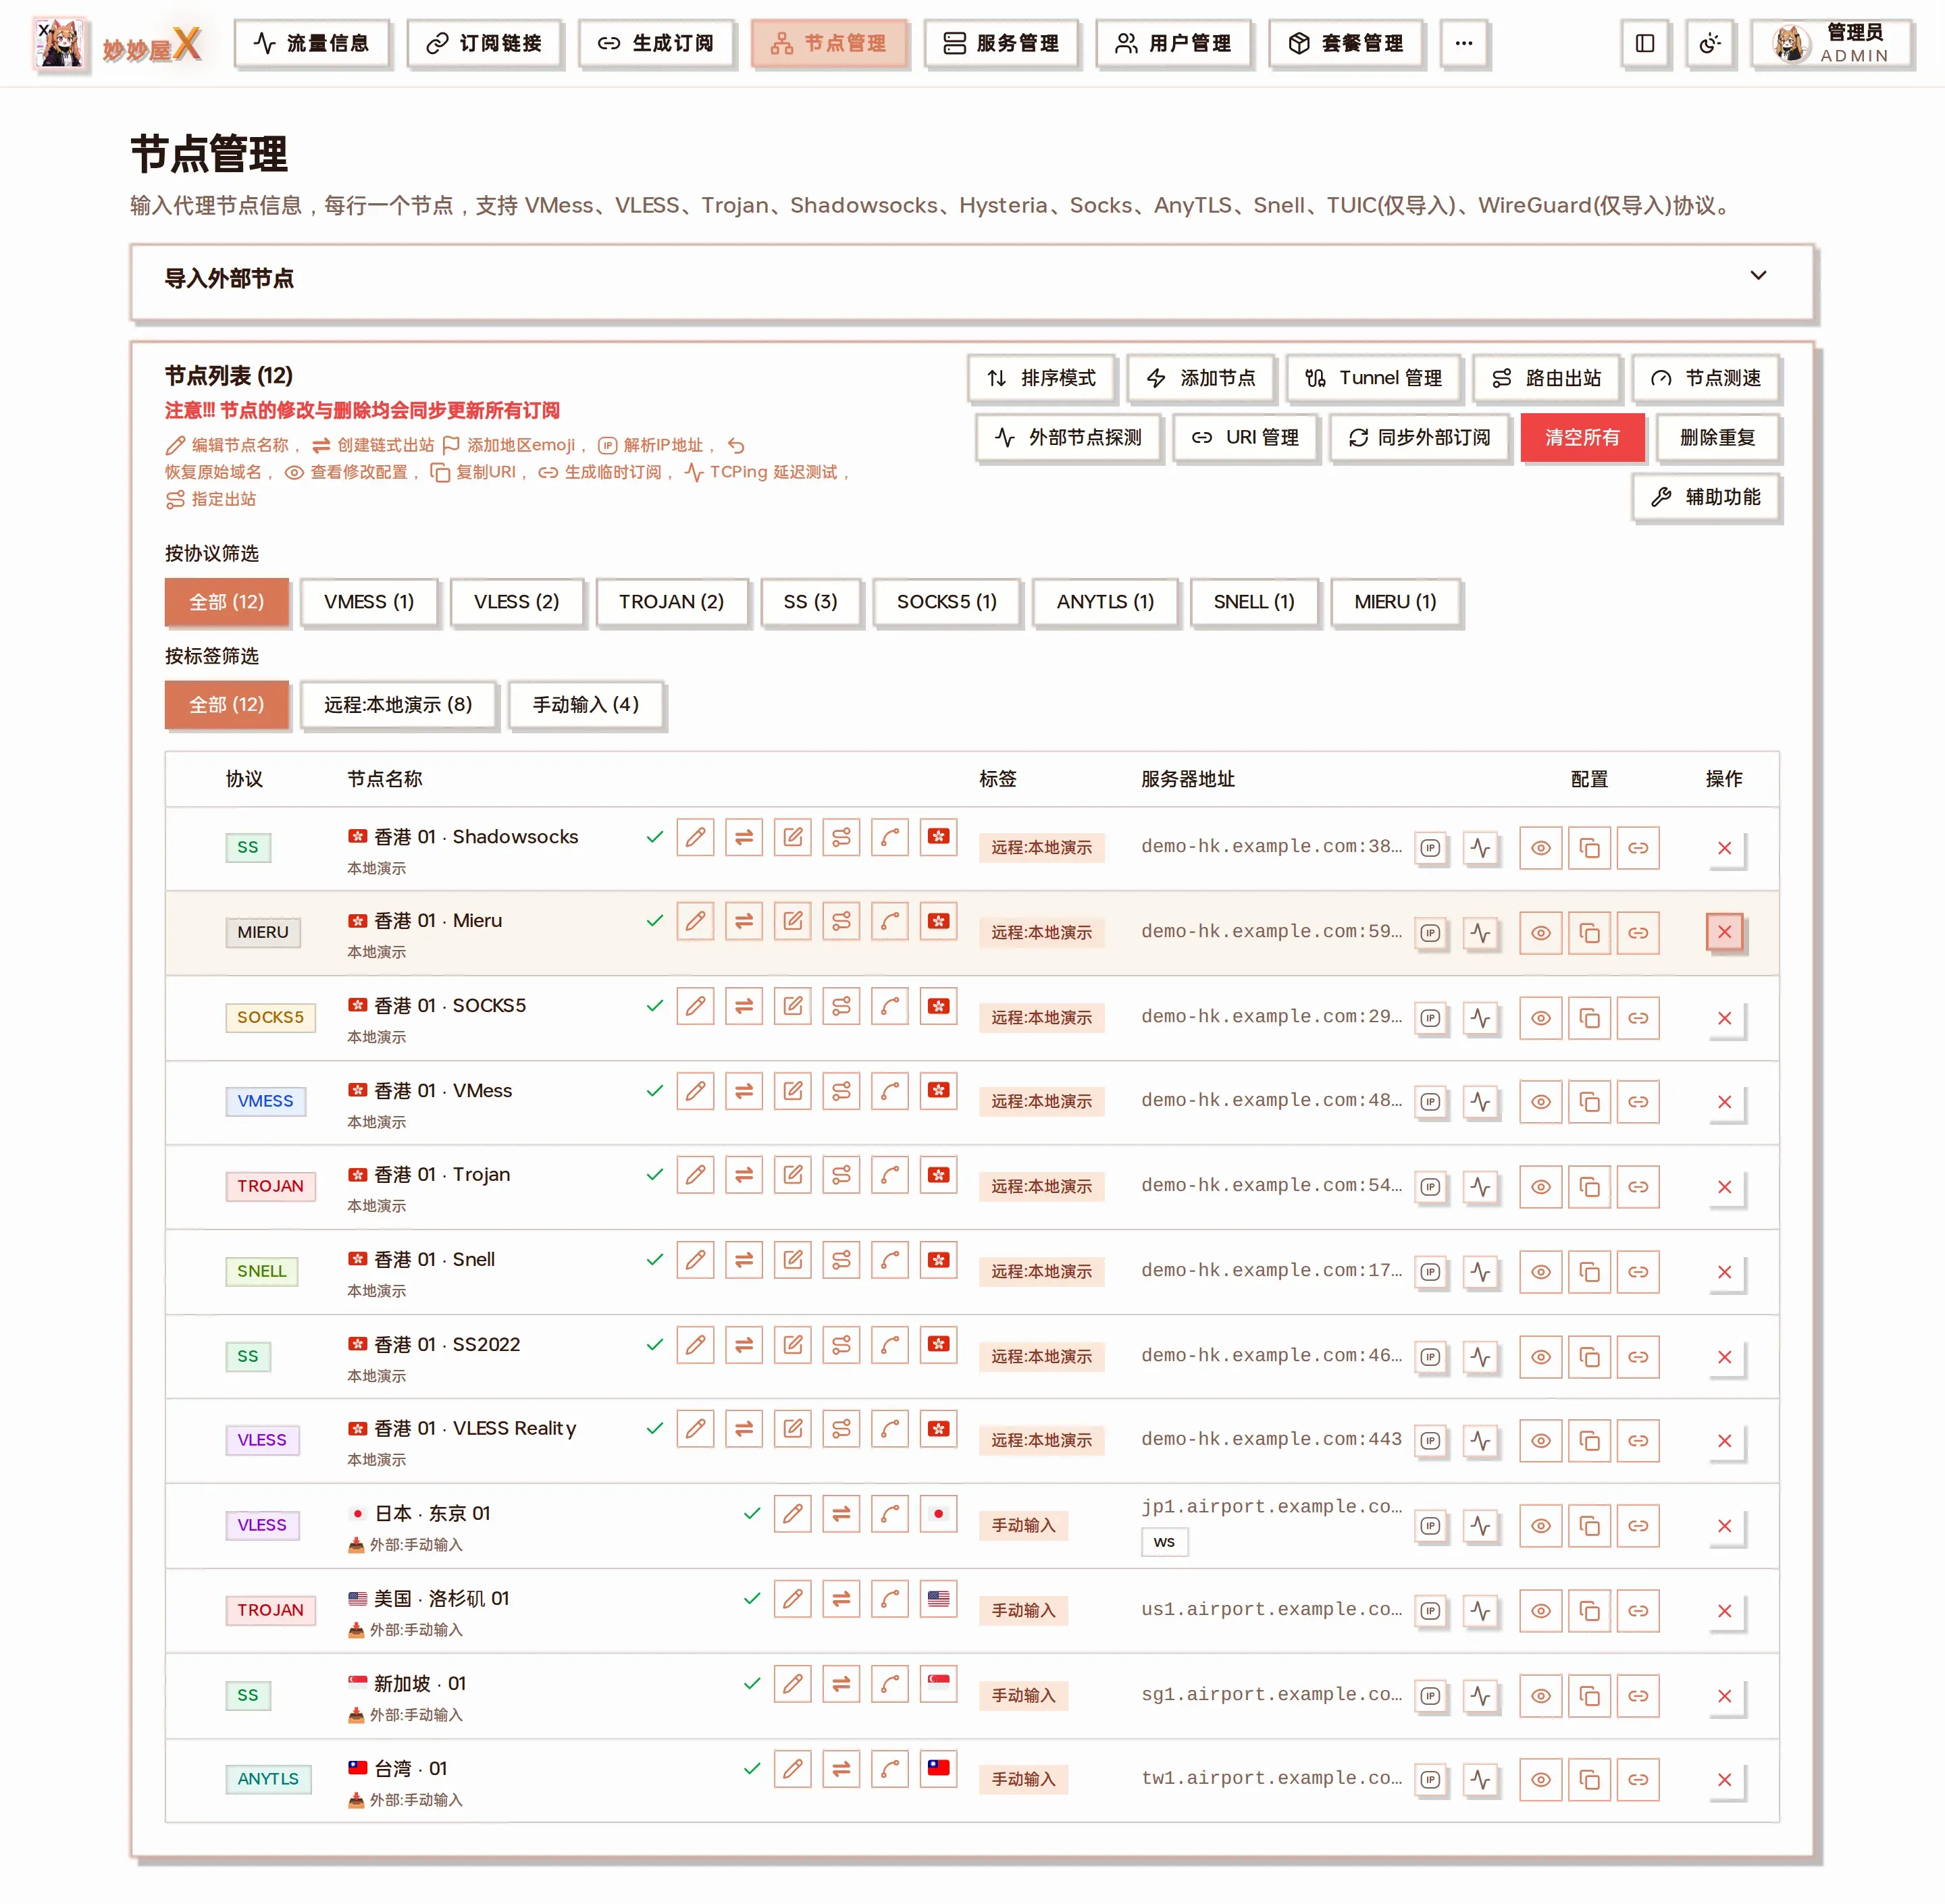
Nodes: nodes synced from inbounds carry a “Remote:server name” tag
6 Generate a Subscription
Section titled “6 Generate a Subscription”Open “Users”, create a user and bind a package; the user gets a subscription link via “Copy subscription”. Admins can also tick nodes and choose a rule set on the “Generate” page to produce a subscription file directly.
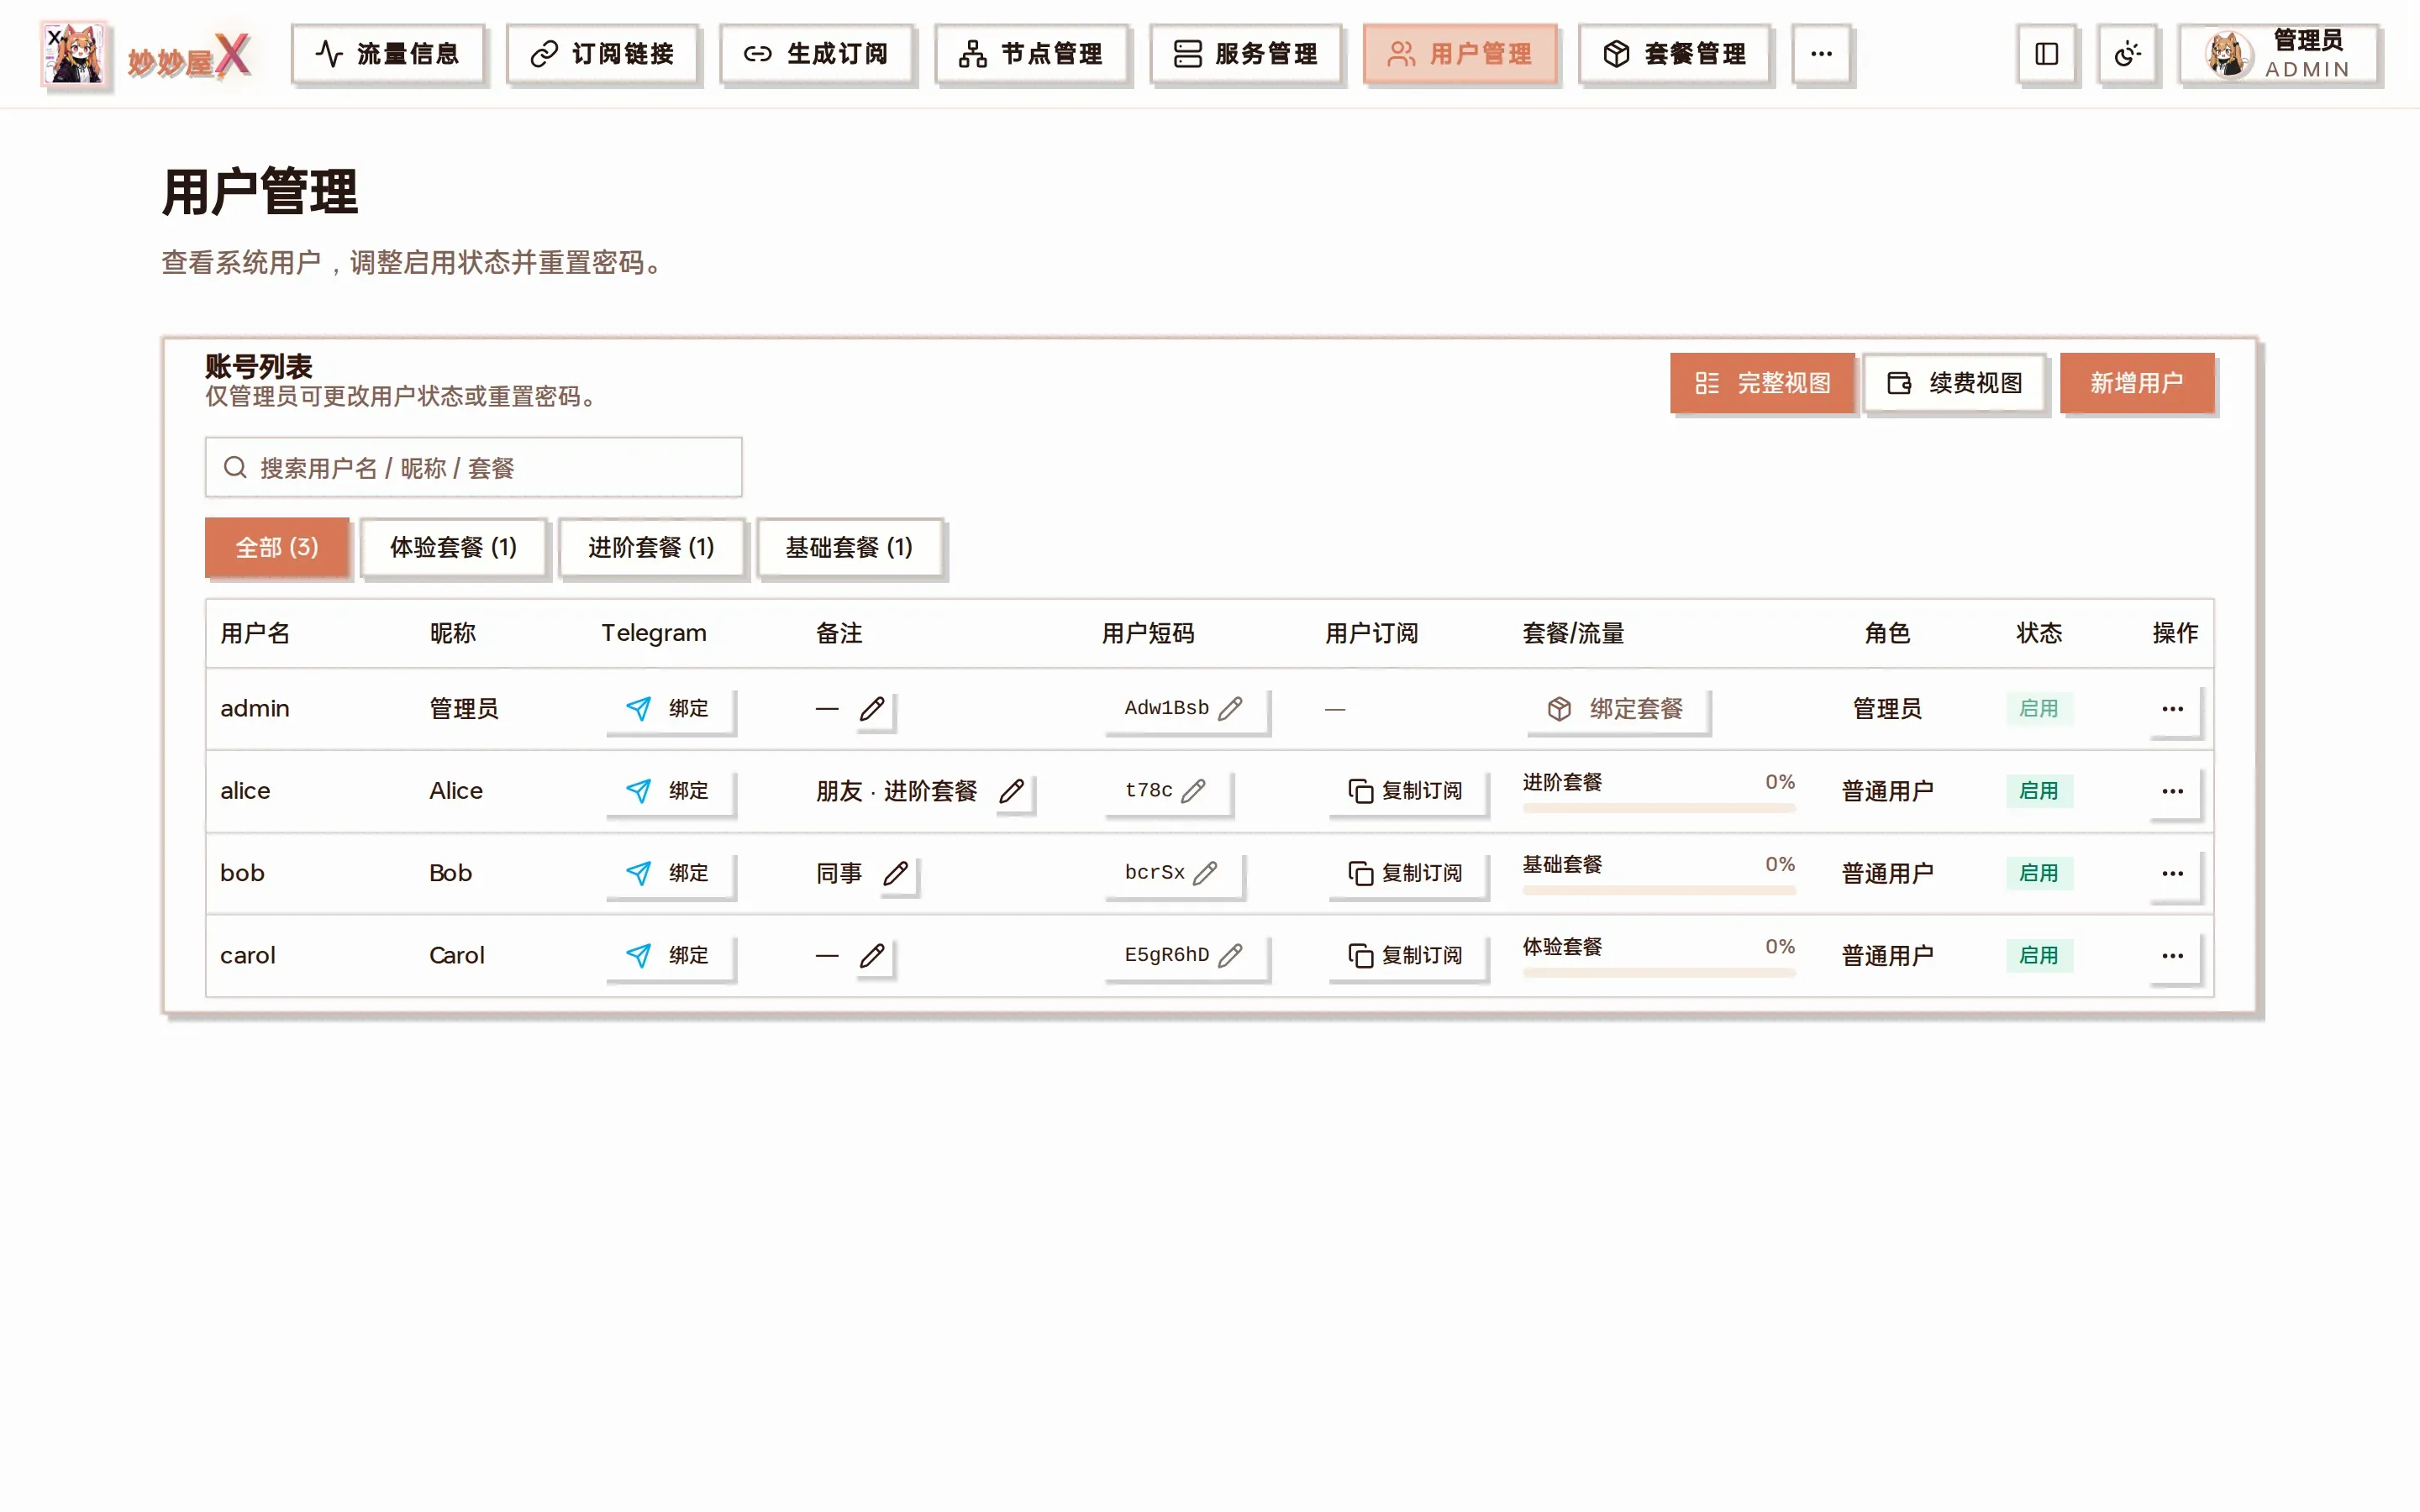
Users: one row per user, “Copy subscription” is that user’s link
12 client formats are supported including Clash/Stash/Shadowrocket/Surge. See Subscription Generator.